backset
60 or 70 mm
35 mm to 50 mm
A B C D
1"
25 mm
1
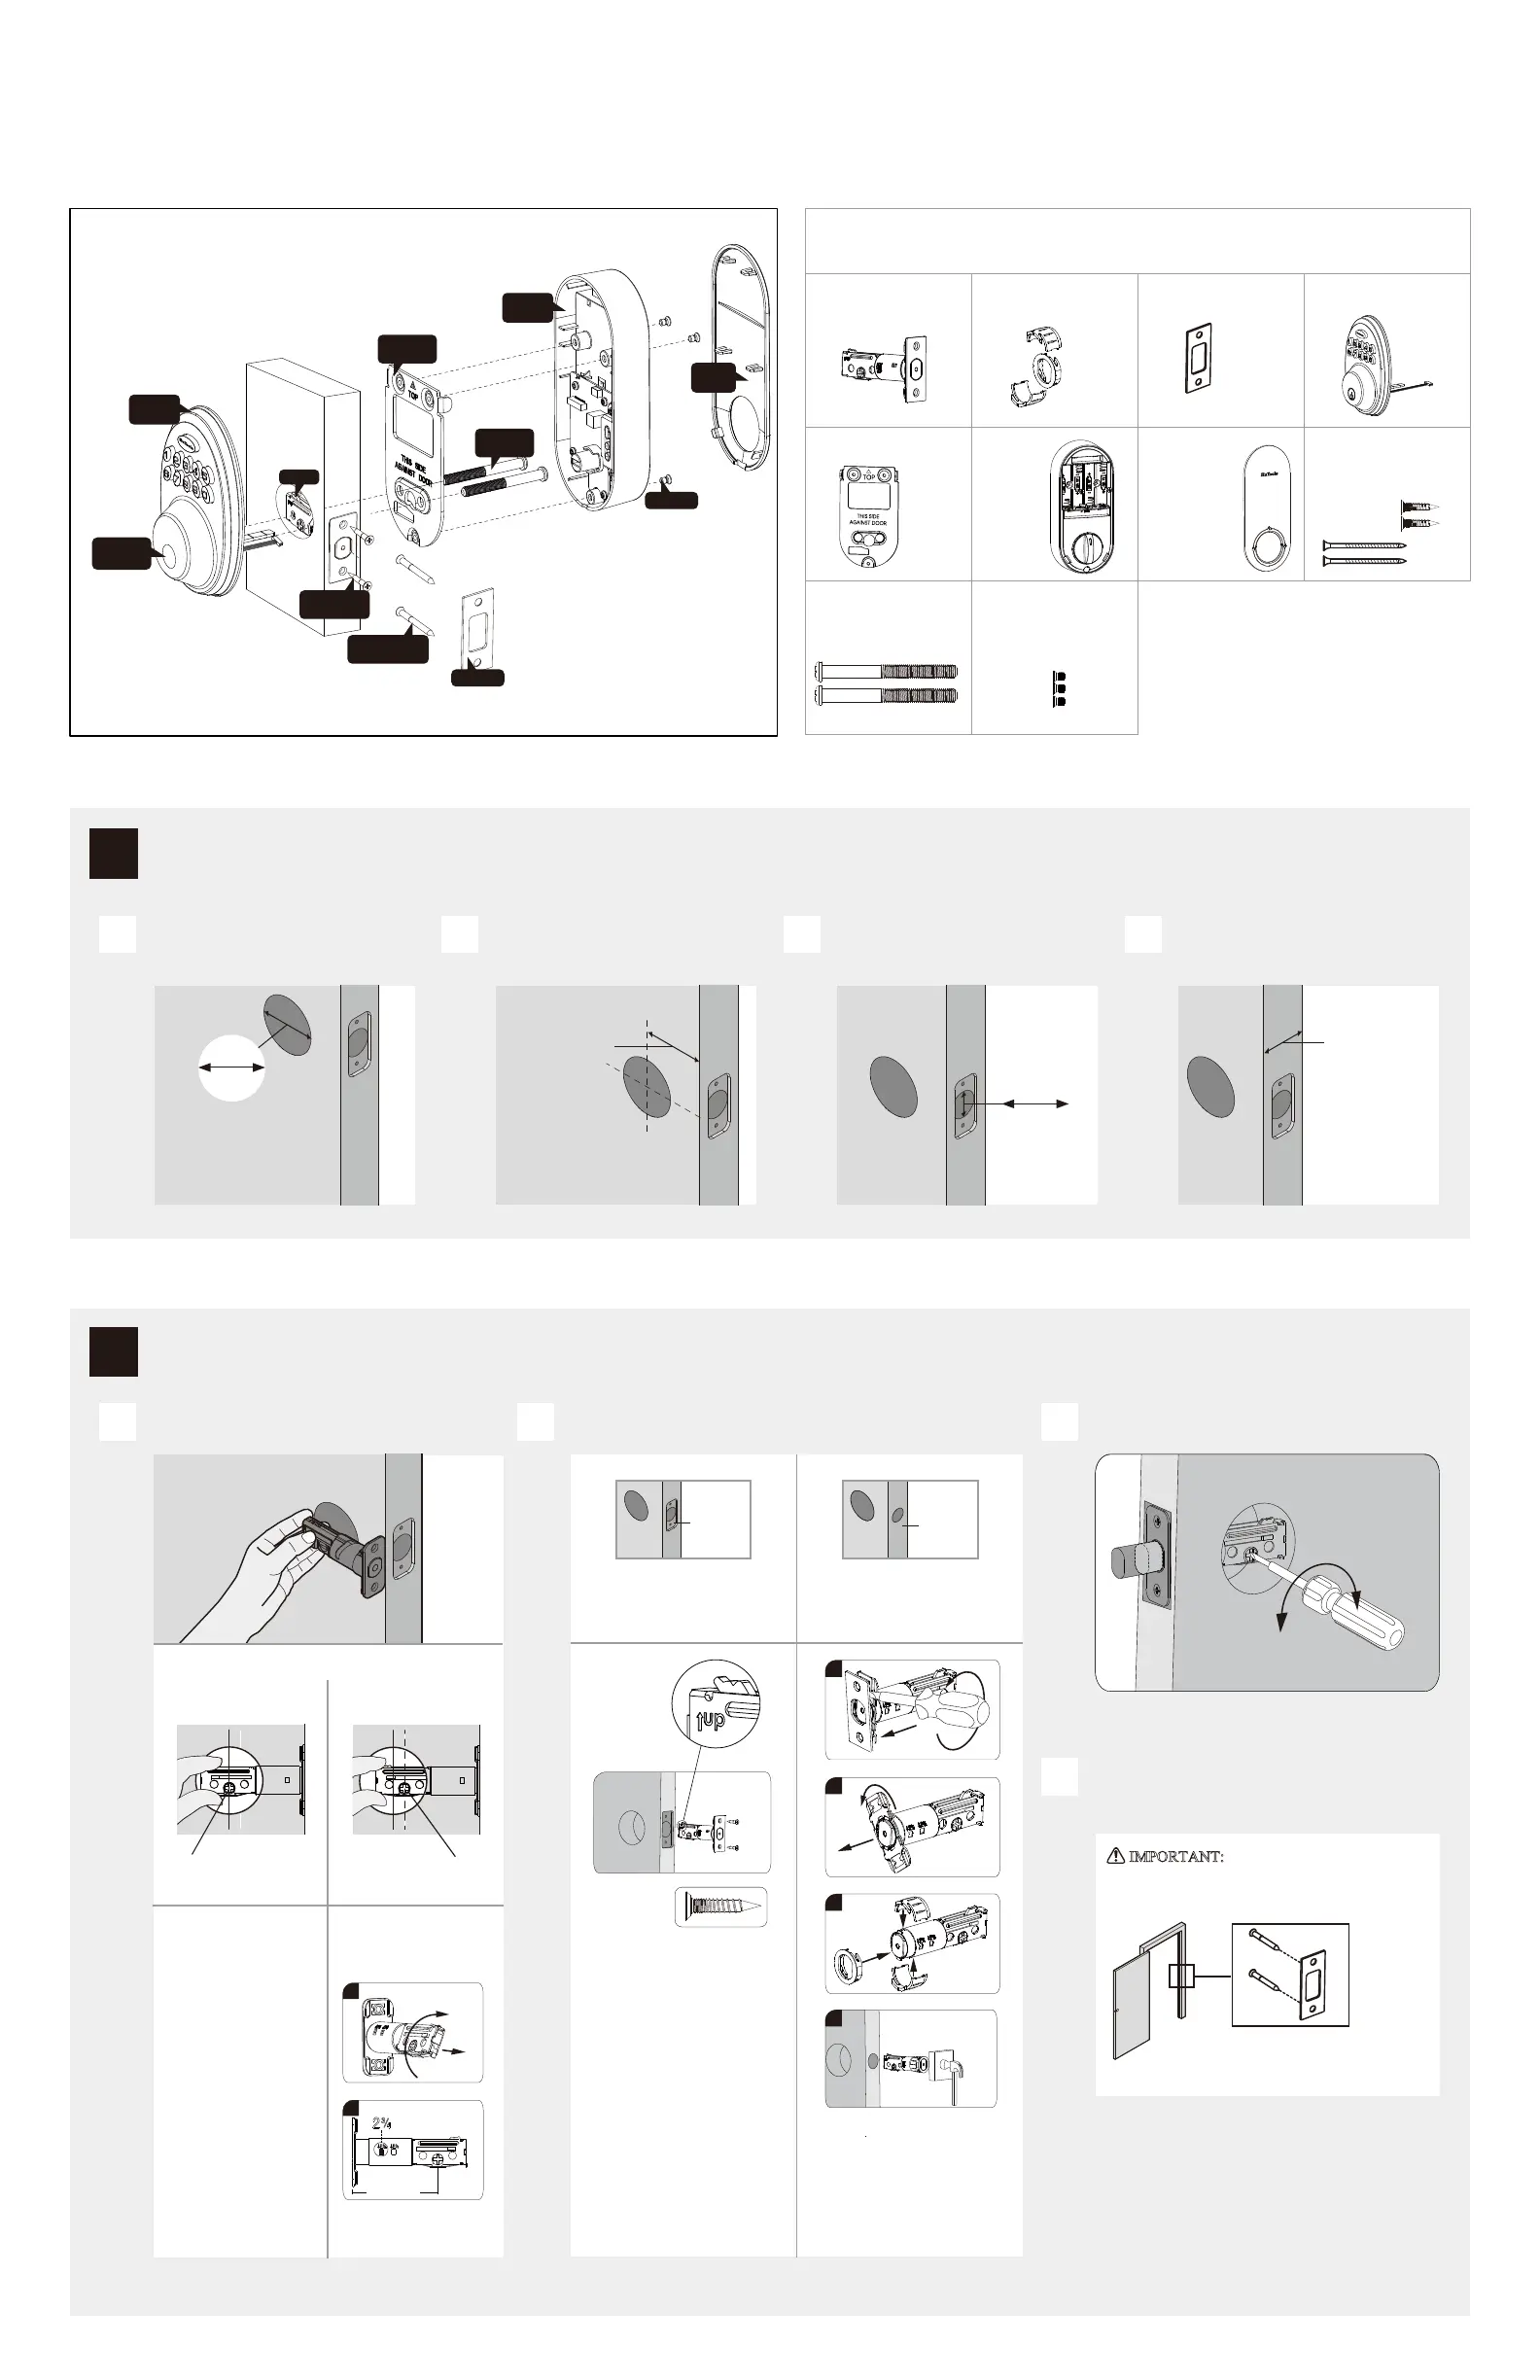
Prepare the door and check dimensions
Measure to confirm that the hole in the door
is 2-1/8" (54 mm)
Measure to confirm that the backset is
either 2-3/8" or 2-3/4" (60 or 70 mm)
Measure to confirm that the the hole in
the door edge is 1" (25 mm)
Measure to confirm that the door is 1-3/8"
to 2" (35 mm or 50 mm)thick
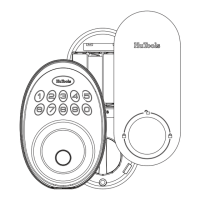
Latch
Exterior Assembly
Battery Cover
Strike
A
E
K
F
G
B
C
D
Parts List
Drive-In Collar
Latch and
Strike Screws
Mounting Plate
Interior Assembly
Screws
Interior
Assembly
Mounting Plate
Screws
L
Backup Key
H
I
1 / 6
2-3/8" or 2-3/4"
1-3/8" to 2"
54 mm
2-1/8"
J
Installation Guide
Latch/Strike
Screws(I)
Reinforcement
Screws(H)
Strike
Mounting
Screws(J)
Mounting
Plate
Screws(K)
Battery
Cover
Interior
assembly
Exterior
Assembly
Latch
A B C
D
2
Install the latch and strike
B
A
Is the door edge chiseled?
Is the slotted hole centered in the door hole?
Hold the latch in front of the door hole, with
the latch face flush against the door edge
YES
YES
NO
NO
Install latch in door with
supplied screws.
No adjustment is
required. Proceed
to next step.
Slotted hole is centered. Slotted hole is NOT centered.
Rotate and pull the
latch as shown
to extend latch.
Use a screwdirver to test if deadbolt works smoothy.
chiseled
not
chiseled
IMPORTANT: Make sure hole in door frame
is drilled a minimum of 1" (25 mm) deep.
I
H
C
or
or
Use a flathead screwdriver to remove
Rectangular face from latch and install
drive-in collar.
Install strike on the door frame
1
φ2-3/4”
(70mm)
2
1
2
3
4
Install latch in door with wood
block and hammer.
Fingerprint
Sensor