This document describes the HUTT W8 Variable Frequency Window Cleaning Robot, a device designed for automated window cleaning.
Function Description
The HUTT W8 is a window cleaning robot that operates on glass surfaces. Its primary function is to clean windows using both dry-wiping and wet-wiping modes. The robot features a water tank for water spraying, which is controlled by the pump pressure software and can be turned on/off via remote control. It employs a variable frequency system for efficient cleaning. The robot is designed to adhere to glass surfaces using suction, allowing it to move across windows. It also includes safety features such as a safety rope attachment and anti-drop sensors.
Important Technical Specifications
- Model No.: W8
- Rated Voltage: 24V===
- Rated Power: 90W
- Noise Level: 70dB
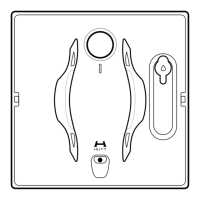
- Machine Dimensions: 242*242*83mm
- Charging Current: 300mA
- Remote Control Operation Frequency: 2450Mhz
- Capacity of the back up battery: 650mAh
- Machine remains attached when the power is off: 20 minutes
- Fan Suction Range: 1850-3800Pa
- Capacity of the Water Tank: 80ml
- Cleaning Speed: 0.06m/s-0.07m/s
- Minimum applicable area: 400*600mm
- Remote Control Maximum Output Power: 4mW
Usage Features
The HUTT W8 offers several usage features for convenient and effective window cleaning:
Operation Modes:
- Dry-wiping: The machine defaults to wet-wiping mode. To dry-wipe, the "Water Spray" function must be turned off using the remote control, and a dry cleaning pad installed.
- Wet-wiping: The machine starts in wet-wiping mode directly with a dry cleaning pad installed. It is crucial to use the original cleaning pad to ensure optimal performance.
Installation and Setup:
- Installing the cleaning pad: The white side of the cleaning pad should be smoothly stuck to the machine, ensuring it doesn't cover the four detection holes to prevent air leakage.
- Filling water into the water tank: Remove the water tank plug, fill with pure water or special glass cleaner (non-corrosive liquid recommended for better results, e.g., distilled water), and then tighten the plug. Corrosive liquids are forbidden.
- Connecting to the power supply: Connect the machine's power cord to the adapter, then connect the plug's power cord to the adapter, and finally insert the plug into a power socket.
- Fixing the safety rope: Check the safety rope for damage. If intact, fix it to a solid, reliable, and immovable object, leaving sufficient length for operation. It's recommended to circle the object 1-2 more times for enhanced safety.
- Starting the machine: It is recommended to spray some window cleaner on the window first. Hold the power button for more than 1 second to power on. Once attached to the glass, release the machine and short-press the button to start cleaning. If the glass surface is very dusty, it's advised to wipe a clean area the size of the device before installation.
Path Planning:
- "Z" pattern (Upright placement): When placed upright, the robot moves from the upper left to the upper right corner, measuring window width. It then moves to the next line, spraying water intermittently, and continues line by line until the window is clean. The space between lines is 1/3 of the machine's length. After cleaning, it returns to the starting area.
- "N" pattern (Horizontal placement): When placed horizontally, the robot begins wiping in an "N" pattern. This pattern is recommended for windows with narrow frames. It moves rightwards to the right frame, then wipes upwards and downwards along the right frame, moving leftwards to the next line, and continues this pattern.
Water Spraying Function:
- Defaults to wet-wiping mode upon power-on.
- Dry wipe mode can be activated by pressing the water spray button on the remote control to turn off spraying.
- In wet wiping mode, water is sprayed every 10-15 seconds, but not during edge detection or line changing.
- The machine does not spray water when commanded to move via remote control (upwards/downwards/leftwards/rightwards).
Remote Control Functions:
- Move to top, bottom, leftmost, rightmost.
- Water spray ON/OFF (ON by default).
- Wipe downwards from the current position.
- Start/Pause/Continue.
- Restart wiping.
- Fixed point wiping.
- Note: Remove remote control battery if not used for a long time to prevent aging/damage.
Safety Precautions:
- Do not use in rainy, wet, or misty conditions.
- Operate only between 0-40 degrees Celsius; use antifreeze glass cleaner below 0°C.
- For external high-altitude use, implement ground safety warnings.
- Do not use on cracked/damaged glass. Window frame thickness must be at least 6mm.
- Window size must be larger than 40*60cm (height). Check for ultra-narrow, bevel, ultra-thin, or frameless windows, or uneven glass glue, bumps, leaks, gaps, as these conditions are not recommended or require supervision.
- Keep product away from water, children, direct sunlight, high temperatures, humidity, or flammable materials.
- Always check the safety rope for damage and ensure it's fixed to an immovable object.
- Use a dry cleaning pad. Children should not operate the product.
- Use cautiously on oblique surfaces with supervision; use remote control if necessary.
- Shut down the machine before cleaning its surface.
- Avoid rotating parts and openings when the machine is on. Unplug after use and during maintenance.
- Follow the User Manual; contact customer service for faults.
- Ensure battery is well-charged.
- Do not use third-party chargers or disassemble/modify the machine, battery, or charger.
- Discontinue use of damaged chargers; keep away from heat.
- Transport in original packaging with the machine shut off.
- For long-term storage, charge fully, turn off, and store in a cool, dry place. Recharge every two weeks to prevent over-discharge.
- Dispose of batteries according to local laws/regulations.
- Cut off power supply before battery removal for scrapping.
Maintenance Features
Regular maintenance is essential for prolonging the life and effectiveness of the HUTT W8.
General Maintenance:
- Unplug and turn off the machine before cleaning the area beneath the cleaning pad.
- After cleaning, drain water from the water tank.
- Replace the used cleaning pad with a clean, dry one, or leave the machine without a cleaning pad.
- After wet-wiping, place the machine in a dry, ventilated, cool place for 1-2 days to dissipate internal moisture.
Washing the Cleaning Pad:
- Remove the cleaning pad.
- Soak in water at approximately 20°C for 2 minutes.
- Brush with a soft brush; do not rub or twist.
- Allow to dry naturally before reuse.
- Note: Do not use a wet cleaning pad to avoid slipping. Replace aged pads that cannot closely attach to the Velcro for best cleaning effect.
Cleaning the Bottom Component:
- Bottom suction inlet: Wipe with a cleaning cloth to prevent blockage.
- Anti-drop sensor: Wipe with a cleaning cotton swab to maintain sensitivity.
- Water removing blades: Wipe with a cleaning cloth to keep them clean.
Cleaning the Crawler Wheels:
- Avoid placing the machine directly on the floor after use to prevent particles from sticking to the cleaning pad or crawlers, which could scratch the glass.
- If wheels are dirty, enable the wheel cleaning function: Hold the machine with the bottom suction inlet upwards, start the machine, press and hold the power button (crawler wheels will rotate slowly), then use a wet tissue to wipe off dirt.
- Note: Do not clean crawler wheels with a cleaning cloth or dry towel.
Troubleshooting Guidance:
- Machine slides downwards: Caused by excessive moisture in the cleaning pad. Absorb moisture with a paper towel, replace with a dry pad, or wipe water from crawler wheels and surrounding pad areas.
- Machine holds on to the edge: Normal resistance detection; wait patiently.
- Machine not moving smoothly: Replace cleaning pad or check for sticky residue on glass.
- Removing an out-of-reach machine (no remote control): Pull the safety rope against the glass, slowly pulling the machine to reach it by hand.
- Machine doesn't stop automatically: Remove the machine directly.
- Unexpected power failure: Internal battery keeps machine attached for at least 20 minutes and triggers an alarm. Remove machine or restore power.
LED Indicators and Voice Prompts:
- Connected to power: Check adapter socket/interfaces; start after 20 minutes charging.
- Red indicator ON (Low pressure): Check cleaning pad installation (flat, correct side, not reversed), glass surface (smooth, not protuberant), suction opening blockage, or arc-shaped glass (air leakage).
- Red indicator ON (No): If machine runs normally, it self-adjusts. If frequent, remove/re-stick/replace cleaning pad.
- Red indicator ON (No): Check for loose/damaged power plug, power failure, or poor contact.
- Red/blue indicator flashes cyclically (Wheels stop rotating/Crawler wheel abnormal): Clean wheels or contact customer service.
- Red/blue indicator flashes cyclically (Glass friction too small): Remove water/oil stains from crawler wheels/contact area, check for stickers/attachments on glass.
- Red/blue indicator flashes cyclically (Glass friction too large): Clean dirt on crawler wheels, check if humidity from rainy day is too high.
- Red/blue indicator flashes cyclically (Gyroscope/Barometer/Fan/Wireless module error): Unplug adapter and restart. If issue persists, contact customer service.
- Red/blue indicator flashes cyclically (Edge detector error): Check cleaning pad installation (not blocking corners), dirt on detectors, or strong sunlight directly hitting detectors. Unplug adapter and restart. If issue persists, contact customer service.
- Machine holds up to edge: Machine is checking resistance level; wait patiently.
Battery Recycling and WEEE Information:
- Battery Recycling: Remove all screws from the bottom, open the upper cover, unplug the battery socket, and remove the battery. Dispose of according to local laws.
- WEEE Information: The product bears the WEEE symbol, indicating it should not be mixed with unsorted household waste. Dispose of at designated collection points for electrical and electronic equipment recycling to protect human health and the environment.
Conformity:
- Beijing Hutt Wisdom Technology Co., Ltd declares this device conforms to basic requirements and regulations outlined in guidelines 2014/53/EU and 2011/65/EU. The CE declaration of conformity can be found at https://us.huttwisdom.com/certificate.