Do you have a question about the Hvac R Series and is the answer not in the manual?
Installation and servicing of heating equipment involves live electrical components, requiring trained personnel to avoid injury or death.
Installers must know the product, safety precautions, and familiarize themselves with the manual before installation, prioritizing safety.
Heater requires a dedicated 15-Amp, 120-volt AC circuit, using minimum #14 Ga. copper wire for the supply.
Ensure the 120-volt supply power is OFF and de-energized before starting wiring procedures.
Route 120-volt AC circuit wires through the provided hole, ensuring strain relief and connecting Black to L1 and White to N.
Turn off all power before installing the thermostat. Improper wiring or installation may damage the thermostat.
Provides the schematic for the 120 Volt-1 Phase, 1.44 KW-1 Stage heater, including wire color codes.
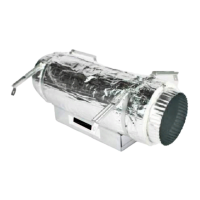
This document provides installation and operation instructions for the 'R' Series Heat Pack, an auxiliary electric heater designed for use in HVAC systems.
The 'R' Series Heat Pack is an electric heater intended to provide supplemental heat within a duct system. It features an integral controlled axial fan that delivers approximately 160 CFM (Cubic Feet per Minute) during operation. The heat pack is designed to be installed in a horizontal position within either metal or flexible ductwork, specifically 6-inch diameter ducts. It includes a wired thermostat for wall mounting, allowing temperature control within the heated room. The heater's discharge end should always point toward the outlet register to ensure proper airflow direction.
Each heater is designed to supply 1440 watts of heat at 120 volts. It requires a dedicated 15-Amp, 120-volt AC circuit for power supply. The installer should use a minimum of #14 Ga. copper wire for the power supply. The thermostat is a low-voltage, wall-mounted unit that does not require batteries and retains temperature and mode settings when power is off. The thermostat's anticipator value, which controls sensitivity and cycle rate, can be adjusted from 1 to 3 (factory default is 2). The thermostat can display temperatures in either Fahrenheit or Celsius. The fan output (G) can be configured to be ON or OFF when the heat output (W) is ON, with the factory default being ON. The room temperature offset can be adjusted from -5 to +5 degrees.
The heat pack is designed for horizontal installation only and should not be installed vertically. It can be located at any convenient point along the supply duct, but the recommended location is directly at the supply register boot. For installation, the appropriate length of duct is removed and replaced with the heat pack. Support attachments, such as duct strap material or optional brackets, are used to secure the unit to ceiling or floor joists. One support attachment is required when installed directly into the supply boot register, while two are needed for installation within the duct run.
The wired thermostat allows users to control the heating and fan system. To enter configuration mode, the FAN button must be pressed and held for approximately 10 seconds. In this mode, users can adjust the anticipator value, select Fahrenheit or Celsius display, configure fan operation with heat, and set a room temperature offset. The thermostat's fan operation can be started or stopped by pressing the FAN button. Heating operation is initiated by selecting "HEAT" mode and adjusting the temperature using the UP/DOWN buttons.
Before installation or servicing, it is crucial to ensure that all power to the unit is OFF to prevent electrical shock. The manual emphasizes the importance of consulting a qualified installer or service agency for proper installation, adjustment, alteration, service, or maintenance. During shipment inspection, users should check for any damage, including broken insulators or deformed heater element wires, and ensure all fasteners and electrical connections are tight. The thermostat is calibrated within an accuracy of plus or minus 2 degrees when shipped from the factory, and the room temperature offset can be used to fine-tune accuracy. The manual also advises against interfering with the temperature sensor by pushing excess wire back into the wall. Regular checks for heated airflow from the supply boot are recommended to confirm proper operation of the heat pack, ensuring the airflow is generated by the heat pack itself and not by the primary heat source.
| Brand | Hvac |
|---|---|
| Model | R Series |
| Category | Thermostat |
| Language | English |