6. CONNECTION & NOZZLE OPERATION
Nozzle Connection: Before connecting the Ripsaw nozzle, ush the hose to remove any debris that may be in the line. Next attach the nozzle
using Teon tape (before attaching check the inlet screen to ensure its free of debris). Once pump is started and up to pressure make sure the
Ripsaw is pointed at the ground.
Nozzle Operation: After pressure is built up, keep a distance of 8” from soil. Do not probe with the tool. Keep the nozzle free of debris by not
submerging in water or bringing to rest in the soil material.
Nozzle Storage: After using the nozzle shutdown the pump before removing from wand or lance. We recommend draining water out of nozzle
before storage to extend the life of your nozzle.
7. KITS & PARTS LIST
9. WARRANTY
8. REPAIR KIT INSTRUCTIONS
NOZZLE
SIZE
RIPSAW HD
NOZZLE PART
NUMBER
REPAIR KIT PART
NUMBER
3.0 1002719-030 1001858-030
4.0 1002719-040 1001858-040
5.0 1002719-050 1001858-050
6.0 1002719-060 1001858-060
8.0 1002719-080 1001858-080
10.0 1002719-100 1001858-100
12.0 1002719-120 1001858-120
952-808-3640 • hello@hydraexinc.com • www.hydraexinc.com
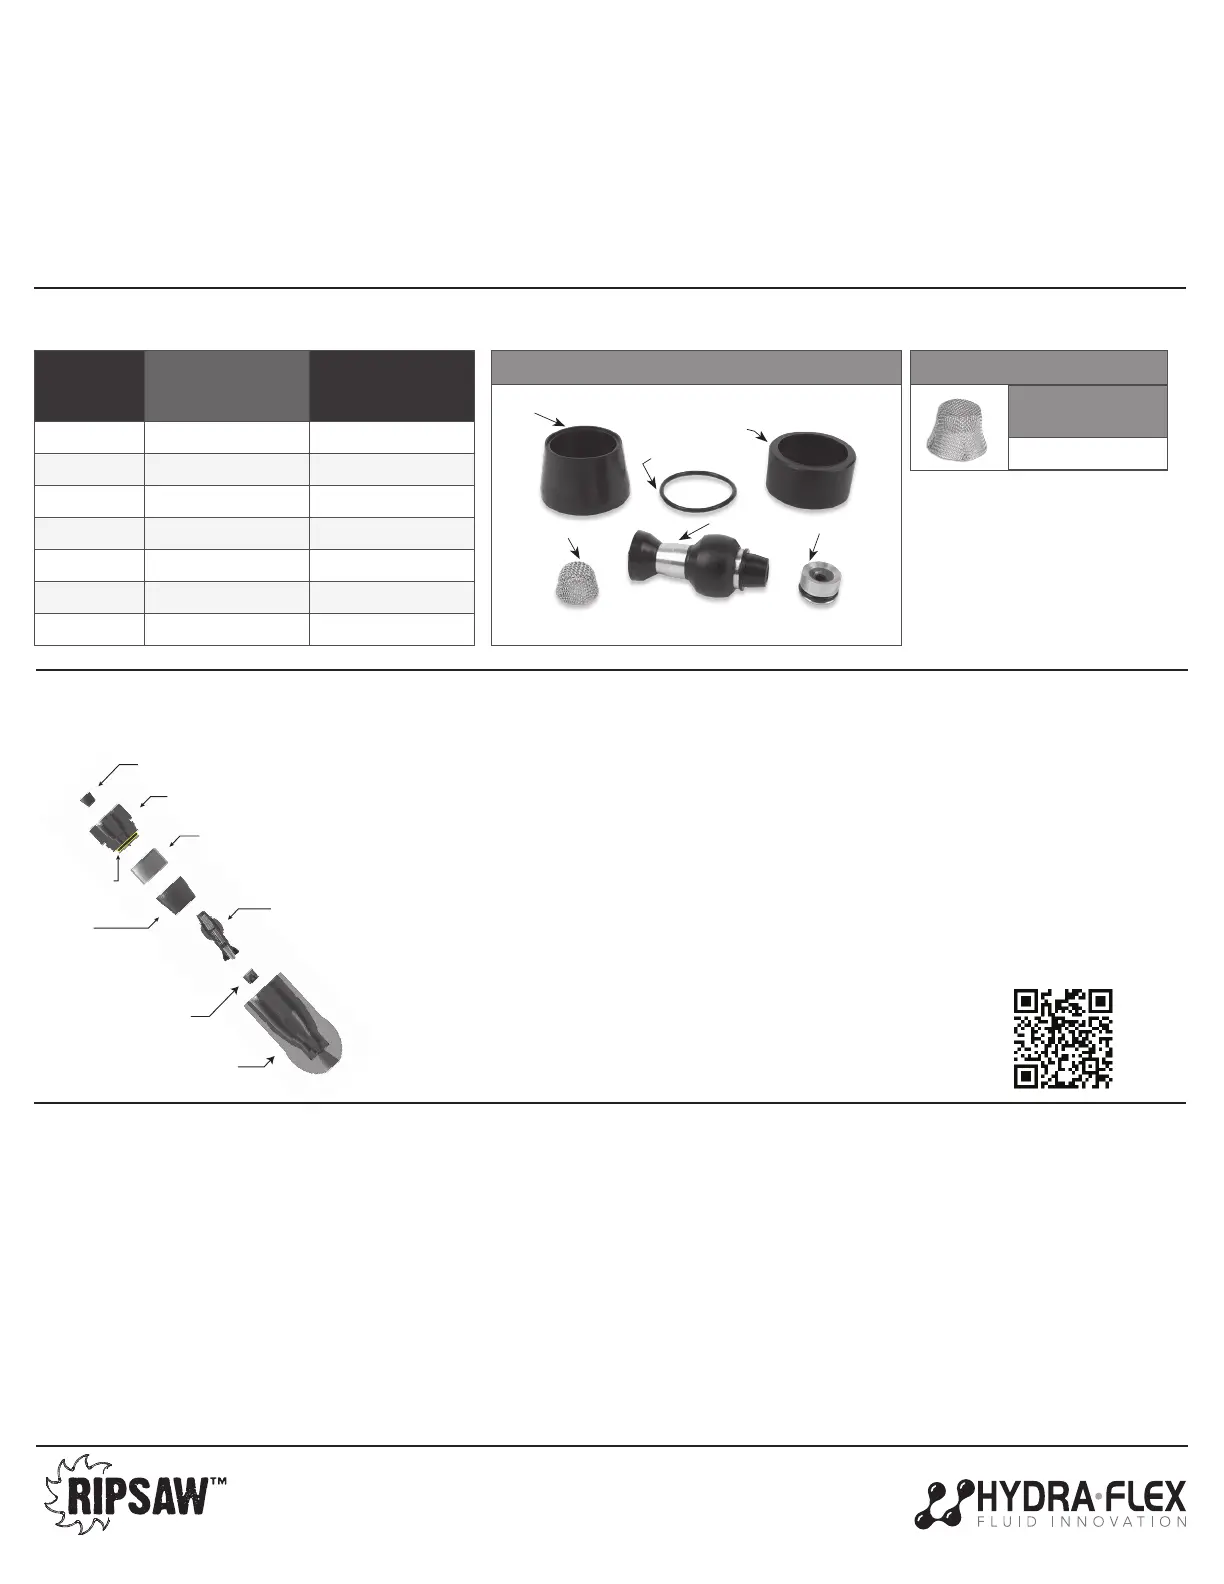
ROTOR REPAIR KIT:
INLET SCREENS
(10 Pack)
1002883
ACCESSORIES
Hydra-Flex products are warrantied to be free from defects in materials and workmanship under normal use and service. “Normal use and service” means
operated within recommended pressures, temperatures, and chemicals, and only handling compatible uids. This warranty does not apply to any accessory
repaired or altered to affect the performance or reliability of the product.
The warranty does not apply to:
a) Freight damage
b) Freezing damage
c) Damage caused by parts or accessories not obtained from
or approved by Hydra-Flex
d) Damage from misuse and/or misapplication
e) Damage due to poor water quality
f) Normal wear of moving parts, components affected by moving parts
or surfaces meant to wear
The warranty period is 90 days from the date the product is shipped from Hydra-Flex. The manufacturer’s warranty liability is limited to the repair or replacement
of that product, to be determined by Hydra-Flex, if our investigation determines the product was defective when shipped. This warranty is in lieu of all other
warranties, expressed or implied, including any warranty of merchantability and/or any other obligations or liabilities on the part of Hydra-Flex. To inquire
about the policy or to le a request for investigation, please use the button below to contact Hydra-Flex or call your sales rep to determine next steps. A return
merchandise authorization number must be granted for units to be returned for replacement or repair.
4000224_RevC
Screen
Existing End Cap
Top Insert
Rotor
Boot
End Cap
O-Ring
Seat
Existing Housing
CLEANING/REBUILD INSTRUCTIONS:
1. Start by unscrewing the end cap on the nozzle and removing the existing components (top insert,
boot, rotor, and seat).
2. Next, remove the o-ring on the end cap and replace.
3. Then install new seat as shown (o-ring side down) and press into place.
4. Push new boot into grooves inside housing.
5. Insert new top insert, ensuring the lip (smaller ID) is closest to the end cap.
6. Position the new rotor on the seat inside the housing, ensuring correct orientation with tip down.
Rotor will lay against the side of the nozzle.
7. Screw on the end cap with rotor laying against the side of the nozzle, do not over-tighten.
8. Examine the inlet of the end cap to ensure there is no debris caught in the screen. If there is debris,
remove the screen and clean/replace.
Rotor Assembly
Inlet Screen
O-Ring
Seat Retainer
Top Insert
Rubber
Boot
SCAN TO WATCH
INSTRUCTION VIDEO!
 Loading...