Do you have a question about the Hydro Doors Digidor III and is the answer not in the manual?
Operate the door only while in view, free of obstructions and properly adjusted.
Keep adults, children, and pets clear of the moving door.
Keep transmitter controls away from children.
Use caution when operating manual release with door open to prevent falls.
Frequently examine the door and operator for wear, damage, and improper balance.
Ensure a Hydro Doors accredited installer services the door regularly.
Obstacle sensing is done electronically and must be tested at least once a year.
Allows manual release from outside during power failure or low battery.
Two units mounted on doorway sides for obstruction detection.
Purpose-made 24vdc motor for powerful and efficient operation.
Operates on 230Vac with 24V battery backup.
Microprocessor-based controller with plug-in printed circuit board.
Features are selected via link settings on the control board.
High-performance receiver integrated on the control board, supports 28 users.
Implemented in software and by adjustable current sensing for safety.
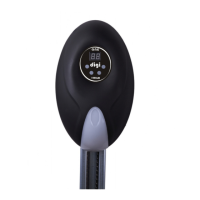
Eliminates wiring, includes buttons for Control, Light, and Lock.
Prominent indicator shows mains/battery mode, lock status, and set-up mode.
Provides audible warnings and assists with set-up procedures.
Both versions of the 60-watt lamp may be used.
Strut incorporates an adjustable stop for travel limit in open position.
Achieves fast operating speed with ramp-up/down for smooth operation.
A 24volt connection is provided, which times-out to conserve battery power.
Closes door automatically 30 seconds after opening with prior warning.
Closed limit set automatically; open position controlled by manual sensor.
Lists compatible door types: sectional, tip-up, and roll-up doors.
Door must be in good working condition for successful automation.
Details the 12-month warranty for the digidoor III ac/dc operator.
Each transmitter has a unique identity that must be recorded by the receiver.
Step-by-step guide to recording transmitters via the wireless wall console.
Function to remove all recorded e-key transmitter codes from the receiver.
Detailed steps for pairing transmitters with the wall console.
Instructions for attaching the power head to the drive strut assembly.
Steps for installing the operator on sectional overhead garage doors.
Explains LED indicators and audible alerts for system status.
Guidance on where and how to mount the wireless wall console.
How to enable and use the auto-close feature, including warnings.
Instructions for adjusting and tightening the wall-mount bracket.
Detailed steps for connecting power and performing the initial setup.
Setting the door's open and closed travel limits during installation.
Pre-installation checks for roll-up doors, including shaft, tracks, and springs.
Attaching the power head to the strut for roll-up door automation.
Procedure to reverse the motor direction for specific roll-up door installations.
Steps for assembling the components of the special roll-up kit.
Instructions for mounting the operator unit for roll-up doors.
Emphasizes greasing, checking, and adjusting springs for roll-up doors.
Ensures manual lever is engaged before engaging the operator.
Amber flashing indicator signifies the operator is in set-up mode.
Procedure for the door to close and open to establish travel limits.
Steps to program the master wireless wall console.
Adjusting obstacle sensing and testing with a 40mm high block.
Connecting batteries to the control board using the specified connector.
Verifying reliable operation and informing the client of safety features.
Step-by-step guide to recording transmitters via the wireless wall console.
Purpose-made 24vdc motor for powerful and efficient operation.
Operates on 230Vac with 24V battery backup.
Microprocessor-based controller with plug-in printed circuit board.
Features are selected via link settings on the control board.
High-performance receiver integrated on the control board, supports 28 users.
Implemented in software and by adjustable current sensing for safety.
Eliminates wiring, includes buttons for Control, Light, and Lock.
Prominent indicator shows mains/battery mode, lock status, and set-up mode.
Provides audible warnings and assists with set-up procedures.
Both versions of the 60-watt lamp may be used.
Strut incorporates an adjustable stop for travel limit in open position.
Achieves fast operating speed with ramp-up/down for smooth operation.
A 24volt connection is provided, which times-out to conserve battery power.
Closes door automatically 30 seconds after opening with prior warning.
Closed limit set automatically; open position controlled by manual sensor.
Emphasizes that installations must be done by an accredited installer.
Lists relevant SANS standards that must be followed during installation.
Highlights the garage door as the largest moving object and advises annual servicing.
Warns against attempting adjustments of springs, cables, or brackets due to high tension.
Recommends fitting infra-red safety beams for added safety.
Obstacle sensing is done electronically and must be tested at least once a year.
Contact details for the main Hydro Doors office and factory.
Contact details for the training division of Hydro Doors.
Lists contact information for various Hydro Doors branches across South Africa.
| Brand | Hydro Doors |
|---|---|
| Model | Digidor III |
| Category | Garage Door Opener |
| Language | English |