Questions or Comments Contact Us At:
www.hydrocheckproducts.com or info@hydrocheckproducts.com or 877-225-2124
900-003 Rev F (Front) Flotec and Tempest are Registered Trademarks of Pentair, Inc
Installation Instructions
Operational Overview
The HC7000 Electronic Utility Pump Switch is specially designed to control the on and off operation of small utility
pumps.
The HC7000 will turn on the pump when the water level reaches the sensor. It will keep the pump running until the
water level drops to the point where the pump loses suction. Note that it must take at least 5 seconds of
running before losing suction for the pump to shut off correctly. It then turns the pump off and waits for the
next cycle to begin. To help protect the pump from damage due to air lock conditions, the HC7000 will turn the
pump off for 10 seconds if the water level doesn’t drop below the level of the sensor after running for 60 seconds.
An alarm will sound (3 beep pattern) if this occurs.
Step-by-Step Installation
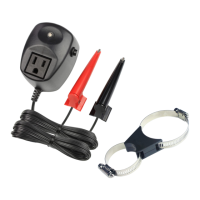
How the Sensor Works:
The sensor detects the presence of water by using a continuity circuit, which, when the tip
of the sensor is in water, allows a small voltage to flow from the sensor, through the water,
to ground. When no water is present, the circuit is broken and no voltage flows. Normally,
the pump provides the ground needed for the continuity circuit, but occasionally it won’t.
When this happens, it is necessary to provide a ground for the sensor to work. This can
be done by taking a length of wire (14 AWG) with a couple of inches of insulation stripped
off at both ends. Secure one end of the wire around a water pipe or electrical conduit.
Place the other end under the pump, which will hold it in place.
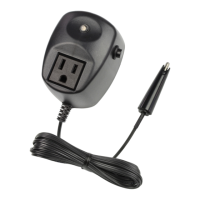
Plug the pump motor into control
module. Note that the HC7000’s
output is rated for a maximum of 120
VAC, ¾ HP/13.8 Amps (standard for
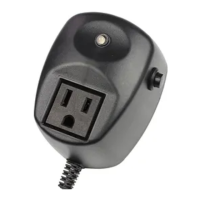
Plug the HC7000’s control module
into the 120VAC outlet. It will beep
once to tell you it’s ready to go and
the LED will illuminate RED. RED
indicates the output is off. GREEN, or
flashing GREEN, indicates the output
is on. Note that this product is not
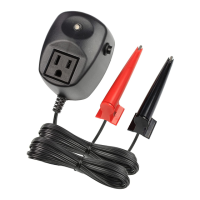
Attach the sensor to the pump with the
supplied tie-wrap at the level where you
want the pump to turn on. The sensor can
be set at any level, but most pumps need
a minimum water depth before they should
be turned on. Consult your pump’s
owner’s manual for this requirement. .
The sensor should be positioned
so that the pump will run for at
least 5 seconds before sucking air.
Important! Test your installation before
leaving it for unattended operation. For best
results, make sure to use a high quality hose that is
as short as possible, kink resistant and is at least
5/8” in diameter.