Page 4
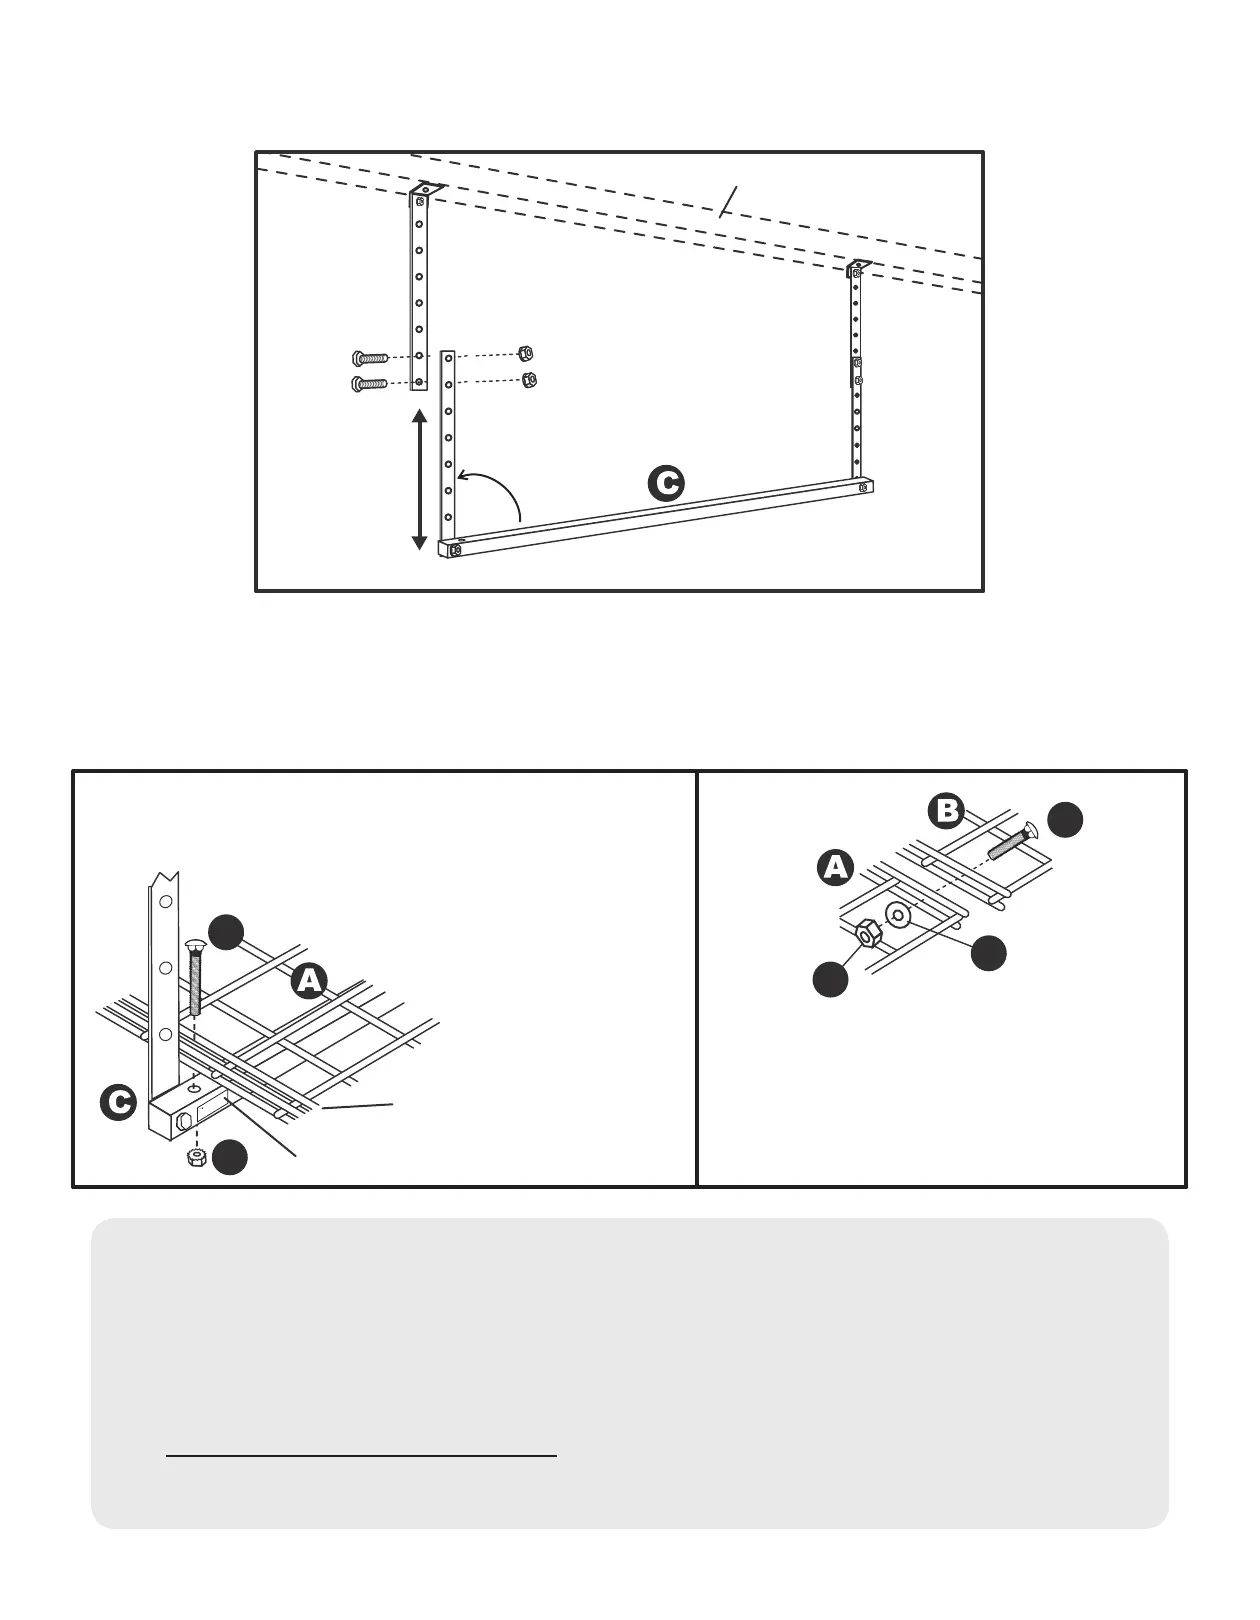
2. Adjust Support Bar Assemblies (optional)
If necessary, adjust length of Support Bar Assemblies (C) by removing Hex Bolts & Hex Nuts as shown.
Overlap Downrods to the length desired & reinstall Bolts & Nuts, being sure both Support Bar Assemblies
are level.
3. Place and Attach Grids
Purch
aser assum
es all liability
if load
exceed
s 250 lb
s. (114 k
g) or if i
mproper
ly installed.
Please see instal
lation docum
ents for l
im
itation
on liab
ility. El c
om
pra
dor asum
e toda
la
respon
sabilidad si el p
eso exc
ede 2
50 libras
(114 k
g). O si est
á instal
ado inco
rrectam
e
nte.
Vea por
favor los
docum
entos
de la in
stalaci
ón para
la respo
nsabilida
d del lim
itationo
n.
L
'ache
teur ass
um
e tout
e la resp
onsabilité si
le poids
excède
250 livre
s (114 kg) ou
si l'unité
n'a pas
été inst
allée
correcte
m
ent.
Veuillez
consult
er les docum
e
nts conce
rnant l'installatio
n pour l
a limit
ation de
respo
nsabilit
é.
US Pa
tents: D
416152;
D4599
26; D4
77957; D470353
; 6435105
; 640
9031; US
& Inte
rnationa
l Patents
Pending
F
E
G
H
I
Lay both 15” Wire Grids (A) on left and right sides
of Support Bar Assemblies (C) and attach as shown,
using 1/4” x 2” Carriage Bolts (E) and 1/4” Flange
Nuts (F). Note: Long grid wires go on the bottom.
3A 3B
Sticker (K)
Four-wire clusters
nearest down-rods
Lay 13” Wire Grid (B) on top of Support Bar
Assemblies (C), between the (2) 15” Wire Grids (A),
and bolt together using (2) #6 x 1” Carriage Bolts (G),
#6 Washers (I), and #6 Hex Nuts (H) on each side.
You have now completed the installation and are ready to load your new HyLoft
Storage Unit. (Maximum 250 lbs. per 45” x 45” unit, evenly distributed).
Place the HyLoft Sticker(K) provided on a support bar for easy reference information.
Periodically (at least annually) check all connections to ensure that they remain tightly
fastened.
Installing Two HyLoft 45” x 45” Units:
Follow the instructions above. Multiple units may be joined together by using
Plastic Tie Straps (J) provided.
Ceiling Joist
Remove Screws
to Adjust
Downrods to
Desired Length
310491/0917
 Loading...