Hypnocube 4Cube Instructions v 6.5, December 2013
- 20 -
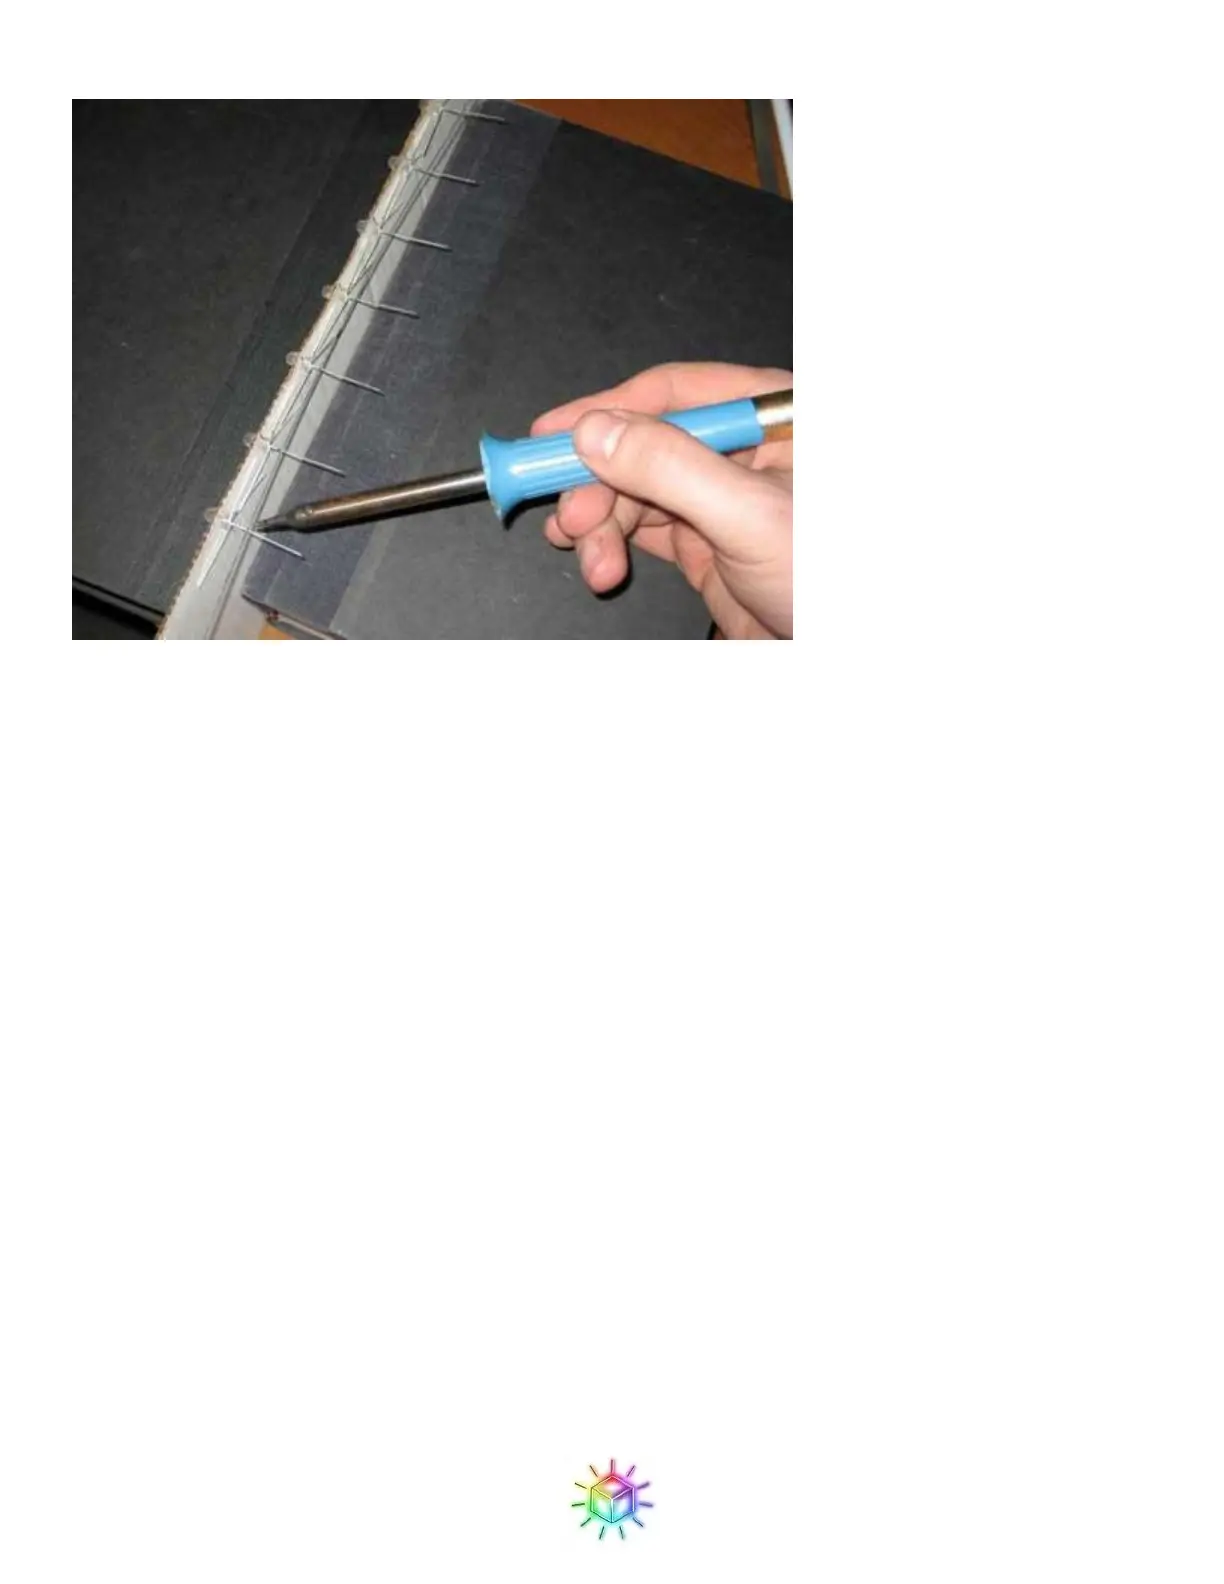
Figure 38: Soldering the LED strip on a cardboard jig.
Soldering here can be tricky, since the long wires are galvanized steel (steel was necessary to provide sufficient
structural strength, and also wasn't too expensive to get pre-straightened in low quantities.) Steel holds
considerably more heat than the tinned copper you are probably used to, and consequently will both take longer
to heat up (making cold solder joins more likely) and longer to cool off (the solder will take longer to solidify,
allowing the wire to move for a couple seconds after removing the iron.)
Because the wire takes longer to heat, we have to be careful about not damaging the LED. The best technique
I've found is to hold the cross wire down with the iron, and letting solder wick around the bottom to the LED
lead. This ensures that you get the cross wire hot enough for a good join, but you don't run the risk of damaging
the LED by holding the iron directly on the LED lead for too long while waiting for the cross wire to heat up.
You can start at one end and work towards the other, or start at the middle and work out towards the ends (the
method I generally prefer.) Try them both and use the one that works better for you. However, don't solder the
ends first and work to the middle, as this can cause the spacing to be off if the wire isn't perfectly straight.
Again, make sure the cross wire is centered! We will use the ends to hold the strips in a jig at a later step, and
you will need wire sticking out equally from both ends.
Once the all eight LEDs are secure, carefully wiggle the strip out of the jig. Pulling gently on the grounds that
stick straight out is a good strategy.
Congratulations! You should now have one strip, and it should look like Figure 39. Take some time to double
and triple check it against the instructions. Check the orientations of the LEDs, the side the ground wire is on,
and that the cross wire is centered.
 Loading...