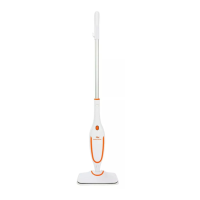
The i-Vac Steamy Wonder is a lightweight steam mop designed for domestic household cleaning, offering a convenient and effective way to clean and sanitize hard flooring surfaces.
Function Description
The i-Vac Steamy Wonder is a steam mop that uses hot steam to clean and sanitize various hard floor types. It is designed to be ready for use quickly, heating up in just 25 seconds. The device is intended for cleaning hard flooring such as ceramic tile, vinyl, laminate, marble, stone, and sealed hardwood floors. It is not suitable for use on unsealed wood floors, and caution is advised when using it on waxed or some unwaxed floors, as it may diminish their gloss. The steam mop helps remove loose dirt and debris from floors, and its steam generation provides a sanitizing effect.
Important Technical Specifications
- Max Power: 1150W
- Water Tank Capacity: 350ml
- Power Cable Length: 5m
- Net Weight: 1.9kg
- Heat Up Time: 25 seconds
Usage Features
The i-Vac Steamy Wonder is designed for ease of use with several key features:
- Handle (1): Provides a comfortable grip for operating the steam mop.
- Cable Hook (2) & Cable Storage Hook (7): For convenient storage and management of the power cord.
- Rod Release Button (3): Allows for easy assembly and disassembly of the rod.
- Steam On/Off Button & Indicator (4): Activates or deactivates steam production, with an indicator to show when it's on.
- Steam Mop Head Release Button (5): Facilitates attaching and detaching the mop head.
- Mop Pad (6): A microfibre pad that attaches to the steam mop head for cleaning.
- Rod (8): The main extension of the steam mop.
- Water Tank Release Button (9): Used to remove the water tank for refilling.
- Water Tank (10): Holds 350ml of water for steam generation.
- Steam Mop Head (11): The part that connects to the mop pad and emits steam.
- Power Cord (12): Connects the steam mop to the power supply.
Assembly:
- Insert the handle into the rod until it clicks into place.
- Insert the handle into the main body, pressing firmly until it clicks.
- Insert the main body into the steam mop head until it clicks.
- Place the mop pad on the floor with the microfibre side down, align the Velcro strips with the steam mop head, and place the mop head on top to secure the pad.
Before Cleaning:
- Remove the water tank by pressing the Water Tank Release Button.
- Twist to open the water tank cap.
- Fill the water tank with filtered or distilled water (do not overfill). Replace the cap, ensuring no leaks.
- Insert the water tank back into the cleaner until it clicks into place.
Operation:
- Plug the power cord into a power supply, ensuring it's secured in the cable hook.
- Press the Steam On/Off Button; the indicator will illuminate, and the cleaner will begin producing steam.
- Once steam appears, the cleaner is ready. Recline the cleaner by placing a foot on the floor head and lowering the main body. Slowly pass the mop over the surface to be cleaned.
Safety Precautions:
- Always unplug the steam mop before cleaning, not in use, or performing maintenance.
- Do not operate near heaters or hot surfaces.
- Ensure hands are dry before plugging in.
- Pull the plug, not the cable, from the socket.
- Do not immerse the appliance, cord, or plug in water.
- Do not use if the power cord is damaged.
- Do not use extension cords with inadequate current capacity.
- Do not handle with wet hands.
- Do not aim steam directly at people, animals, or electrical components.
- Avoid holding steam in one spot for long periods to prevent material damage.
- Never overfill the tank.
- Do not clean over floor electrical outlets.
- Hot steam can cause scalding; use caution, especially on stairs.
- Burns can occur from hot parts, water, or steam.
- Change attachments only when they are cool.
- Use only manufacturer-recommended accessories.
- Do not leave unattended when connected to power.
- Never attempt to steam clean clothes.
- Ensure the appliance does not operate on an empty tank.
- Do not apply steam directly to very cold glass surfaces.
- Do not use without the water tank cap in place and fully screwed down.
- Only water should be used; distilled/purified water is recommended for hard water areas.
- Damage from improper use voids the warranty.
- Store indoors in a cool, dry place.
- Do not add eucalyptus-based oils or chemicals to the tank.
- Avoid touching hot areas during operation.
- Always sweep or vacuum the floor before cleaning with the steam mop.
- Do not use the cleaner without a mop pad attached.
Maintenance Features
Regular maintenance is crucial for the longevity and efficiency of the i-Vac Steamy Wonder.
General Maintenance:
- Always unplug the power plug from the power supply before performing any maintenance.
- Allow the steam mop to fully cool down before performing any maintenance or troubleshooting checks.
Water Tank Maintenance:
- Remove the water tank by pressing the Water Tank Release Button.
- Twist to open the water tank cap.
- Empty any excess water and allow the tank to air dry before replacing the water tank cap and reinserting the tank back into the cleaner.
Removing & Cleaning the Mop Pad:
- Step on the exposed section on the back of the microfibre pad.
- Lift the steam mop away from the microfibre pad.
- The mop pad can be washed in a washing machine with a mild detergent at a maximum temperature of 40°C.
- Note: Do not use bleach or fabric softener when washing the mop pad.
Using a Descaler:
- Tap water contains minerals that can build up in the steam mop, reducing its efficiency. Regular use of a descaling solution is recommended every 3 months.
- Remove the water tank from the steam mop.
- Add 100ml of a descaling solution into the water tank. Fill the rest of the tank with water.
- Re-fit the water tank back into the steam mop.
- Plug the steam mop into the power supply and press the Steam On/Off Button. The steam mop needs to run (without the steam mop head attached) until the water tank is emptied. This should be done in a well-ventilated area away from the floor.
- Once the water tank is empty, refill the tank with water and re-run the steam mop again until the water tank is empty. This helps flush out any remaining mineral build-up.
- Note: Do not leave the steam mop unattended during this process.
Troubleshooting:
The manual provides a troubleshooting guide for common issues:
- Steamer will not switch on: Check if the steamer is plugged in, or try a different socket.
- Steamer will not produce steam: Check if the hard water filter is assembled and if there is enough water in the clean water tank.
- Water leaks from the back of the steam mop: There may be a blockage in the mop head; contact customer care.
- Steamer leaves too much water on the floor: Replace with a dry mop pad or check if too much detergent is added to the detergent tank (though the manual advises against adding detergent).
Customer Care:
For spare parts or product queries, customers can contact Godfreys Customer Care:
- Australia: 1800 815 270
- New Zealand: 0800 282 288
Available spare parts include Water Tank (Part Number: 33151825), Mop Pads 2pk (Part Number: 31400158), and Descaling Solution 1 Litre (Part Number: 61101464).