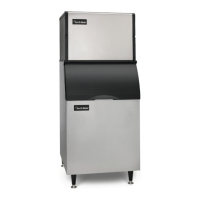
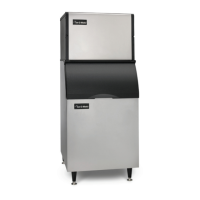
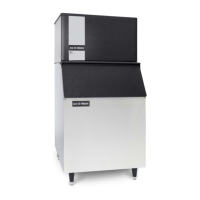
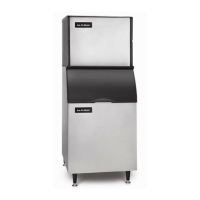
The Ice-O-Matic ICE Series Cubers are electro-mechanical ice machines designed for commercial use, producing cube ice. This manual covers installation, start-up, and maintenance for various models, including ICE0250 through ICE2100 Series, ICEU150, ICEU220, and ICEU300 Undercounter Series, and ICE0320 and ICE0520 22 Inch Series, including 230/50/1 volt units.
Function Description:
The ICE Series cubers operate through a freeze cycle and a harvest cycle. When the ICE/OFF/WASH switch is in the "ICE" position, the compressor, water pump, and condenser fan motor (if applicable) energize. During the freeze cycle, water circulates over the evaporator(s) to form ice cubes. Once the suction pressure reaches a pre-set cut-in pressure, a time delay module (timer) is energized, indicating the cubes are nearing completion. The remaining freeze cycle duration is determined by the timer setting, which is factory pre-set to achieve proper ice bridge thickness but may require adjustment during initial start-up.
After the timer completes its cycle, the machine enters the harvest cycle. The control relay energizes, supplying power to the water purge valve, hot gas valve, and harvest motor. The water purge valve opens to flush water and impurities from the water trough, minimizing mineral buildup and ensuring clear ice cubes. The hot gas solenoid opens, directing hot gas to the evaporator to break the bond between the ice slab and the evaporator. Concurrently, the harvest assist motor turns a slip clutch, pushing a probe against the ice slab. Once the evaporator reaches approximately 40°F (4.5°C), the slip clutch overcomes the ice bond, pushing the slab into the storage bin. A switch on the clutch actuates after one revolution, initiating the next freeze cycle. If ice drops into a full bin during harvest, the splash curtain (on most models) is held open, activating a bin switch to shut off the machine. When ice is removed, the curtain closes, and the machine restarts. Undercounter models (ICEU150, 220, 225, 226, ICEU300, 305) do not have a splash curtain and instead use a thermostatic bin control.
Important Technical Specifications:
- Ambient Operating Temperatures: Minimum 50°F (10°C), Maximum 100°F (38°C) for 60 Hz models, 110°F (43°C) for 50 Hz models. Not approved for outdoor installation.
- Incoming Water Supply:
- Minimum Temperature: 40°F (4.5°C)
- Maximum Temperature: 100°F (38°C)
- Minimum Pressure: 20 psi (1.4 bar)
- Maximum Pressure: 60 psi (4.1 bar) (a water pressure regulator is required if pressure exceeds this limit).
- Clearance Requirements (Self-contained air-cooled): Minimum 6 inches (15cm) at the rear, top, and sides for proper air circulation.
- Electrical Specifications: Refer to the serial plate for proper voltage and circuit breaker size. Machines require a dedicated circuit. European installations need a disconnect with at least 3mm separation in all poles. Most ice machines are designed for permanent connection without an electrical cord set, except for 115-volt Undercounter series ice makers, which are supplied with an electrical cord.
- Remote Condenser Guidelines:
- Maximum rise from ice machine to condenser: 35 physical feet.
- Maximum drop from ice machine to condenser: 15 physical feet.
- Physical line set maximum length: 75 feet.
- Calculated line set length maximum: 100 feet.
- Ambient operating temperatures: -20°F (-28.9°C) to 120°F (48.9°C).
- Refrigerant tubing: 3/8" diameter liquid line, 1/2" diameter discharge line, with quick connect couplings.
- Ice Bridge Thickness: 3/16 inch for Undercounter, ICE0250, ICE0305 units; 1/8 inch for all other units.
- Refrigerant: R404A (for ICE0400HA2 example).
Usage Features:
- Bin Control: Shuts off the machine when the bin is full. Most models use a bin switch activated by a splash curtain. Undercounter models use a thermostatic bin control with a capillary tube in the water trough.
- Timer Adjustment: The freeze timer, located in the control box, controls ice bridge thickness. It can be adjusted by sliding dipswitches to "ON" or "OFF" positions, with each switch representing a specific number of seconds.
- Water Filtration: A water filter system is recommended for installation with the ice machine.
- Stacking: Stacking kits are available for stacking ice machines, but Ice-O-Matic does not endorse stacking air-cooled units.
- Dispenser Application: A thermostatic bin control kit should be installed if the ice machine is placed on a dispenser (exception: CD400 Series Dispenser).
Maintenance Features:
- General Maintenance (Recommended every 6 months):
- Clean the ice-making section (minimum every 6 months, more often with local water conditions).
- Check ice bridge thickness and adjust the timer if necessary.
- Check water level in the trough and adjust the float arm if necessary.
- Clean the condenser (air-cooled machines) for unobstructed airflow.
- Check for leaks (water, refrigerant, oil).
- Check and adjust the bin control switch.
- Check and adjust the water valve (water-cooled machines) by measuring water temperature at the condenser outlet (100°F to 110°F).
- Check all electrical connections.
- Oil the fan motor if it has an oil fitting (self-contained air-cooled models only).
- Check and replace the water filter if dirty or restricted.
- Inspect the evaporator water distribution tube for even water distribution.
- Cleaning and Sanitizing:
- Use approved nickel-safe ice machine cleaner in the water trough.
- Initiate a "WASH" cycle for approximately 15 minutes.
- Purge the cleaner down the drain.
- Inspect and wipe down evaporator, spillway, and water transport surfaces. Disassemble and clean the water distribution tube if necessary.
- Turn off water supply, clean the water trough, and remove scale/slime.
- Prepare and add an approved sodium hypochloride food equipment sanitizer solution (100-200 ppm free chlorine).
- Initiate a "WASH" cycle for 10 minutes, wiping down all splash areas, bin interior, deflector, and door with the sanitizing solution.
- Purge the sanitizer down the drain, continuing for 1-2 minutes with water supply ON.
- Discard the first two ice harvests after cleaning.
- Cabinet Care (Stainless Steel):
- Clean thoroughly once a week with a non-abrasive cloth or sponge, working with the grain.
- Avoid abrasive tools (steel wool, abrasive sponge pads, wire brushes, scrapers) and cleaners containing chlorine or chlorides.
- Rinse with clean water and wipe dry immediately if chlorinated cleansers are used.
- Recommended cleaning agents: Soap, Ammonia, Windex, detergent with water, Fantastik, 409, Spic'nSpan Liquid for routine cleaning; Easy-Off or similar oven cleaners for grease/fatty acids; Vinegar for hard water spots/scale.
- Winterizing Procedure:
- Turn off water to the machine.
- Ensure all ice is off the evaporator(s).
- Place the ICE/OFF/WASH switch to "OFF".
- Disconnect tubing between water pump discharge and water distribution tube.
- Drain the water system completely.
- For water-cooled machines, hold the water regulating valve open and use compressed air to blow water out of the condenser.
- Remove and discard all ice from the storage bin.