5 Venting to Existing MasonryChimney
Follow the lighting instructions for each appliance being in-
spected. Adjust thermostat so appliance(s) will operate
continuously.
Allow 5 minutes of main burner operation, then check for
spillage at the draft hood relief opening of each appliance.
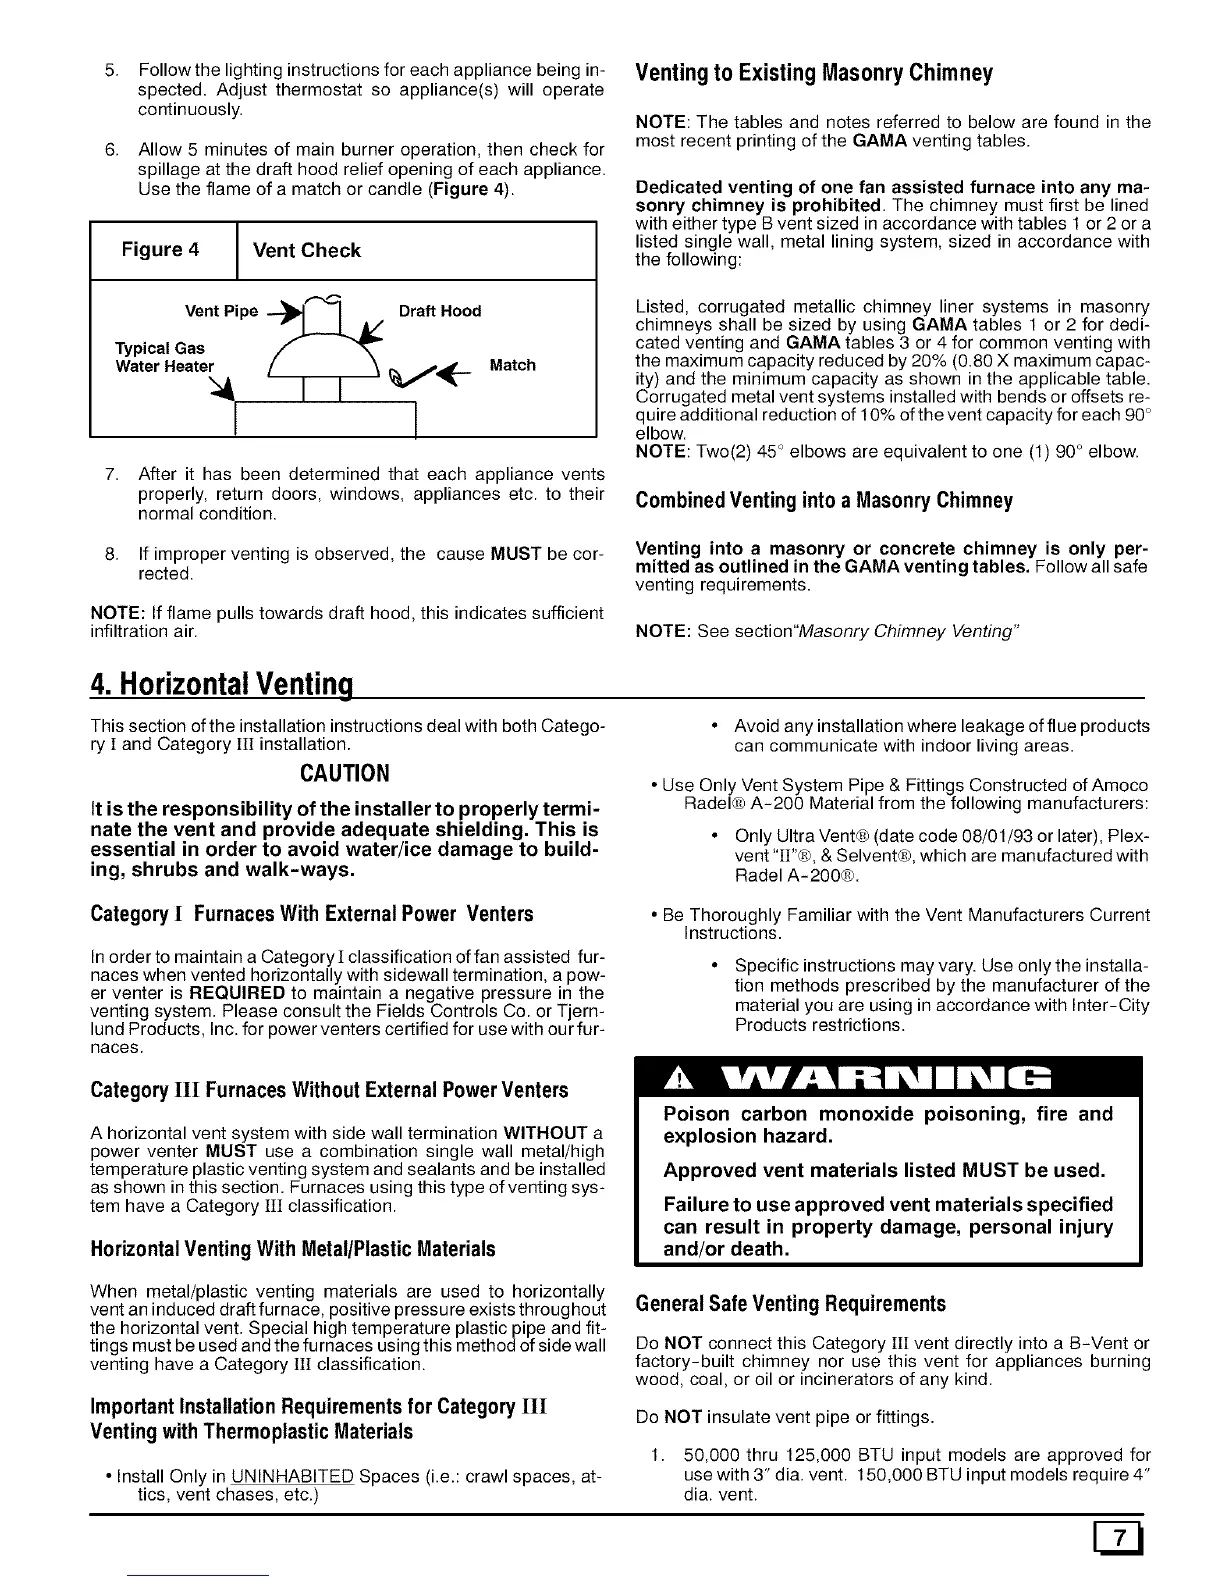
Use the flame of a match or candle (Figure 4).
Figure 4 Vent Check
Vent Pipe "-'_1 I A/ Draft Hood
Typical Gas
Water Heater
! I
Match
7. After it has been determined that each appliance vents
properly, return doors, windows, appliances etc. to their
normal condition.
8. If improper venting is observed, the cause MUST be cor-
rected.
NOTE: If flame pulls towards draft hood, this indicates sufficient
infiltration air.
NOTE: The tables and notes referred to below are found in the
most recent printing of the GAMA venting tables.
Dedicated venting of one fan assisted furnace into any ma-
sonry chimney is prohibited. The chimney must first be lined
with either type B vent sized in accordance with tables t or 2 or a
listed single wall, rnetal lining systern, sized in accordance with
the following:
Listed, corrugated metallic chimney liner systems in masonry
chimneys shall be sized by using GAMA tables 1 or 2 for dedi-
cated venting and GAMA tables 3 or 4 for common venting with
the maximum capacity reduced by 20% (0.80 X maximum capac-
ity) and the minimum capacity as shown in the applicable table.
Corrugated metal vent systems installed with bends or offsets re-
q uire additional reduction of 10% of the vent capacity for each 90°
elbow.
NOTE: Two(2) 45 ° elbows are equivalent to one (1 90° elbow.
Combined Venting into a Masonry Chimney
Venting into a masonry or concrete chimney is only per-
mitted as outlined in the GAMA venting tables. Follow all safe
venting requirernents.
NOTE: See section"Masonry Chimney Venting"
4. HorizontalVenting
This section of the installation instructions deal with both Catego-
ry I and Category III installation.
CAUTION
It isthe responsibility of the installer to properly termi-
nate the vent and provide adequate shielding, This is
essential in order to avoid water/ice damage to build-
ing, shrubs and walk-ways.
• Avoid any installation where leakage of flue products
can communicate with indoor living areas.
• Use Only Vent System Pipe & Fittings Constructed of Amoco
Radel® A-200 Material from the following manufacturers:
• Only Ultra Vent@ (date code 08/01/93 or later), Plex-
vent "II"®, & Selvent®, which are manufactured with
Radel A-200®.
Category I Furnaces With External Power Venters
Inorder to maintain a Category I classification offan assisted fur-
naces when vented horizontally with sidewall termination, a pow-
er venter is REQUIRED to maintain a negative pressure in the
venting system. Please consult the Fields Controls Co. or Tjern-
lund Products, Inc. for power venters certified for use with our fur-
naces.
• Be Thoroughly Familiar with the Vent Manufacturers Current
Instructions.
Specific instructions may vary. Use only the installa-
tion methods prescribed by the manufacturer of the
material you are using in accordance with Inter-City
Products restrictions.
Category III Furnaces Without External Power Venters
A horizontal vent system with side wall termination WITHOUT a
power venter MUST use a combination single wall metal/high
temperature plastic venting system and sealants and be installed
as shown in this section. Furnaces using this type of venting sys-
tem have a Category III classification.
Horizontal Venting With Metal/Plastic Materials
Poison carbon monoxide poisoning, fire and
explosion hazard.
Approved vent materials listed MUST be used.
Failure to use approved vent materials specified
can result in property damage, personal injury
and/or death.
When metal/plastic venting materials are used to horizontally
vent an induced draft furnace, positive pressure exists throughout
the horizontal vent. Special high temperature plastic pipe and fit-
tings must be used and the furnaces using this method of side wall
venting have a Category III classification.
Important Installation Requirements for Category II!
Venting with Thermoplastic Materials
• Install Only in UNINHABITED Spaces (i.e.: crawl spaces, at-
tics, vent chases, etc.)
General Safe Venting Requirements
Do NOT connect this Category III vent directly into a B-Vent or
factory-built chimney nor use this vent for appliances burning
wood, coal, or oil or incinerators of any kind.
Do NOT insulate vent pipe or fittings.
1. 50,000 thru 125,000 BTU input models are approved for
use with 3" dia. vent. 150,000 BTU input models require 4"
dia. vent.
 Loading...