Inserting Batteries
• The battery compartment is located on the bottom portion of the unit.
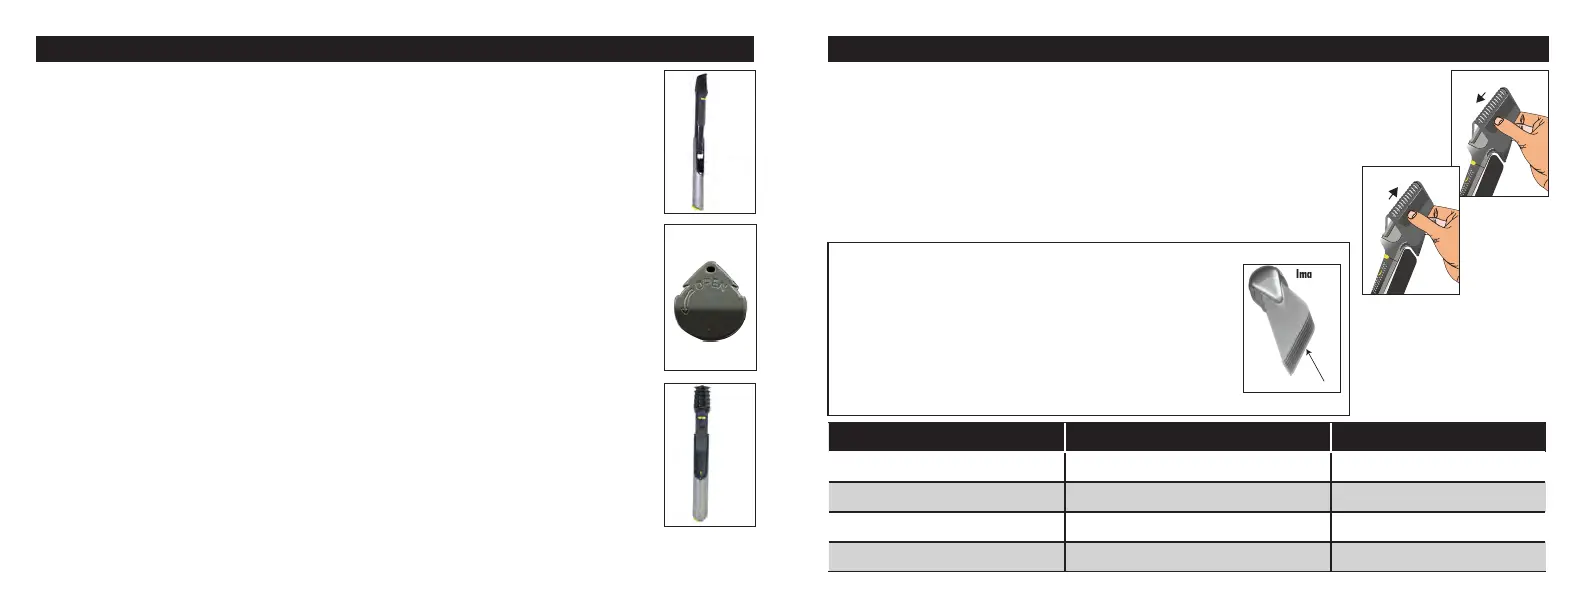
• To access the battery compartment, fully extend the handle then press the yellow battery
icon button and pull apart (Image 1).
• Once apart, twist battery cover counterclockwise (following engraved arrow) to open
(Image 2).
• Align two AA batteries, with the positive and negative positions indicated on the battery
compartment. Insert the positive (+) end of each battery rst.
• Close the compartment cover by pushing in and rotating clockwise until it clicks.
• Replace the handle onto the unit by lining it up with the channels on the unit (Image 3).
• Once you reach the locked position, press the yellow battery icon and push to fully close
(Image 3).
• Always purchase the correct size and grade of battery most suitable for the intended use.
• Do not mix old and new batteries.
• Ensure the batteries are installed correctly with regard to polarity (+ and -). The unit will NOT
operate if one or both batteries are inserted incorrectly.
• Remove batteries from equipment, which is not to be used for an extended period of time.
• Do not mix old and new batteries.
• Do not mix alkaline, standard (carbonzinc), or rechargeable (nickel cadmium or nickel metal
hydride) batteries.
Getting Started
Image 1
Image 2
Image 3
Image 4
How to Use MicroTouch® Titanium Trim™
Choosing the Correct Comb Attachment
• To choose the correct comb attachment, lay out all 4 comb attachments so the length indicated
is visible.
•
Each comb length species the length of hair that will remain after it is trimmed (¼”, ½”, ¾”, 1”).
•
Slide the open end of the comb attachment over the blade head until it snaps into place
(Image 4).
•
To remove a comb attachment, rmly grasp the unit and tilt the comb slightly forward while
pulling upward (Image 5).
Image 5
Image 6
Guide Surface
GUIDE NUMBER LENGTH IN INCHES LENGTH IN MM
2 ¼” 6mm
4 ½” 13mm
6 ¾” 19mm
8 1” 25mm
NOTE: The 1” comb is dierent than the others.
• Only use the 1” comb with the guide surface against your head
while cutting.
• This may require switching hands when changing directions.
• For proper lifting of the hair, the 1” comb only has one guide surface
(Image 6).
• The other 3 combs included and Blade Guard may be used with either
side against your head.
 Loading...