5
6
8. USING THE LED FLASHLIGHT
6. USING THE FLASHLIGHT
9. SAFETY
10. FCC CAUTION
11. SPECIFICATION INFO
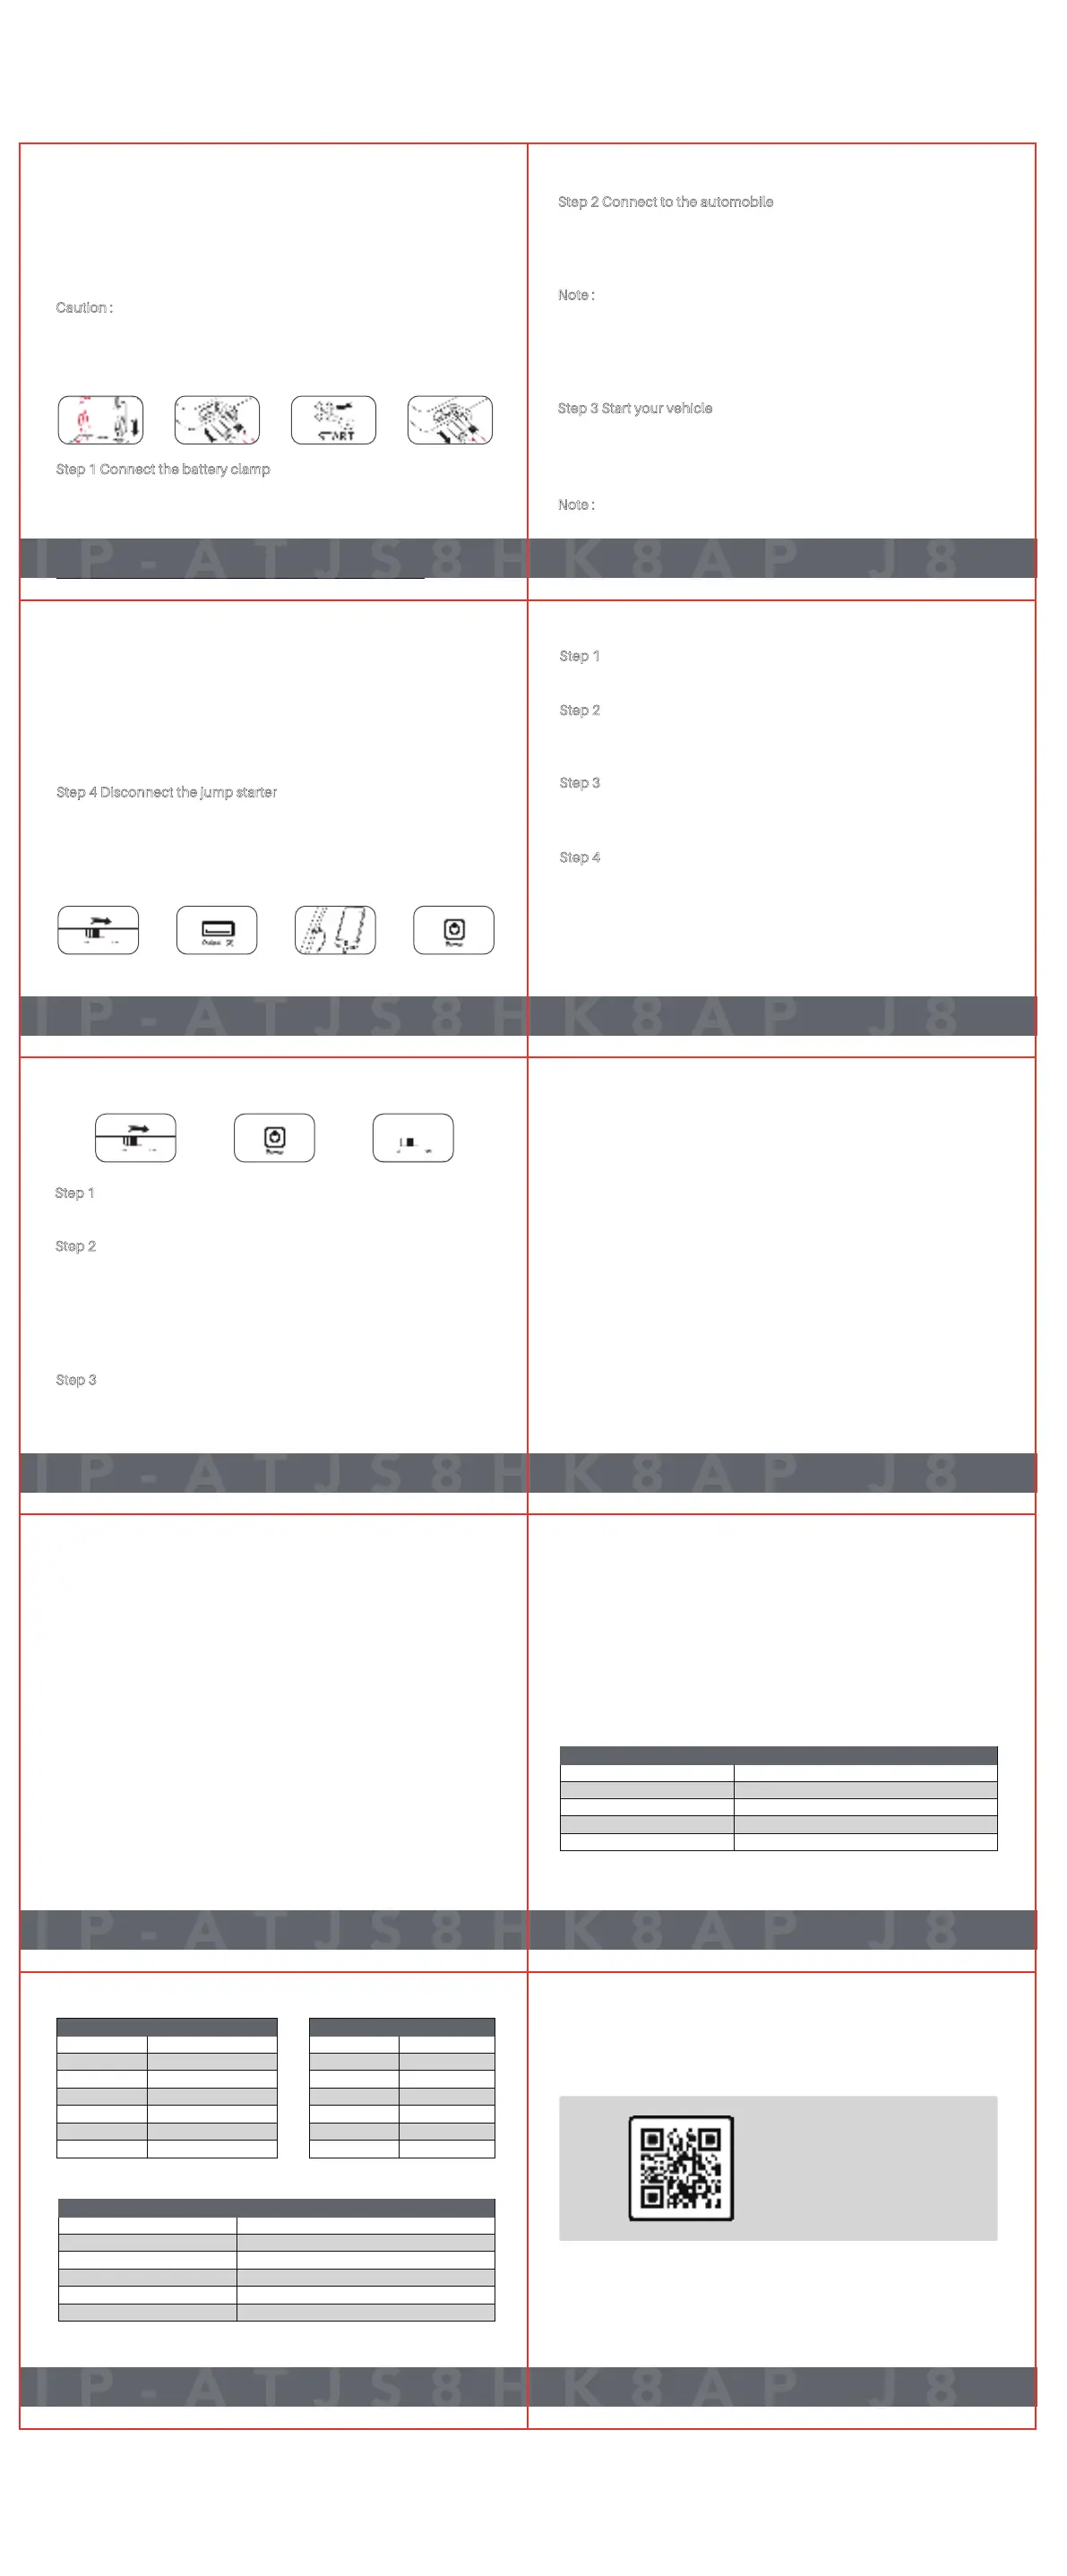
Operating Instruction:
If an automobile cannot be started on its own battery this portable jump starter
can be used to apply sufficient charge to aid you in jump starting the vehicle.
After successfully starting the vehicle remove the battery clamp lead from the
jump starter.
If after 30 seconds you have not started the vehicle, the LED light on the battery
clip lead will flash alternately red and green.
If starting the vehicle is unsuccessful, the LED light on the battery jumper
clamps lead will turn red.
If the LED light is not green please disconnect the jump starter, check it has
sufficient charge, remove the clips and clamp lead. Then try again from step 1.
Step 4 Disconnect the jump starter
Ensure the vehicle is in park (for automatic transmission) or neutral (for manual
transmission) and the parking brake is applied.
Ensure the product power level is 60% or more.
Caution :
Check the Jump starter has at least 60% charge. Insert the head of the battery
clamp to the Smart Jump Clamps Port.
Connect the 12V battery clips to the vehicle,first connect the red (positive) clip
to the (+) battery terminal. Then connect the black (negative) clip to the (-)
battery terminal.
Step 1 Connect the battery clamp
Step 2 Connect to the automobile
If starting the vehicle is unsuccessful the LED light on the battery jumper clamps
lead will turn red. If the LED light is not green please disconnect the jump
starter, check it has sufficient charge, remove the clips and clamp lead. Then try
again from step 1.
Note :
Note :
The LED light on the battery jumper clamps lead will turn green if the clips are
correctly connected and the J8 jump starter has sufficient charge. Turn the
ignition key or press the ignition button to start the vehicle.
Step 3 Start your vehicle
7
7. CHARGING ELECTRONIC DEVICES WITH THE USB PORTS
Turn on the On/Off switch.
Step 1
Turn on the On/Off switch.
Step 1
Choose a suitable charging cable and insert the cable into the USB output port
1(2) of the jump starter.
Step 2
Press the power button for 3 seconds to turn on the flashlight.
There are 3 LED light modes Press the power button to switch between them.
• Strong lighting mode
• Strobe mode
• SOS mode
Step 2
Insert the other end of the cable into the inputport of the product you wish to
charge.
Step 3
Press the power button to start charging your electronic device.
Step 4
To turn off the LED light press the power button for 3 seconds, then turn off
the On/Off switch.
Any change or modifications to this device not expressly approved by the
manufacturer could void your authority to operate this equipment.
(1) The device may not cause harmful interference.
(2) This device must accept any interference received, including interference
Step 3
8
This equipment has been tested and found to comply with the limits for a Class
B digital device, pursuant to part 15 of the FCC Rules. These limits are designed
to provide reasonable protection against harmful interference in a residential
installation.
This equipment generates, uses and can radiate radio frequency energy. If it is
not installed and used in accordance with the instructions it may cause harmful
interference to radio communications. However, there is no guarantee that
interference will occur in a particular installation.
If this equipment does cause harmful interference to radio or television
reception the user can try to correct the interference by one or more of the
following measures:
FCC Disclaimer
This device complies with part 15 of the FCC Rules. Operation is subject
to the following two conditions:
-Reorientatings or relocate the receiving antenna.
-Increase the separation between the equipment and the receiver.
-Connect the equipment to an outlet on a circuit different from that to which
-Consult the dealer or an experienced radio/TV technician for assistance.
FCC Disclaimer
the receiver is connected.
that may cause undesired operation.
9
(1) EMC Directive 2014/30/EU (including amendments).
(2) Low Voltage Directive 2014/35/EU.
(3) Red Directive 2014/53/EU (If Product has RF function).
Declaration of Conformity for EU Countries:
DO NOT throw this electronic device into the trash. When discarding, to
minimize pollution and ensure utmost protection of the global environment,
please recycle it.
WEEE Disposal Instructions:
General
Product Name
Brand
SKU
IDEAPLAY J8 Portable Jump Starter
IDEAPLAY
IP-ATJS8HK8AP
Model Number
Additional Accessories Included
J8
Smart Clamp Cable, USB-C Charging Cable, Cable
Power
Input
Output 1
Output 2
5V/2A
5V/2.1A
5V/1A
Start Current:
Peak Current:
400A
800A
Gas Engines:
Diesel Engines:
Up to 7.0L
Up to 5.5L
Dimension
Product Size
Product Weight 0.67lb
5.7”*3.2”*1”
Features
Charger Type
Output Ports
LCD Digital Display
USB-C
2
YES
On/Off Switch
Operating Temperature Range:
YES
32℉to 113℉
Storage Temperature Range:23℉ to 113℉
Made In China
www.iDeaUSA.com
 Loading...