Examples Showing EZ-√Check In Use
Safety First: Unplug power tools before performing these operations
Before taking any measurement, place the base
and foot on a at surface, turn on display, select
the display mode then zero the display.
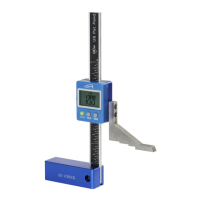
Router Table
To adjust bit height, set up EZ-Check with the foot
over bit as shown at right. Hold down on base
while raising bit to the desired height.
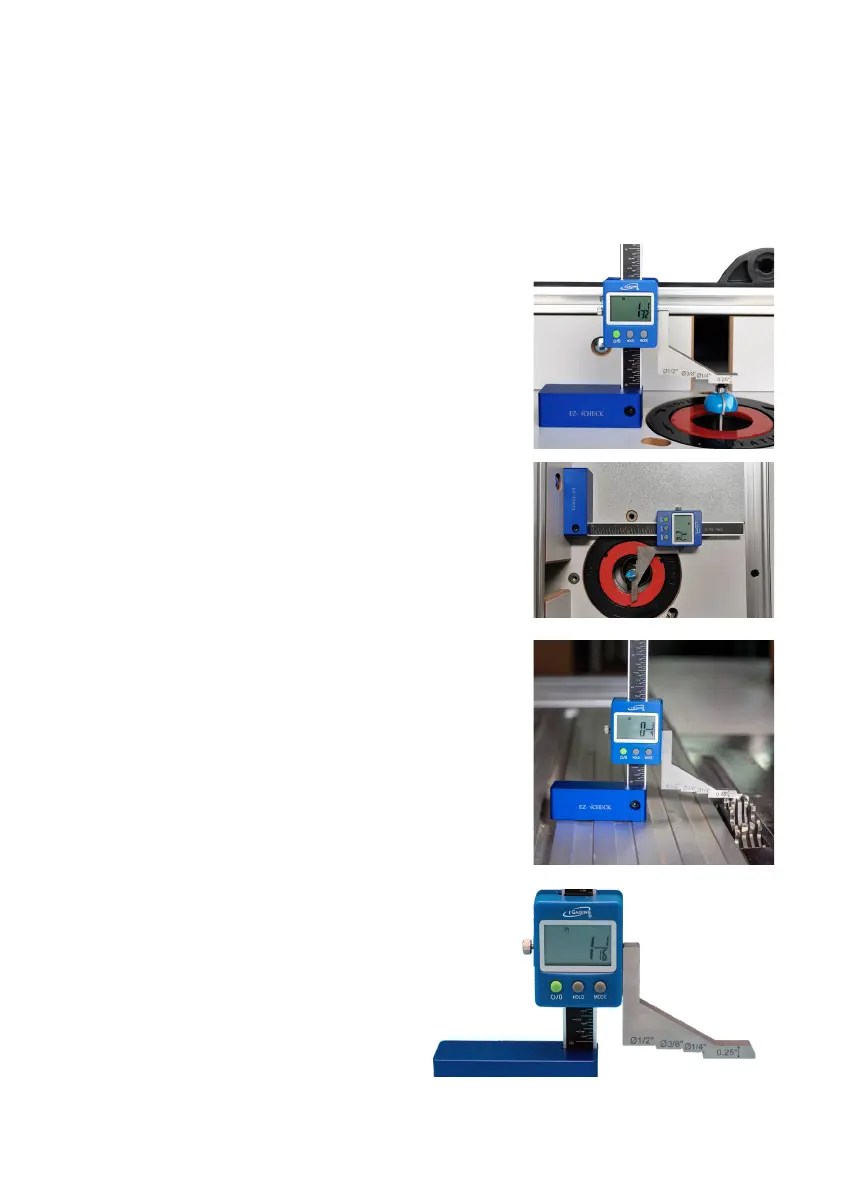
To set fence to bit distance, lay EZ-Check with the
backside down on the tabletop as shown at right
with the base against the fence:
1. To measure to the centerline of the bit.
a. For 1/4”, 3/8” and 1/2” straight bits measure
with the centerline oset against the cutter.
b. For all other bits, raise the bit and measure
with the appropriate centerline oset against
the 1/4” or 1/2” shank of the bit.
2. To measure to the outside of the bit, place the
foot against the outside of the cutter.
3. To measure to the inside of the bit, place the
top of the foot against the inside of the cutter
and add either 0.250” or 1/4” to the measure-
ment.
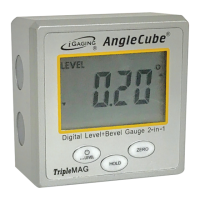
Table Saw
Adjust blade or dado set height in a similar way to
router table bit height. The magnets in the base
will help hold down the base on cast iron tabletops.
Measure fence to blade distance similar to the
router table inside of the bit measurement.
Specs:
Range: 0-5” / 0-125mm
Reading: 0.0005” | 0.01mm | inch 64th
Accuracy: 0.001”
Ф 1/4”, 3/8”, 1/2” Centerline osets
Designed in California, Made in China
Enjoy Accuracy®
www.iGaging.com
®2021 iGaging 2