Do you have a question about the Iget Homeguard HGWIP812 and is the answer not in the manual?
Download the Homeguardcare app for your smartphone via QR code or app store search.
Connect the AC adapter to the camera and plug it in, then connect the camera to your router via WiFi.
Launch the app, select 'Add Camera', then choose 'Add cameras via WiFi configuration guide'.
Select 'Please scan the camera's QR code' and scan the QR code on the bottom of the camera.
Name the camera, input the correct WiFi password, and click 'Next' to connect.
Congratulations on setting up your HOMEGUARD Camera. Position and view remotely.
Tap the monitoring screen to access controls like Cruise, Menu, Flip, Mirror, Snapshot, and Recording.
Utilize 2-way audio by pressing and holding the Mic button, and switch IR LED/Preset modes.
Install Homeguardcare software for your Mac or Windows PC from the included CD.
Details on hardware features, resolution, compression, sensor, pan/tilt, security, dimensions, and power.
The iGET HOMEGUARD HGWIP812 is a versatile IP camera designed to provide peace of mind through home surveillance, allowing you to monitor your home, children, elderly relatives, and pets from anywhere. This quick start guide helps users set up and operate the camera with ease.
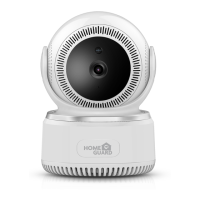
The HOMEGUARD HGWIP812 is a smart home surveillance camera that offers real-time video monitoring. It connects to your home Wi-Fi network, enabling remote viewing via a dedicated smartphone application, "Homeguardcare," available for both iOS and Android devices. The camera is equipped with a lens, microphone, and speaker, supporting two-way audio communication, allowing you to listen in and speak through the camera. It also features infrared LEDs for night vision, ensuring clear monitoring even in low-light conditions. The camera's pan and tilt functionality allows for a wide viewing range, which can be controlled remotely through the app. For local storage, the camera includes a built-in microSD socket, enabling continuous recording or event-triggered recordings.
Setting up the HOMEGUARD HGWIP812 involves a few simple steps. First, you need to download the "Homeguardcare" app on your smartphone. The camera can be connected to your Wi-Fi network using two primary methods:
Once connected, the camera's operational status is indicated by an LED light. A blinking blue light signifies successful Wi-Fi configuration, while a slowly blinking blue light indicates it's connecting to Wi-Fi. A steady blue light means the network status is good. A red light indicates working status, with a blinking red light for an ongoing upgrade, and a steady red light for normal operation with an internet connection. If the indicator is off, it means the Wi-Fi connection has failed or the device is not operational.
The "Homeguardcare" app provides a comprehensive live view interface with various controls:
For monitoring on a larger screen, the HOMEGUARD HGWIP812 also supports viewing from Mac or Windows PCs by installing the "Homeguardcare" software from the included CD.
While the guide does not explicitly detail maintenance features, it provides important information for ongoing use:
The HOMEGUARD HGWIP812 is designed for continuous surveillance, providing a reliable solution for monitoring your property and loved ones with convenient remote access and control.
| camera resolution | 1920 × 1080 |
|---|---|
| night vision range | 8 m |
| viewing angle | 105° |
| image sensor type | 1/2.7” CMOS Sensor |
|---|---|
| lens focal length | 3.6 mm |
| lens aperture | F=2.0 |
| horizontal pan range | 300° |
|---|---|
| vertical tilt range | 60° |
| motion detection | Supported |
| power input | 5V DC |
|---|---|
| power consumption | <6W |
| wireless speed | 150 Mbps |
| camera dimensions | 86mm × 85mm × 121mm |
|---|