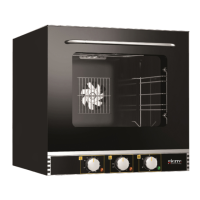
This document provides instructions for the installation, use, and maintenance of convection ovens. The manual covers several models: BRIO INOX FACILE, BRIO VER FACILE, BRIOX FACILE, BRIO MIDI INOX FACILE, BRIO MIDI VER FACILE, BRIO MAXI INOX FACILE, and BRIO MAXI VER FACILE.
Function Description
These appliances are professional convection ovens designed exclusively for cooking or heating food. Any other use is considered improper and potentially dangerous. They are intended for professional use and must be operated by qualified personnel. The ovens are equipped with an electromechanical control panel.
Important Technical Specifications
The manual provides detailed technical specifications for each model:
- Dimensions (Width x Depth x Height):
- BRIO/BRIOX: 600x595x560 mm
- BRIO MIDI: 860x775x525 mm
- BRIO MAXI: 860x775x605 mm
- Electric Power:
- BRIO: 2.5 kW
- BRIOX: 2.7 kW
- BRIO MIDI: 3.2 kW
- BRIO MAXI: 6.3 kW
- Power Supply:
- BRIO/BRIOX/BRIO MIDI: 230V~50/60Hz
- BRIO MAXI: 400 (2N)V ~(50/60 Hz) or 230 V (50/60 Hz)
- Wiring Type:
- BRIO/BRIOX/BRIO MIDI: H05RN-F 3x1.5 mm²
- BRIO MAXI: H05RN-F 4x2.5 mm² or H05RN-F 3x4 mm²
- No-load oven weight:
- BRIO/BRIOX: 36 kg
- BRIO MIDI: 59 kg
- BRIO MAXI: 68 kg
- Max. Food load: 4 kg per shelf (BRIO/BRIOX), 6 kg per shelf (BRIO MIDI/MAXI)
- Number of pans: 4 (BRIO/BRIOX/MAXI), 3 (BRIO MIDI)
- Number of fans: 1 (BRIO/BRIO MIDI), 2 (BRIOX/MAXI)
- Mounting: On bench or stand
- Water inlet (optional): 3/4" G
- Water pressure: 150÷400 kPa (1.5÷4 bar)
- Water hardness: Max 3° F
- Insulation class: I
- IP rating: IPX3
- Control panel: Electromechanical
Usage Features
The oven's operation is straightforward:
- Switching on/off: After connecting to the mains, turn the thermostat knob (M2) to switch on the oven. This illuminates the cooking chamber and activates the indicator light. Opening the door during operation temporarily stops the oven; it restarts automatically when the door is closed.
- Temperature regulation: The thermostat knob (M2) allows setting the desired cooking temperature between 80-300°C.
- Cooking time regulation: The cooking timer knob (M1) sets the desired cooking time up to a maximum of 60 minutes. Turning this knob starts the oven and activates the fan. Turning it counterclockwise (∞ symbol) enables continuous operation. At the end of the set time, the timer returns to zero, switches off the oven, and signals the end of the cycle with a buzzer.
- Humidification (optional): The humidifier button (U1) activates the electric water valve, which generates steam in the chamber. To achieve the desired steam dosage, the button must be held down.
- Preheating: To ensure good cooking results, it is recommended to preheat the oven for approximately 12-15 minutes.
- Safety Devices: The oven includes a safety thermostat (F1) that trips if the cooking chamber overheats, cutting off heating. This thermostat can only be reset manually by pressing a red button after removing the front panel and disconnecting power. A door switch interrupts oven operation (heating elements and fan) when the door is opened. Grilles prevent contact with moving parts in the cooking chamber.
Maintenance Features
Regular cleaning and maintenance are crucial for optimal performance, hygiene, and efficiency.
- Daily Cleaning:
- Before cleaning, disconnect power, close the water cock, and allow the oven to cool.
- Clean stainless steel parts daily with warm soapy water or suitable detergents, rinse thoroughly, and dry well. Avoid chlorine-containing detergents (bleach, hydrochloric acid), steel wool, brushes, or scrapers.
- Do not leave acidic food residues (salt, vinegar, lemon) on stainless steel parts to prevent damage.
- Do not wash the outside of the appliance with direct water jets; use a moist cloth to remove dust, protective oils, or grease.
- Avoid corrosive substances (e.g., muriatic acid) on the oven support top to prevent damage to lower parts.
- Use high-temperature protective gloves when handling trays and trolleys.
- An authorized field engineer should perform a general check-up at least once a year.
- Cleaning the Cooking Chamber (daily):
- At the end of the day, with the chamber temperature below 50-60°C, remove baking-pan supports for separate cleaning, being careful not to hit the bulbs.
- Spray the chamber with a suitable food-grade degreasing detergent.
- Close the door and wait 15-20 minutes for the detergent to work.
- Clean the interior with a moist cloth.
- Run a convection cooking cycle at 150°C to dry the chamber.
- Component Replacement (non-routine maintenance): This must be performed by an authorized installer after disconnecting power and closing water supply cocks.
- Door disassembly: Hinges (A) have movable levers (B) that hook onto hinge sections (C) to hold the door open. To remove, lift the door outwards as illustrated (Fig. 5), holding the sides near the hinges. To reassemble, insert hinges into their slots and remember to remove the levers (B) before closing the door.
- Oven lamp: Unscrew the protective cap (A - Fig. 6) inside the oven to access the bulb. Reassemble the cap after replacement.
- Heating element: Unscrew the internal screws that secure it. Electrical connections are accessible from the back after removing the rear panel.
- Oven fan: After removing the rear panel, remove side racks and fan protection from inside the oven. Unscrew the central nut and any lateral screws on the motor's rotor to free the fan. Remove the fan and then unscrew the motor flange screws.
- Door seal: Remove the old seal by hand and replace it with a new one without tools.

 Need help?
 General

 To Next Page