EasyManua.ls Logo

Ikan PT-Elite-U User Manual

Ikan PT-Elite-U
7 pages
To Next Page IconTo Next Page
Page #1 background imageLoading...
Page #1 background image
Fits tablets between 5” x 7.5”
and 8” x 10.5”
www.ikancorp.com
11500 S. Sam Houston Pkwy West, Houston, TX 77031
1.713.272.8822
support@ikancorp.com
© 2013 ikan Corporation. All right reserved
CONDITIONS OF WARRANTY SERVICE
• Free service for one year from the day of purchase if the problem is caused by manufacturing errors.
• The components and maintenance service fee will be charged if the warranty period has expired.
Free Service will not be Provided in the Following Situations: (*Even if the product is still within the warranty period.)
• Damage caused by abuse or misuse, dismantling, or changes to the product not made by the company.
• Damage caused by natural disaster, abnormal voltage, and environmental factors etc.
PT-Elite-U
Universal Tablet Teleprompter QUICKSTART GUIDE
Question and Answer IconNeed help?

Do you have a question about the Ikan PT-Elite-U and is the answer not in the manual?

Ikan PT-Elite-U Specifications

General IconGeneral
Aspect Ratio16:9
MaterialAluminum
Weight6 lb
CompatibilityiPad, Android, and Windows Tablets
Screen Size7 inches
Beam Splitter Glass70/30
Mounting OptionsTripod Mount
Glass70/30

Summary

What's Included

Glass Frame

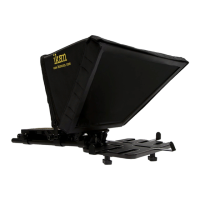
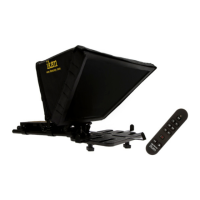
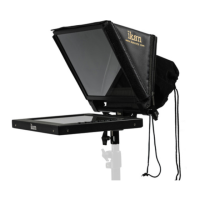
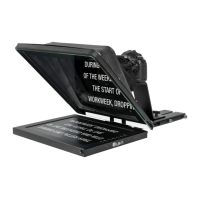
The main frame structure that holds the prompter glass.

Hood

A fabric attachment to prevent light leakage into the lens.

Prompter Glass

The 30/70 split beam teleprompter glass for displaying text.

Baseplate

EV2 adjustable camcorder baseplate for mounting the unit.

Tablet Mount

Mount designed to securely hold a tablet.

Hex Keys

Includes 3mm and 1/8 inch hex keys for assembly and adjustments.

D-Ring

A mounting screw with a D-ring for camera attachment.

Countersink Screws

Socket head countersink screws used for securing components.

Assembly Instructions

Fit Frame to Mount

Attach the glass frame to the tablet mount and secure with screws.

Insert Prompter Glass

Replace frame screws and brackets to secure the prompter glass.

Secure Baseplate Rods

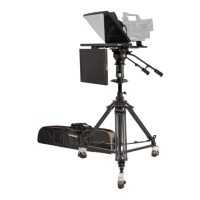
Attach the large baseplate rods to the rod clamp.

Attach Magnetic Hood

Connect the magnetic hood to the glass frame.

Quick Release Mounting Options

Mounting Baseplate

Attach the Quick Release Plate to the bottom of the Large Baseplate.

Related product manuals