16
ENGLISH
Drywall without available wood stud:
- Mark the attachment point(s) with a
pencil at the appropriate height.
- Drill 5/16-inch (8mm) diameter
hole(s) through the wall at the height
you marked with pencil.
- Drive the plastic plug(s) into the
hole(s), using a hammer if needed.
- Following the appropriate pictogram
instructions on the following pages,
drive the screw(s) with washer(s)
through the brackets and tighten
screw(s) rmly into the plastic plug(s)
in the wall. Do not over-tighten.
FRANÇAIS
Cloison en plâtre sans montant en
bois :
- Marquer le(s) point(s) de xation
à l’aide d’un crayon à la hauteur
désirée.
- Percer dans le mur un(des) trou(s)
de 8 mm (5/16 inch) de diamètre
à la hauteur marquée au crayon. -
Insérer la(les) cheville(s) en plastique
à l’intérieur du(des) trous. Utiliser un
marteau si nécessaire.
- Suivre les instructions
correspondantes sous forme de
pictogrammes gurant sur les pages
suivantes et insérer la(les) vis avec
la(les) rondelle(s) à travers les
crochets, puis serrer fermement
la(les) vis dans la(les) cheville(s),
dans le mur. Veiller à ne pas serrer de
manière excessive.
ESPAÑOL
Pladur sin posibilidad de montaje a la
estructura de madera:
- Con un lápiz, marca el punto (o
los puntos) de montaje a la altura
adecuada.
- Con un taladro, haz un agujero de 8
mm (5/16”) de diámetro en la pared,
justo encima de cada marca de lápiz.
- Introduce los tacos de plástico en
los agujeros con la ayuda, si fuera
necesaria, de un martillo.
- Siguiendo las instrucciones que
se dan en las siguientes páginas,
introduce los tornillos con su
correspondiente arandela en los
soportes y apriétalos bien, pero si
n
pasarte, a los tacos de la pared.
ENGLISH
Type of Wall Material:
Using the guide below, identify your
wall material and the appropriate
steps to take for that wall material.
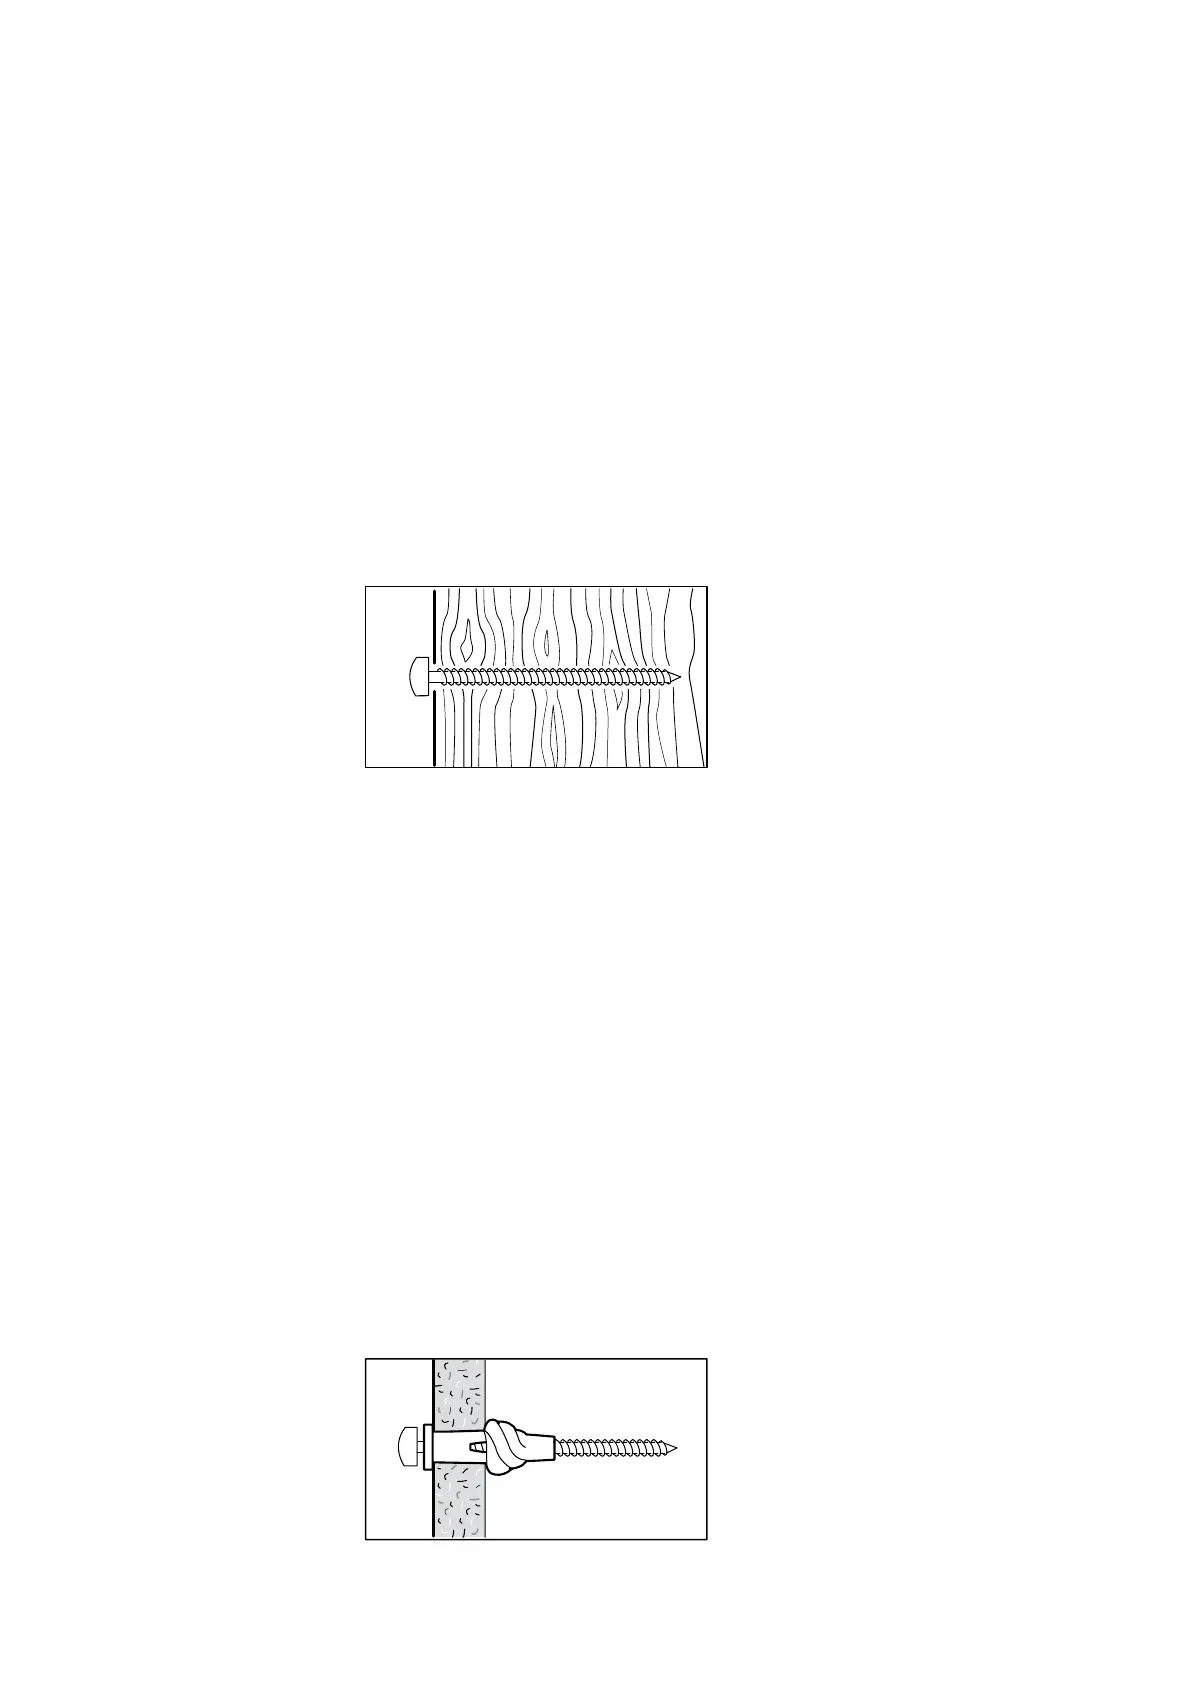
Drywall or plaster with available wood
stud:
- Mark the attachment point(s) with a
pencil at the appropriate height and
positioned over wood stud(s).
- Drill 1/8-inch (3mm) diameter pilot
hole(s) into the wood stud(s), at the
height you marked with pencil.
- Following the appropriate pictogram
instructions on the following pages,
drive the screw(s) with washer(s)
through the brackets and tighten
screw(s) rmly into the wood.
FRANÇAIS
Matériau du mur :
le guide ci-dessous vous permet
d’identier le matériau de votre mur
pour savoir comment procéder.
Cloison en plâtre avec montants en
bois :
- Marquer le(s) point(s) de xation à
l’aide d’un crayon à la hauteur désirée
sur le mur, en le(s) alignant sur le
montant.
- Percer un(des) trou(s) pilote(s) de
3 mm (1/8 inch) de diamètre dans
le(s) montant(s) en bois, à la hauteur
marquée au crayon.
- Suivre les instructions
correspondantes sous forme de
pictogrammes gurant sur les pages
suivantes et insérer la(les) vis avec
la(les) rondelle(s) à travers les
crochets, puis serrer fermement
la(les) vis dans le montant en bois.
ESPAÑOL
Material de la pared:
consulta la guía que gura a
continuación para identicar de qué
material está hecha la pared y saber
qué pasos seguir.
Pared de pladur con posibilidad de
montaje a la estructura de madera:
- Con un lápiz, marca el punto (o
los puntos) de montaje a la altura
adecuada de manera que coincidan
con los listones de madera de la
estructura interna del pladur.
- Con un taladro, haz un agujero de 3
mm (1/8”) de diámetro en los listones
de madera, justo encima de cada
marca hecha con el lápiz.
- Siguiendo las instrucciones que
se dan en las siguientes páginas,
introduce los tornillos con su
correspondiente arandela en los
soportes y apriétalos bien a la
madera.
AA-940429-5
 Loading...