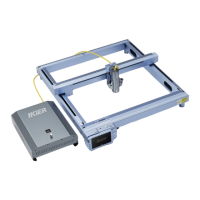
Do you have a question about the IKIER K1 Pro and is the answer not in the manual?
Put the machine vertically and push the left and right Y-axis sliders to the bottom.
Remove the X-axis top cover.
Install the X-axis rail.
Install laser module.
Tighten the screws.
Install the X-axis top cover.
Connect the Type-C Data Cable, the 4P cable, to the tail of the laser.
Turn on the machine power switch first and then turn on the fiber laser control box switch.
Position the test material and adjust laser head height for spot overlap.
Adjust the control box frequency from 30kHz to 60kHz.
Refer to the user manual for how to use lightburn and laserGRBL.
Set engraving power settings and vector mode to 'M3 mode'.
Check focal position and lens cleanliness for unsatisfactory engraving or cutting.
Adjust focal distance using fixed focus method if red light indicator is faulty.
Check focal position and M3 constant power mode for uneven engraving energy.
| Operating System | Windows, macOS |
|---|---|
| Connectivity | USB, SD card |
| Layer Resolution | 0.1 - 0.4 mm |
| Nozzle Diameter | 0.4 mm |
| Bed Temperature | up to 100°C |
| Filament Diameter | 1.75 mm |
| Output voltage | 24V |
| Motherboard | 32-bit motherboard |
| File Format | G-code |
| Nozzle Temperature | ≤260℃ |
| Supported Materials | PLA, ABS, PETG |
| Power Supply | 110V/220V AC, 50/60Hz |
| Display | 4.3-inch color touchscreen |