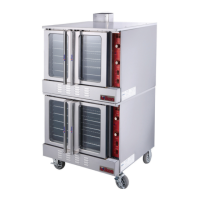
This document provides comprehensive instructions for the installation, operation, and maintenance of the IECO Electric Convection Oven, including the single IECO model and the stacked IECO-2 configuration. It emphasizes safety, proper setup, and effective use to ensure optimal performance and longevity of the equipment.
Function Description
The IECO Electric Convection Oven is designed for commercial food preparation, utilizing heated air circulated by a fan within the cooking cavity. This convection method allows heat to penetrate food more rapidly and evenly compared to conventional ovens, resulting in quicker cooking times and lower required temperatures while maintaining comparable product quality. The oven is powered by electricity, which also drives the ignition system and the fan.
Usage Features
The oven's control panel is intuitively designed for ease of operation. Key features include:
- Fan Speed Control: A dedicated knob allows users to select between HI and LOW fan speeds, depending on the type of food being cooked.
- Fan Mode Selection: In "COOK" mode, the fan runs continuously unless the doors are open. In "COOL" mode, the fan operates continuously even with the doors open, facilitating rapid cooling of the oven after cooking is completed. It's important to note that burners will not operate if the oven doors are open.
- Cook Timer: A timer knob allows users to set a specific duration for cooking. An alarm sounds when the timer reaches zero, serving as a reminder but not directly controlling the oven's operation. To set times less than 25 minutes, the knob should be turned past 25 minutes and then back to the desired time. The alarm can be canceled by turning the COOK TIMER dial to the OFF position.
- Power On Light: An indicator light illuminates when the oven is powered on.
- Heat-On Indicator: This light indicates when the heating elements are active. It turns off when the oven reaches the set temperature and cycles on and off to maintain the desired cooking temperature.
- Cook Temperature Control: A knob allows users to select the desired cooking temperature. The heat-on indicator will go out once the set temperature is reached.
- Oven Interior Light Switch: For ovens equipped with an interior light, a switch allows users to turn the light on to view the product. The light remains on as long as the switch is held.
- Power Switch: This switch turns the oven ON for use and OFF when cooking is completed.
- Fuse: The oven is equipped with a fuse for electrical protection.
Operating Guidelines:
- Pre-heating: Always pre-heat the oven to the desired temperature before placing food inside. The oven is considered pre-heated when the "Heat-On" indicator light goes out.
- Temperature Adjustment: Convection ovens generally require lower temperatures than standard ovens. A general rule of thumb is to subtract 50-100°F from standard oven recipes. Experimentation may be necessary to achieve optimal results. Cooking at higher temperatures will not reduce cooking time and may lead to unsatisfactory baking and roasting.
- Cooking Time: Begin checking food doneness at approximately half the time recommended for standard oven recipes. A suggested time and temperature chart is provided as a guide, but actual times may vary based on product weight, recipe, pan type, and thermostat calibration. Maintaining a systematic record of times and temperatures is recommended for future reference.
- Loading: The oven can hold up to thirteen 18" x 26" sheet pans. The number of racks that can be loaded depends on product and pan height.
- Airflow: Avoid placing empty sheet pans or aluminum foil on the bottom of the oven, as this can disrupt airflow and cause uneven cooking.
- Roasting Meats: To minimize shrinkage, place meat directly on racks and a half-full sheet pan of water on the bottom rack. This helps maintain humidity and reduces moisture loss from the meat.
- Even Loading: Maintain equal loads when cooking multiple pans of product simultaneously. Weighing products can help ensure even cooking. Smaller loads will cook at a different rate than larger ones.
- Delicate Products: For light products like cake batter or custard, consider leaving the oven OFF after pre-heating and loading, allowing 7-10 minutes for the product to set before turning the oven ON. This prevents rippling or distortion from the fan.
- Frozen Products: When starting with frozen products, pre-heat the oven up to 100°F above the target cooking temperature, then load the product and reset the temperature to the normal setting.
- Oven Lights: To prolong bulb life, avoid leaving the oven lights on unnecessarily when not viewing the product.
Maintenance Features
The manual outlines several maintenance procedures and adjustments that can be performed by qualified service personnel to ensure the oven's continued performance.
- General Adjustments: Many common issues can be resolved by adjusting existing parts rather than replacing them. These include adjustments to the thermostat, doors, and tightening fasteners.
- Door Switch Adjustment: The door switch, located behind the combustion compartment cover on the right side, is activated by a cam on the door's hinge pin.
- Open the doors fully.
- Remove the lower cover by loosening four screws inside the door opening.
- Position the doors so they are nearly closed but not latched.
- Loosen the setscrew on the cam and rotate it until a "switchclick" is heard.
- Tighten the setscrew and test the door to ensure proper switch contact when closed.
- Replace the cover.
- Caution: The door turnbuckles and door switch are in a heated zone; care should be taken to avoid burns.
- Thermostat Calibration (Electro-Mechanical Controls Only): Thermostat calibration is crucial for even cooking.
- Turn the Power Switch to ON.
- Place a thermocouple (or reliable mercury-type thermometer) in the center of the middle oven rack.
- Set the thermostat dial to 350°F (177°C) and allow the oven to preheat for 1/2 hour.
- Once the indicator light goes out, check the internal oven temperature. If the reading is within 10°F of the setting, no adjustment is needed.
- To Calibrate:
- Remove the thermostat knob by loosening the setscrew and pulling the knob forward, being careful not to rotate the thermostat stem.
- Using a small screwdriver, turn the screw at the bottom of the stem clockwise to lower the temperature or counterclockwise to raise it. Do not rotate the thermostat stem itself.
- Open the door and turn the POWER SWITCH to the COOL DOWN position to activate the oven fan and cool the oven to about 250°F (120°C).
- Return the POWER SWITCH to ON and repeat the previous steps until the oven thermostat and the pyrometer/thermometer readings match.
- Replace the knob and tighten the setscrews.
- Note: The maximum turn of screw "A" is 1-1/2 turns, clockwise or counter-clockwise. This thermostat is a direct-acting device that opens on temperature rise.
- Cleaning of the Ovens:
- Stainless Steel: Clean with a good stainless steel cleaner.
- Painted Surfaces: Wipe clean regularly with a mild detergent using a moistened cloth when the oven is COLD to avoid streaking. After cleaning, wipe with light oil.
- Porcelain Interiors: Clean regularly with a degreasing agent. For heavier deposits, commercial oven cleaners like Dow Oven Cleaner, Easy-Off, or Mr. Muscle can be used.
- Caution: Prevent alkaline-type cleaners from contacting aluminized steel surfaces (e.g., blower wheel) inside the oven.
- Blower Wheel, Racks, and Rack Supports: These components can be removed and soaked in a solution of ammonia and water. Ensure all parts are thoroughly rinsed before reassembly.