Do you have a question about the ILVE PILFSD61 and is the answer not in the manual?
Turn on the dishwasher by pressing the On/Off button.
Add detergent to compartment A for wash cycles or B for pre-wash.
Monitor the mechanical or electric indicator for rinse aid levels.
Scrape food particles and load baskets according to instructions.
Press the Program Button to choose and activate a wash cycle.
Turn on the water tap and press the Start/Pause Button to begin.
Turn off the dishwasher using the On/Off button after the cycle.
Wait a few minutes before unloading to avoid scald and improve drying.
Essential grounding procedures to reduce the risk of electric shock.
Guidelines for safe operation, avoiding door abuse, heating element contact, and tripping hazards.
Explanation of all buttons, indicators, and functions on the control panel.
Visual identification of key components and parts of the dishwasher.
Detailed guide on filling and adjusting the rinse aid dispenser for optimal results.
Understanding the role of rinse aid in ensuring spotless and streak-free drying.
Information on various detergent types, concentrated formulas, and tablets for dishwashers.
Instructions for correctly filling the detergent dispenser before each wash cycle.
Guidelines for selecting and using detergent specifically designed for automatic dishwashers.
Step-by-step visual guide on how to add detergent to the appliance's dispenser.
General advice for loading, including selecting dishwasher-proof items.
Lists items suitable, not suitable, and with limited suitability for dishwasher use.
Key principles for arranging dishes for optimal cleaning and spray arm rotation.
Recommended procedure for removing dishes to prevent water dripping onto clean items.
Instructions for placing delicate items like glasses, cups, and small bowls in the upper basket.
Advice for positioning larger and heavily soiled items like pots and pans in the lower basket.
How to modify the upper basket height to accommodate taller items.
Guidance on arranging cutlery in the basket for effective and safe cleaning.
Comprehensive table detailing all wash programs, their cycles, and resource consumption.
Step-by-step instructions for powering on the dishwasher and initiating a cycle.
Procedure for modifying a selected wash program before or during the cycle.
Method for adding dishes after the cycle has started but before detergent dispensing.
Actions to take upon cycle completion: switching off, opening door, and unloading.
Explanation of the filter system's components and function in preventing pump blockages.
Step-by-step instructions for removing and cleaning the filter assembly for optimal performance.
Detailed instructions on cleaning the coarse and fine filters using a brush and running water.
Tips for safely cleaning the control panel and the appliance's external surfaces.
How to clean the dishwasher door edge and panel, avoiding water penetration.
Measures to take to protect the dishwasher from damage due to freezing temperatures.
Procedure for removing and cleaning the upper and lower spray arms to ensure proper water jet function.
Guidelines for correctly positioning and leveling the dishwasher for stable operation.
Critical safety warnings regarding electrical connections, plugs, and avoiding extension cords.
Information on required voltage, fuse rating, and dedicated circuit for safe operation.
Detailed instructions on the importance and method of proper electrical grounding.
How to securely connect the cold water supply hose to the appliance's inlet.
Instructions for properly connecting the drain hose to a drain pipe or sink to prevent leaks.
Procedures for draining water from hoses and water outlets, especially for extended periods.
Essential checks to perform before activating the dishwasher for the first time.
Review common issues and solutions to self-diagnose problems before contacting support.
Solutions for issues related to power, water supply, and water pumping malfunctions.
Addressing common problems like excessive suds, interior staining, and operational noise.
Diagnosing and fixing issues with dishes not being clean, cloudiness, or marks.
Identifying causes and applying solutions for dishes not drying properly.
Interpreting the 'Rapid' error code for longer inlet time and potential causes.
Understanding the '90min+Rapid' error code related to temperature issues.
Interpreting the 'Glass' error code for overflow conditions and leak detection.
Key physical dimensions of the dishwasher unit: height, width, and depth.
Specifications for water pressure requirements and electrical power supply details.
The maximum number of place settings the dishwasher can accommodate.
Diagrams and instructions for optimal placement of items in the upper basket.
Diagrams and instructions for optimal placement of items in the lower basket.
Diagrams and instructions for arranging cutlery in the cutlery basket.
Instructions for registering your product and information on ILVE's privacy policy.
Details on what the warranty covers, common exclusions, and conditions for domestic use.
Steps involved in making a warranty claim, including statutory rights and defect reporting.
This document serves as an Operating & Installation Manual for the ILVE Dishwasher, providing comprehensive instructions for its use, maintenance, and installation. It begins with important safety information and grounding instructions, emphasizing proper use and precautions to ensure user safety and appliance longevity.
The manual includes a quick operation guide for immediate use. To start, the user opens the door and presses the On/Off button. Detergent is then filled into Compartment A for each wash cycle, or Compartment B for programs with pre-wash. The rinse aid level is checked using the mechanical indicator C or the electric indicator on the control panel. Dishes are loaded after scraping off large food particles and softening burnt food. A program is selected by pressing the Program Button until the desired program lights up. Finally, the water tap is turned on, and the Start/Pause Button is pressed to begin the wash cycle after about 10 seconds.
The guide also covers changing a program, adding forgotten dishes, and switching off the appliance. A program can be modified if it has been running for a short time; otherwise, the detergent dispenser may need refilling. To add dishes, the Start/Pause button is pressed, the door is opened slightly, and once the spray arms stop, the door can be fully opened to add items before closing and restarting. After a cycle, the buzzer sounds, and the appliance can be turned off. Users are advised to wait about 15 minutes before unloading to avoid scalding and allow dishes to dry better, starting with the lower basket.
The manual stresses the importance of grounding the appliance to prevent electric shock. It warns against improper connection of the grounding conductor and advises consulting a qualified electrician if in doubt. Proper use guidelines include not abusing the door or dish rack, avoiding contact with the heating element, and operating the dishwasher only when all enclosure panels are in place. Users are cautioned against placing heavy objects on the open door, as the appliance could tip. Special attention is given to loading sharp items with points down or horizontally to prevent damage. Only dishwasher-safe plastic items should be washed, and only detergents and rinse aids designed for automatic dishwashers should be used, keeping them out of reach of children. The door should not be left open to avoid tripping hazards, and damaged supply cords must be replaced by a qualified person.
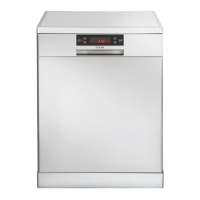
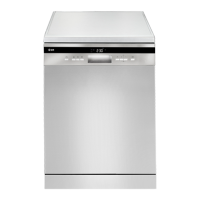
The control panel features an On/Off button, a Function button for extra drying or strong wash, and corresponding indicators. Delay indicators show chosen delay times (3h/6h/9h/12h), set using the Delay button. A Program button allows selection of wash cycles, and a Start/Pause button initiates or pauses a program. Rinse aid and child lock indicators are also present, with the child lock activated by pressing the delay and program buttons for 5 seconds.
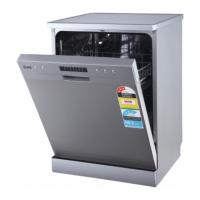
The dishwasher includes an upper basket, inner pipe, lower basket, dispenser, cup shelf, and spray arms visible from the front. The back view shows the filter assembly, inlet pipe connector, and drain pipe.
Before initial use, the rinse aid dispenser must be filled. The dispenser, located inside the door, holds about 110ml of liquid rinse aid, which is released during the final rinse to prevent spots and streaks and improve drying. The rinse aid level can be monitored by an optical indicator, which changes from dark (full) to light (empty). Users are advised to refill before the indicator falls below 1/4 full. To fill, the cap is turned to the "open" arrow, rinse aid is poured in, and the cap is replaced by aligning it with the "open" arrow and turning it to the "closed" arrow. Overfilling should be avoided to prevent excessive foaming.
The manual also details detergent use. Detergents are categorized by the presence of phosphate and chlorine. Newer pulverised detergents are often phosphate-free, which may require more detergent in hard water to prevent white spots. Concentrated detergents, especially with enzymes, are recommended for "normal" wash programs to reduce pollution and achieve effective cleaning. Detergent tablets may require longer programs to dissolve completely. The detergent dispenser should be refilled before each wash cycle, with one tablespoon generally sufficient for a normal load, and more for heavily soiled items. Detergent should be added just before starting the dishwasher to prevent it from getting damp.
Recommendations for loading include using dishwasher-proof utensils, mild detergents, and lower temperature programs for delicate items. Glass and cutlery should not be removed immediately after a program ends to prevent damage. Items not suitable for washing include wooden, horn, mother-of-pearl, or heat-resistant plastic handles, old cutlery with glued parts, pewter, copper, crystal glass, steel items prone to rusting, wooden platters, and synthetic fibers. Some glasses may dull over time, and silver/aluminum parts may discolor.
Before loading, large food particles should be scraped off, and burnt food softened. Rinsing dishes under running water is not necessary. Items like cups, glasses, pots, and pans should be faced downwards or slanted to allow water to drain. All utensils must be stacked securely and not obstruct the spray arms. Very small items should not be washed in the dishwasher. Large, difficult-to-clean items should be placed in the lower basket, while delicate items like glasses and cups go in the upper basket. Long-bladed knives should be placed horizontally in the upper basket. Overloading should be avoided for optimal results and energy consumption.
The upper basket's height can be adjusted to accommodate larger utensils in either basket. The lower basket features folding spikes for better stacking of pots and pans. Cutlery should be placed in the cutlery basket with handles at the bottom, and sharp items with points down for safety. Silverware should not nest together.
The wash cycle table provides information on various programs, including Intensive, Heavy, ECO, Glass, 90 min, and Rapid, detailing their cycle selection, description, detergent requirements, running time, energy consumption, and water usage. The ECO program is highlighted as the test cycle for comparability tests.
To start a cycle, the baskets are loaded, detergent is added, and the appliance is plugged in with the water supply turned on. The door is closed, the On/Off button is pressed, and the desired program is selected using the Program button. Finally, the Start/Pause button is pressed to begin the wash.
A program can only be modified if it has been running for a short time. If detergent has already been released, it must be refilled. To change, the Start/Pause button is pressed to enter standby, then the Program button is held for more than 3 seconds to select a new cycle, and Start/Pause is pressed again. If the door is opened during a wash cycle, the machine pauses, and the program light blinks with a buzzer sound until the door is closed.
A forgotten dish can be added before the detergent cup opens. This involves pressing Start/Pause, opening the door slightly, waiting for spray arms to stop, opening the door fully, adding dishes, closing the door, and pressing Start/Pause again.
At the end of the cycle, the buzzer sounds, and the appliance can be turned off using the On/Off button. The water supply should be shut off, and the door opened. Waiting about 15 minutes before unloading allows dishes to cool and dry better. The lower basket should be emptied first to prevent water from dripping onto dishes in the lower basket.
The filtering system, consisting of a coarse filter, a flat (main) filter, and a microfilter (fine filter), prevents food remnants from entering the pump. The filters should be cleaned regularly. To remove, the coarse filter's tap is squeezed, and it's lifted out. The main filter and fine filter are then lifted out. The entire filter assembly should be cleaned weekly with a brush under running water.
The control panel can be cleaned with a damp cloth and dried thoroughly. For the exterior, appliance polish wax is recommended. Sharp objects, scouring pads, or harsh cleaners should be avoided. The door edges should be cleaned with a soft, warm, damp cloth, avoiding spray cleaners to protect electrical components.
In winter, frost protection measures are necessary. This includes cutting off electrical power, turning off and disconnecting the water inlet pipe, draining water from the pipe and valve, reconnecting the pipe, and removing water from the sump with a sponge. If the dishwasher freezes, professional service is advised.
Spray arms should be cleaned regularly to prevent hard water chemicals from clogging jets and bearings. The upper spray arm is removed by rotating its nut clockwise, and the lower spray arm is pulled upward. They should be washed in soapy, warm water, and jets cleaned with a soft brush before reinstallation.
After every wash, the water supply should be turned off, and the door left slightly open to prevent moisture and odors. The plug should be removed before cleaning or maintenance. Solvents, abrasive cleaning products, and harsh cleaners should not be used. For the exterior, a cloth with warm soapy water is suitable, and for the interior, a cloth dampened with water and vinegar or a specific dishwasher cleaning product can be used.
For long periods of disuse, a wash cycle with an empty dishwasher is recommended, followed by removing the plug, turning off the water supply, and leaving the door slightly open to preserve door seals and prevent odors. Seals should be periodically cleaned with a damp sponge to remove trapped food.
The appliance should be positioned with its back against the wall and sides against adjacent cabinets. Water supply and drain hoses can be positioned on either side. The dishwasher's height can be adjusted by screwing its feet for leveling.
The manual warns against using extension cords or adapter plugs and emphasizes proper earthing. The voltage and frequency must match the rating plate, and the plug should be inserted into a properly earthed electrical socket. If the socket is unsuitable, a qualified electrician should install a proper one.
For cold water connection, the supply hose should be connected to a threaded 3/4-inch connector and fastened tightly. If water pipes are new or unused for a long time, the water should be run until clear to prevent blockages. The hydrant should be closed after use.
The drain hose should be inserted into a drain pipe with a minimum diameter of 40mm or run into the sink, avoiding bending or crimping. The top of the hose must be less than 1000mm from the floor. An extension hose, if needed, should be similar and no longer than 4 meters to maintain cleaning effectiveness. The waste connection should be less than 1000mm from the bottom of the dish.
Before starting the dishwasher after installation, ensure it is level and fixed, the inlet valve is open, there are no leaks at connections, wires are tightly connected, power is switched on, inlet and drain hoses are not knotted, and all packing materials are removed.
The manual provides a troubleshooting guide for common problems. If the dishwasher doesn't start, check for blown fuses, tripped circuit breakers, power supply, and securely closed door. If water is not pumped, check for kinks in the drain hose, clogged filters, or a clogged kitchen sink. Suds in the tub indicate improper detergent. Stained tub interior or white film on surfaces may be due to detergent with colorant or hard water minerals. Rust stains on cutlery suggest non-corrosion-resistant items. Knocking or rattling noises in the wash cabinet may be caused by items obstructing spray arms or loose crockery. Knocking in water pipes may be due to installation or piping cross-section.
For unsatisfactory washing results, check if dishes were loaded correctly, if the program was powerful enough, if enough detergent was dispensed, if items are blocking spray arms, or if filters/spray arm jets are clean. Cloudiness on glassware may be due to soft water and too much detergent. Black or gray marks on dishes can be caused by aluminum utensils rubbing. Detergent left in dispenser cups indicates dishes blocking the dispenser.
For unsatisfactory drying results, check for improper loading, too little rinse aid, or dishes being removed too soon. Wrong program selection or low-quality cutlery can also affect drying.
The manual lists error codes: "Rapid" indicates longer inlet time, suggesting the faucet is closed, water intake is restricted, or water pressure is too low. "90min+Rapid" indicates not reaching the required temperature, pointing to a malfunction of the heating element. "Glass" indicates overflow, suggesting a leak. In case of overflow, the main water supply should be turned off, and any water in the base pan removed before restarting.
This section provides detailed diagrams for optimal loading of the upper and lower baskets, as well as the cutlery basket, for comparability tests. It specifies capacity (12 place settings), upper basket position (lower), program (ECO), and rinse aid setting (6 or max). It also notes to open the door slightly (50mm) to assist in drying. The diagrams illustrate placement of cups, saucers, glasses, dinner plates, soup plates, dessert dishes, forks, soup spoons, dessert spoons, teaspoons, and knives.
| Type | Freestanding |
|---|---|
| Noise level | 47 dBA |
| Water consumption | 11.5 L/cycle |
| Half Load Option | Yes |
| Delay Start | Yes |