10780631 • 07-2003 3
a
Ed. 10780631 • 07-2003 3
rd
Ed.
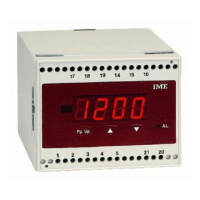
Besides the measured instantaneous value, it is possible to display the
highest reading
(highest peak) and the state of the alarms (“On” = alarm
condition or “OFF” = monitoring condition).
PEAK VALUE
During normal working, pressing the key
▲
it is possible to display the
highest measured value.
Keeping this key
▲
pressed for about 5 seconds, you can reset the peak
value “rS.P”.
Reset is automatically made also when the meter is turned off
(lack of auxiliary
supply)
or upon changing of input signal or display programming.
ALARM DETECTING
By passing one or both of the set thresholds, LED “AL” is turned on.
Repeatedly press PgUp until rL.A is displayed
Simultaneously pr
ess
▲▼
.
Display shows PAS followed by AL.1
By pressing
▲
state of the alarm 1 is displayed
On = alarm condition actually present
OFF = standard condition
By pr
essing PgUp AL.2 is displayed
By pressing
▲
state of the alarm 2 is displayed
On = alarm condition actually present
OFF = standard condition
By pressing PgUp End is displayed
Simultaneously press
▲▼
.
Display shows Sto and the meter automatically leaves the programming. ■
ETENDUE
Permet de sélectionner l’étendue désirée, 5 étendues (canaux) sont disponibles
Ch1 étendue 200V pour entrées comprises entre
-50…50V et -200…200V (DG4P, RM3C)
0…50V et 0…200V (DG4Q)
Ch2 étendue 20V pour entrées comprises entre
-5…5V et -20…20V ou bien 1…5V (DG4P, RM3C)
0…5V et 0…20V ou bien 1…5V (DG4Q)
Ch3 étendue 200mV pour entrées comprises entre
-50…50mV et -200…200mV (DG4P, RM3C)
0…50mV et 0…200mV (DG4Q)
Ch4 étendue 20mA pour entrées comprises entre
-5…5mA et -20…20mA ou bien 4…20mA (DG4P, RM3C)
0…5mA et 0…20mA ou bien 4…20mA (DG4Q)
Ch5 étendue 2000µA (2mA) pour entrées comprises entre
-500…500µA et -2000…2000µA (DG4P, RM3C)
0…500µA et 0…2000µA (DG4Q)
ATTENTION:
La programmation du canal Ch5 (2mA) est exprimée en µA (2000µA)
Le choix de l’étendue se fait soit par programmation à l’aide du clavier, soit
par le raccordement des bornes d’entrée (voir le schéma de raccordement).
10 Appuyer sur PgUp l’afficheur indique InP.
Appuyer en même temps sur
▲▼
L’afficheur indique PAS suivi par Ch. 1 (ou bien le canal mémorisé)
20 Appuyer plusieurs fois sur PgUp jusqu’à afficher le canal désiré.
Appuyer une nouvelle fois sur PgUp pour faire apparaître End
30 Appuyer en même temps sur
▲▼
L’afficheur indique Sto l’appareil mémorise la programmation et
se quitte automatiquement le menu.
English
55
Display
H
 Loading...