10780631 • 07-2003 3
a
Ed. 10780631 • 07-2003 3
rd
Ed.
English
99
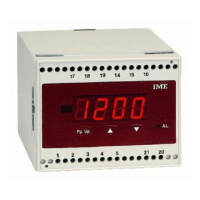
DISPLAY
40 Press PgUp the display shows InP
50 Press once again PgUp the display shows dSP
60 Simultaneously press
▲▼
The display shows PAS followed by L.In (beginning of measuring range)
71 Pressing once
▲
on the display, the beginning of measuring range
value is shown.
a If the displayed value is the desired one, press PgUp and go
on with the programming (see item 8)
b If you want to modify the value, act on
▲
or
▼
until you get
the desired one, then press PgUp
80 Display shows H.In (end of measuring range)
91 Pressing once on the display, the end of measuring range value
is shown.
a If the displayed value is the desired one, press PgUp and go on
with the programming (see item 10)
b If you want to modify the value, act on
▲
or
▼
until you get the
desired one, then press PgUp
100 Display shows dP (comma)
111 Pressing once
▲
on the display, the decimal point is shown.
a If the comma position is the desired one, press PgUp and go no
with the programming (see item 12)
b If you want to modify its position, act on
▲
until you get the
desired one, then press PgUp
120 Display shows L.dS (beginning of scale display)
131 Pressing once
▲
on the display, the beginning of scale value is shown.
a If the displayed value is the desired one, press PgUp and go on
with the programming (see item 14)
b If you want to modify the value, act on
▲
or
▼
until you get the
desired one, then press PgUp
140 Display shows H.dS (full scale display)
151 Pressing once
▲
on the display, the full-scale value is shown.
a If the displayed value is the desired one, press PgUp and go on with
the programming (see item 16)
Paramètres programmables
InP / canal d’entrée (étendue)
Le choix du canal d’entrée (et par conséquent de l’étendue) est fait sur
deux niveaux, connexion (bornes d’entrée) et par la programmation par
clavier.
• Les canaux d’entrée disponibles sont 5
Ch1 étendue 200V (Un)
Ch2 étendue 20V (Un)
Ch3 étendue 200mV (Un)
Ch4 étendue 20mA (In)
Ch5 étendue 2mA (In)
dSP / plage de mesure et affichage
Permet de sélectionner (dans l’étendue choisie) les valeurs réelles de la
plage de mesure et d’y associer l’affichage désiré.
• Début de la plage de mesure
•
Fin de la plage de mesure
• Affichage correspondant au début de la plage de mesure
• Affichage correspondant à la fin de la plage de mesure
• Point décimal (XX.XX ou bien XXX.X ou bien XXXX)
AL.1 • AL.2 / alarmes
• Type minimum ou bien maximum
• Etat des relais normalement excités ou bien désexcités
• Seuil -1999…1999 chiffre - 0...9999 (DG4Q)
• Hystérésis (point de reprise) -1999…1999 chiffre - 0...9999 (DG4Q)
• Retard de l’intervention 0…60 secondes. ■
H
 Loading...