15
1
15
3
4
4
5
1
11
1111
1111
1112
1
11
12 11
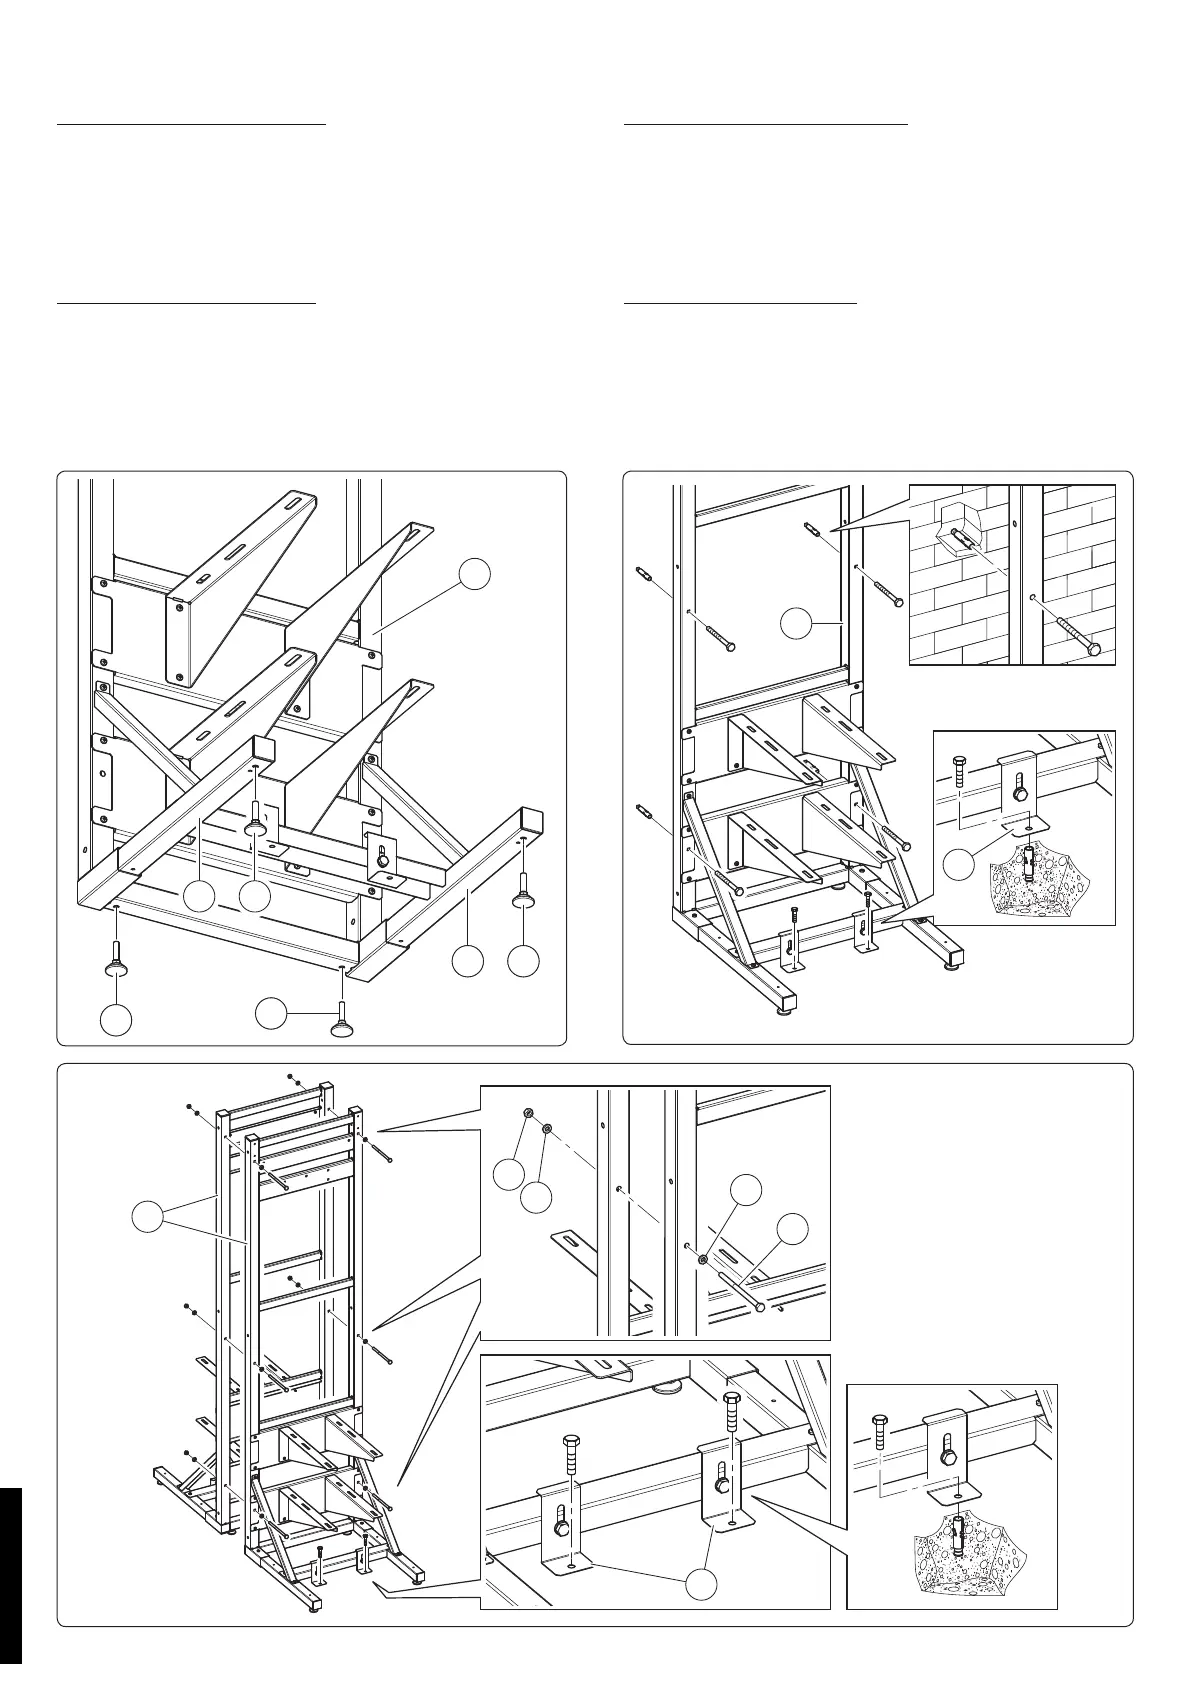
h) Avvitare i piedini (11) al telaio posteriore (1) e ai tubolari
inferiori (12) come indicato in g. 7.
Fissaggio telaio singolo a parete.
i) Fissare il telaio (1) a parete e le squadrette (15) a terra come
indicato in g. 8 utilizzando il dispositivo di ssaggio più
adatto alla supercie su cui si deve eseguire l'installazione
(escluso dalla fornitura).
ATTENZIONE: Immergas non si assume alcuna responsabilità
per danni/lesioni causati da ssaggi errati.
Fissaggio telai schiena-schiena.
i) Fissare due telai (1) schiena-schiena come indicato in g. 9 utiliz-
zando le viti (3), rondelle (4) e dadi (5). Fissare le squadrette (15) a
terra utilizzando il dispositivo di ssaggio più adatto alla supercie
su cui si deve eseguire l'installazione (escluso dalla fornitura).
ATTENZIONE: Immergas non si assume alcuna responsabilità
per danni/lesioni causati da ssaggi errati.
h) Screw on the legs (11) to the rear frame (1) and to the lower
tubulars (12) as indicated in g. 7.
Single wall-mounted frame xing.
i) Fix the frame (1) to the wall and the brackets (15) to the
ground, as indicated in g. 8 using the most suitable xing
device for surfaces on which installation must be executed
(not supplied).
ATTENTION: Immergas is not responsible for damage/injury
caused by incorrect xings.
Fixing frames back-to-back.
i) Fix two frames (1) back-to-back as indicated in g. 9, using
screws (3), washers (4), and nuts (5). Fix the brackets (15) to
the ground using the most suitable xing device for surfaces on
which installation must be executed (not supplied).
ATTENTION: Immergas is not responsible for damage/injury
caused by incorrect xings.
7
8
9
STD.010400/001
 Loading...