Do you have a question about the impact Polycom VVX 300 and is the answer not in the manual?
Record and assign a name to your voicemail greeting by entering a phone number to be called.
Configure voicemail messages to be sent to your email address for convenient access.
Dial *98 and enter your password to access voicemail directly from your phone.
Call your phone number and press * during the greeting to access voicemail remotely.
Use numerical key presses to navigate main menu, greetings, and options within voicemail.
Log in to manage features online using your username and password.
Instructions for dialing numbers within the United States and internationally.
Methods for answering calls and managing active calls using hold and resume.
Steps to transfer calls to another party or enable/disable call forwarding.
Enable per-call forwarding by entering the forwarding number when the phone rings.
Utilize star codes like *72 for call forwarding and *40 for anonymous call rejection.
Press the Mute button to prevent others from hearing you during a call.
Understand and switch between Home, Calls, Active Call, and Lines views.
Interpret call colors (grey, white) to understand call status (active, incoming, held).
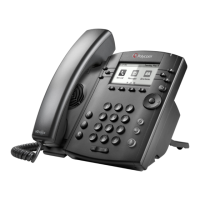
This document serves as a comprehensive guide for the Polycom VVX 300 and VVX 310 series phones, detailing their voicemail, call management, and general usage features. It is designed to help users effectively set up, operate, and maintain their ImpactConnect Hosted PBX system.
The voicemail system offers robust functionality for managing messages and greetings. To access voicemail settings, users navigate to the Homepage, select "Messages," and then click on the "Settings" tab. From here, they can enable or disable voicemail and customize various options.
Recording a greeting is a straightforward process. Users select the "Record" button and enter a phone number where they wish to be called. They then assign a name to the greeting and select "Call." The system will initiate a call to the specified number, prompting the user to record their new greeting. This feature allows for personalized greetings, enhancing the professional image of the user.
Voicemail to Email is a convenient feature that automatically sends voicemail messages to the email address associated with the user's account. Within the "Unified Messaging" section, users can choose the desired format for delivery, providing flexibility in how they receive and manage their messages.
Accessing voicemail can be done directly from the device or from another phone. To access from the device, users simply dial *98. The system will then prompt for a password. To access from another phone, users call their own phone number and press * when prompted during the voicemail greeting. A password will be required. It is important to note that the voicemail password is the same as the user's account password. When navigating through any menu, pressing # will return the user to the previous menu.
The voicemail system offers a main menu with several options. Pressing 1 allows users to access new messages, while pressing 2 provides access to old messages. Option 5 is for setting various options, and option 6 is for changing greetings. Users can recover deleted messages by pressing 7.
Within the "Messages" menu, after a message plays, users have several actions available. Pressing 1 saves the message, 2 repeats it, and 3 forwards it. Option 4 deletes the message, 5 moves to the next message, and 6 allows for a reply. Pressing # finishes the message interaction.
The "Greetings" menu offers specific controls for managing greetings. Pressing 1 allows users to record a new greeting, 2 to review existing greetings, and 3 to select a different greeting. Pressing # returns to the previous menu. Users can re-record a greeting by pressing 1, and the system supports multiple greetings. It is important to note that voicemail cannot be forwarded to a ring group.
Under "Options," users can change their password by pressing 1 and record their name by pressing 2. For additional information, users can refer to the User Guide available at www.impacthostedpbx.com/support.
Users can manage their features online by logging into vportal.impacttelecom.net. The username format is "yourextension@yourdomain," and the password consists of digits only (5-10 characters). Users should check their credentials with their administrator if they encounter any issues.
The device supports both domestic and international calls. To place a domestic call within the United States, users dial the area code followed by the phone number. For international calls, users dial 011, followed by the international phone number. International calling must be enabled for the service.
To initiate a call, users can pick up the handset or press the speakerphone or headset button, then enter the phone number, and press "Send." Alternatively, they can enter the phone number first, then press "Dial," and then pick up the handset or press the speakerphone or headset button.
From the "Lines view," users press the phone Line key, enter the phone number, and press "Send." From the "Home view," users select "New Call" using the left and right arrow keys, enter the phone number, and press "Send." For quick calls, users can select a recent call, a favorite, or a contact's phone number from the Contact Directory.
To answer a call using the speakerphone, users press the speakerphone button or tap "Answer." To answer with the handset, users simply pick up the handset. To answer with a headset, users press the headset button. If a new call comes in while on an active call, users can press "Answer," which will automatically place the current call on hold.
From the "Calls view," users can place a call on hold by pressing "HOLD" or the hold button. It is important to highlight the call first. To resume a held call, users press "Resume" or the resume button.
From the "Calls view," users can transfer a call by pressing "Transfer" or the transfer button, and then calling the other party. Once they hear the ringback tone or after speaking with the other party, they press "Transfer" or the transfer button again. Users can also press "Blind" to complete a transfer without waiting for the ringback tone.
To enable call forwarding, users press "Forward" from the "Home" or "Lines view." They then select the desired forwarding type, enter a forwarding number, and press "Enable." To disable call forwarding, users press "Forward" from the "Home" or "Lines view," select the forwarding type to disable, and press "Disable."
The device supports various star codes for quick access to specific functions. To enable per-call forwarding, as the phone rings, users press "Forward," enter the forwarding number, and press "Forward."
During a call, users can press the mute button to prevent other parties from hearing them. To disable mute, users press the mute button again. This function applies to calls using the handset, headset, and speakerphone.
The phone offers four main views: Home, Calls, Active Call, and Lines view (the default). Users can access "Home" and "Lines view" at any time. If the phone has one or more calls, users can also access "Calls" or "Active Call" view. To switch to "Home view" from any menu, users press the home button. Pressing the home button again will alternate between "Home" and "Lines view."
The "Home view" displays icons that users can select to access various phone functions. Users can use the right, left, up, and down arrow keys to display more icons, providing quick access to features like "New Call," "Messages," and "Directories."
The "Lines view" displays phone Lines, Favorites, and soft keys. If the phone is idle, users can press the Line key to access the Dialer. This view provides an overview of active lines and quick access to frequently used contacts.
If the phone has one or more calls, users can access the "Calls view." Call color indicates status:
Users can use the up and down arrow keys to select a call (highlight it). The soft keys control the highlighted call, allowing actions such as "Hold," "End Call," "Transfer," and "More" options. This view provides a centralized interface for managing multiple ongoing calls.
For customer support, users can call 855-997-6353 or email customersupport@impacttelecom.com. Additional account information can be found at myaccount.impacttelecom.com, and general information at www.impacttelecom.com.
| Resolution | 320 x 240 pixels |
|---|---|
| Lines | 6 |
| Ethernet Ports | 2 |
| SIP Protocol Support | Yes |
| Bluetooth | No |
| Wi-Fi | No |
| HD Voice | Yes |
| Audio Codec | G.711, G.722, G.729 |
| Power over Ethernet | Yes |
| Headset Port | Yes |
| Conference Capabilities | Yes |