EasyManua.ls Logo

Impax IM222-24L - User Manual

Impax IM222-24L
16 pages
Print Icon
To Next Page IconTo Next Page
Loading...
DECLARATION OF CONFORMITY
After sales support: Tel: 0344 264 2485 Website: www.impaxpowertools.com
1. Product model: IM222-24L
2
. Name and address of the manufacturer or his authorised representative:
N
AP BRANDS LTD. Office 20, Fleming Court Business Centre,
Leigh Road, Eastleigh, Hampshire SO50 9YN
T
el: +44 (0)23 8064 9650. Email: sales@napbrands.co.uk
3
. This declaration of conformity is issued under the sole responsibility of the manufacturer.
4. Object of the declaration:
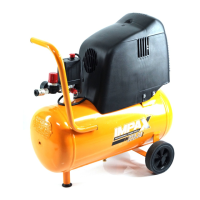
Equipment: 24L Oil Free Air Compressor
Brand name: IMPAX
Model/type: IM222-24L
5. The object of the declaration described above is in conformity with the relevant statutory requirements:
6. References to the relevant designated standards used or references to the other technical
specifications in relation to which conformity is declared:
7. The person authorized to compile the technical file:
Name: Robert Redfern
Address: Nap Brands Ltd. Office 20, Fleming Court Business Centre, Leigh Road, Eastleigh,
Hampshire SO50 9YN
Signed for and on behalf of:
Authorised Representative
Robert Redfern, Technical Manager
10/11/2020
Supply of Machinery (Safety) Regulations 2008
Electrical Equipment (Safety) Regulations 2016
Electromagnetic Compatibility Regulations 2016
The Restriction of the Use of Certain Hazardous Substances in Electrical and Electronic Equipment
Regulations 2012
Simple Pressure Vessels (Safety) Regulations 2016
Noise Emission in the Environment by Equipment for use Outdoors Regulations 2001
Measured Sound Power Level: 95.5dB(A), Declared Guaranteed Sound Power Level: 97dB(A)
BS EN 1012-1
BS EN 60204-1
BS EN 55014-1
BS EN 55014-2
BS EN 61000-3-2
BS EN 61000-3-3
BS EN ISO 3744
20

Questions and Answers

Summary

Declaration of Conformity

Manufacturer and Product Details

Details of the manufacturer and the product being declared, including its model and brand.

Compliance Information

Lists the statutory requirements and technical standards the product conforms to.

Technical File Details

Identifies the person authorized to compile the technical file for the product.

User Information

Certificate of Guarantee

Details the product's warranty period, terms, conditions, and exclusions.

Introduction and Safety

Introduces the product and outlines essential safety precautions before operation.

Customer Support

Provides contact details for helpline assistance and spare parts procurement.

Symbols

Product Symbols Explained

Explains various symbols found on the product rating plate for important information and instructions.

Safety Information

Specific Safety Instructions

Critical warnings and guidelines for safe compressor operation and use with pneumatic tools.

Electrical Safety Precautions

Guidelines for safe electrical connections, grounding, and avoiding water exposure.

Personal Safety Guidelines

Advice on operator alertness, safety equipment, and appropriate attire during use.

Electrical Information

Mains Plug Connection

Details on connecting the mains plug, wire colours, and safety compliance for the product.

Components and Specifications

Component List

Identifies and lists all parts of the air compressor with corresponding numbers.

Technical Specification

Provides key technical data for the air compressor, including voltage, power, and capacity.

Unpacking and Assembly

Unpacking Instructions

Guidance on safely unpacking the compressor and checking for completeness.

Fitting the Wheels

Step-by-step instructions for attaching the transportation wheels to the compressor.

Locating and Moving

Advice on positioning the compressor on a stable surface and safe methods for moving it.

Operating Instructions

Basic Compressor Operation

Explains the fundamental principles of how the compressor works and its safety features.

Preparing for Use

Checks to perform before connecting the compressor to the mains supply.

Switching On and Off

Correct procedure for turning the compressor on and off to prevent motor damage.

Connecting Hoses & Accessories

Guidance on connecting accessories and setting the appropriate air pressure.

Maintenance & Storage

Maintenance

Important procedures before maintenance, including draining and cooling the unit.

Cleaning The Filter

Instructions for removing, cleaning, and re-installing the air filter element.

Draining the Reservoir

Procedure for draining condensation from the reservoir before storage.

Storage

Guidelines for safely storing the air compressor after use.

Troubleshooting

Problem Diagnosis

Common problems, their possible causes, and recommended remedies.

Environmental Protection

WEEE Disposal

Information on the environmentally responsible disposal of waste electrical and electronic equipment.

Overview

This document describes the IMPAX 24L Oil Free Air Compressor, model IM222-24L, a professional power tool designed for various air-powered applications.

Function Description:

The IMPAX 24L Oil Free Air Compressor is designed to provide compressed air for a range of tasks. It is an oil-free compressor, which means it does not require oil for lubrication, reducing maintenance and preventing oil contamination in the air output. The compressor features an air receiver tank that stores compressed air, allowing for a consistent supply and reducing the frequency of the motor running. It includes a pressure relief safety valve, an On/Off pressure switch, an air receiver pressure gauge, a pull handle for portability, an air outlet pressure regulator, and an air outlet pressure regulator lock ring. The device is equipped with a 13A plug for connection to a mains supply.

Important Technical Specifications:

  • Model: IM222-24L
  • Voltage: 230V~50Hz
  • Rated power: 1.5KW S3 25% (2HP)
  • CFM: 7.8
  • Working pressure: 10Bar/145psi
  • No load speed: 3400min⁻¹
  • Receiver capacity: 24L
  • Weight: 17kg
  • Type: Oil free
  • Sound power level: 97dB(A)
  • Free air delivery (FAD): 222L/min
  • Maximum rated air pressure for the accessory: Do not operate accessories at an air pressure greater than the maximum rated air pressure for the accessory.
  • Pressure rating of the tool: If the pressure rating of the tool is less than 8 bar, the pressure regulator must be used to adjust the output pressure.
  • Minimum operating pressure: The minimum operating pressure of 6 Bar. The pressure switch is fitted with a delayed discharge valve which will start the air pump motor. The pressure relief safety valve is set to operate at 8.5 Bar and is connected directly onto the air receiver tank and will operate if the set pressure of 8.5 Bar is exceeded should the pressure switch fail.
  • Air receiver tank supply tube: Note during extended periods of use the air receiver tank supply tube will become hot.
  • Minimum temperature for filter drying: 24hrs at room temperature.
  • Minimum distance from walls: The compressor must be a minimum of 4 Metres away from the work area.

Usage Features:

  • Starting the compressor: Ensure the air outlet pressure regulator is closed and the water drain cock is closed. Connect the compressor to a suitable 13A mains supply and switch it on by pulling up the On/Off switch.
  • Connecting hoses & accessories: Connect a hose to the compressor using the quick release connector.
  • Adjusting air pressure: When using regulated air output, determine the working pressure of the accessory. Slowly open the air outlet pressure regulator while observing the air outlet pressure gauge until the minimum pressure for the accessory is reached. Fine adjustments can be made until optimum performance. The air outlet pressure regulator can be locked by tightening the locking ring.
  • Safety valve: The safety valve is set for the highest permitted pressure of the pressure vessel and is adjustable. It is equipped with a special ring, collar, or nut.
  • Draining the reservoir: It is important to drain the reservoir before storage. Switch off the compressor, unplug it, and place a suitable container beneath the compressor to catch any condensation. Undo the drain valve anti-clockwise until a hissing noise is heard, indicating depressurising. When the gauge indicates zero and the hissing has stopped, tighten the drain outlet nut again.
  • Overload protection: The compressor is fitted with an overload protection device. In the event that the motor becomes too hot, a thermal protection device will cut the mains supply to the motor. When the motor temperature returns to normal, the mains supply will be restored automatically.
  • Preparing for use: Before connecting to the mains supply, check that the mains voltage is 230V and the On/Off switch is in the OFF (lower) position. The pressure regulator should be set at its lowest setting, i.e., turned fully anticlockwise.
  • Moving the air compressor: Before moving the compressor, switch off and disconnect it from the mains power supply. Always use the handle and wheels. Do not lift by (or put strain on) air taps, valves or hoses. Take care when moving the compressor to avoid damaging the valves or fittings.
  • Unpacking and assembly: The compressor is packed with sharp objects. Take care when unpacking. Remove the machine, together with accessories supplied, from the packaging. Check carefully to ensure that the machine is in good condition and account for all the accessories listed in this manual. Make sure that all the accessories are complete. If any parts are found to be missing, the machine and its accessories should be returned together in their original packaging to the retailer. Do not throw the packaging away, keep it safe throughout the guarantee period, then recycle if possible, otherwise dispose of it by the proper means. Do not let children play with empty plastic bags due to the risk of suffocation. Take care when lifting the compressor from the packaging. Do not lift the compressor by the pressure regulator. Get assistance if necessary. This unit weighs 22kg.
  • Fitting the wheels: Fit the transportation wheels to either side of the compressor as shown in Fig. 1 using a 17mm spanner. Insert the rubber foot into the receptacle on the bottom of the air receiver tank.
  • Basic compressor operation: This manual provides safe operation. Read all instructions before operating. Ensure the compressor is suitable for the task. Do not use for purposes other than intended. Ensure all accessories are suitable for the compressor.
  • Warning!: This compressor must be connected to a power socket that is safeguarded by a suitable circuit breaker or fuse. Only use recommended parts. To avoid the risk of bursting, only hoses with a rated pressure of 8 bar, or more should be used. Never attempt to repair faulty hoses. Avoid kinking or trapping the air hose. Always replace faulty hoses – never attempt to repair if a leak is detected. Drain the tank after each use. Switch off and slowly open the drain valve to release the air then tilt the compressor to empty condensed water. Keep the motor vent clear and free from dust, wipe regularly to maintain an adequate supply of clean air to the compressor.
  • Extension leads: Carefully select an extension lead. Some machines are not suitable for use with extension leads. If the tool is designed for use outdoors; use an extension lead also suitable for that environment. When using an extension lead, select one capable of handling the current (amps) drawn by the machine in use. Fully extend the lead regardless of the distance between the power supply and the tool. Excess current (amps) and a coiled extension lead will both cause the cable to heat up and can result in fire.
  • General safety rules: Read all instructions. Failure to follow all instructions listed below may result in electric shock, fire and/or serious injury. The term “power tool” in all of the warnings listed below refers to your mains operated (corded) power tool or battery operated (cordless) power tool.
  • Work area: Keep work area clean and well lit. Cluttered and dark areas invite accidents. Do not operate power tools in explosive atmospheres, such as in the presence of flammable liquids, gases or dust. Power tools create sparks which may ignite the dust or fumes. Power tools are dangerous in the hands of untrained users.
  • Maintain power tools: Check for misalignment or binding of moving parts, breakage of parts and any other condition that may affect the power tools operation. If damaged, have the power tool repaired before use. Many accidents are caused by poorly maintained power tools.
  • Keep cutting tools sharp and clean: Properly maintained cutting tools with sharp cutting edges are less likely to bind and are easier to control.
  • Use the power tool, accessories and tool bits etc., in accordance with these instructions and in the manner intended for the particular type of power tool, taking into account the working conditions and the work to be performed: Use of the power tool for operations different from intended could result in a hazardous situation.
  • Service: Have your power tool serviced by a qualified repair person using only identical replacement parts. This will ensure that the safety of the power tool is maintained.
  • Power tool use and care: Do not force the power tool. Use the correct power tool for your application. The correct power tool will do the job better and safer at the rate for which it was designed. Do not use the power tool if the switch does not turn it on and off. Any power tool that cannot be controlled with the switch is dangerous and must be repaired. Disconnect the plug from the power source before making any adjustments, changing accessories, or storing power tools. Such preventive safety measures reduce the risk of starting the power tool accidentally. Store idle power tools out of the reach of children and do not allow persons unfamiliar with the power tool or these instructions to operate the power tool.
  • Avoid accidental starting: Ensure the switch is in the off position before plugging in. Carrying power tools with your finger on the switch or plugging in power tools that have the switch on invites accidents.
  • Remove any adjusting key or wrench before turning the power tool on: A wrench or a key left attached to a rotating part of the power tool may result in personal injury.
  • Do not overreach: Keep proper footing and balance at all times. This enables better control of the power tool in unexpected situations.
  • Dress properly: Do not wear loose clothing or jewellery. Keep your hair, clothing and gloves away from moving parts. Loose clothes, jewellery or long hair can be caught in moving parts.
  • If devices are provided for the connection of dust extraction and collection facilities, ensure these are connected and properly used: Use of these devices can reduce dust related hazards.
  • Electrical information: The wires in the mains lead fitted to this product are coloured in accordance with the following code: Green & Yellow (Earth), Brown (Live), Blue (Neutral). This product is double insulated and therefore does not require a connection to earth. A 3 pin plug must comply to BS1363/A. Fuse must comply to BS1362. Do not connect the brown live or blue neutral to the earth pin marked E on the 3 pin plug. Connect the Blue wire to the terminal marked Neutral (N). Connect the Brown wire to the terminal marked Live (L). Connect the Green and Yellow wire to the terminal marked Earth E. Ensure that the outer insulation is gripped by the cord grip and that the wires are not trapped when replacing the plug cover. The mains lead on this product is fitted with a 13 amp (BS1363/A) plug. A 13 amp (BS1362) fuse must be fitted in the plug.
  • In doubt consult a qualified electrician: There are no user serviceable parts inside except those referred to in the manual. Always refer servicing to qualified service personnel. Never remove any part of the casing unless qualified to do so; this unit contains dangerous voltages.
  • Warning!: For your protection if this tool is to be used outdoors do not expose to rain or use in damp locations. Do not place tool on damp surfaces, use a workbench if available. For added protection use a suitable residual current device (R.C.D.) at the socket outlet.
  • Note: If the mains cable requires replacing it must be replaced with an identical one and fitted by a qualified person.

Maintenance Features:

  • Cleaning the filter: The filter is located inside the compressor motor housing. To remove, unscrew the 4 screws (2 either side) with a cross-head screwdriver. Remove the foam filter and wash in clean water. Ensure the filter is dry (minimum of 24hrs at room temperature) before re-installing it.
  • General cleaning: Cleaning and maintaining the compressor regularly will give a long and trouble-free life.
  • Long-term storage: Before long-term storage, thoroughly clean the compressor, including removal of all fitted accessories. Do not use solvents on plastic parts; use a clean cloth dampened with warm soapy water. Metal parts should be wiped with a light machine oil to prevent rusting.
  • Storage after use: Set the switch to "OFF" and unplug the cord. Drain water from the air tank. Protect the electrical cord and air hose from damage. Store the air compressor in a clean and dry location away from children.
  • Filter replacement: New filters can be obtained by ringing the IMPAX helpline on 0344 264 2485. Please have the model number to hand. You can find the number on the front page of this instruction manual.
  • Note: Under no circumstances should the compressor be operated with the air filter removed.
  • Caution: Water must never come into contact with the compressor.

Impax IM222-24L Specifications

General IconGeneral
BrandImpax
ModelIM222-24L
CategoryAir Compressor
LanguageEnglish

Related product manuals