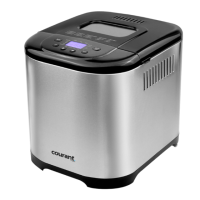
The Courant Bread Maker, model CBM-5010, is a versatile kitchen appliance designed to simplify the bread-making process. It features an LCD indicator controlled by a microcomputer, offering a range of automatic modes for various culinary tasks beyond just bread. These modes include making sticky rice, cake, kneading, jam, and baking. The device also offers multiple taste selections, such as sweet bread and French bread, catering to diverse preferences.
Important Safeguards:
Before operating the bread maker, it is crucial to read and understand all instructions carefully to mitigate risks of fire, electric shock, and personal injury. The appliance can be used by children aged 8 years and above, as well as individuals with reduced physical, sensory, or mental capabilities, provided they receive proper supervision and instruction on safe usage and understand the associated hazards. Children should not play with the appliance, and cleaning and user maintenance should only be performed by children over 8 years old under supervision. The appliance and its cord must be kept out of reach of children under 8 years.
Never operate the appliance with a damaged cord or plug, or if it malfunctions or has been damaged. In such cases, it should be returned to an authorized service facility for examination and repair. If the supply cord is damaged, it must be replaced by the manufacturer or a similarly qualified person to avoid hazards. The surfaces of the bread maker can become hot during operation, so users should always use handles or knobs and avoid touching hot surfaces. The cord should not hang over the edge of a table or counter or come into contact with hot surfaces. This appliance is not designed to be operated by an external timer or a separate remote-control system. All surfaces that come into contact with food should be cleaned regularly.
Before initial use, verify that the voltage of the wall outlet matches the rating plate. To prevent electric shock, never immerse the cord, plugs, or housing in water or any other liquid. Always unplug the appliance when not in use and before cleaning, allowing it to cool down before attaching or removing parts. The bread maker should not be placed on or near a hot gas or electric burner or in a heated oven. Extreme caution is advised when moving the appliance if it contains hot oil or other hot liquids. Users must avoid touching any moving or spinning parts of the machine during baking. The appliance should never be switched on without the bread pan properly placed and filled with ingredients. To remove the bread pan, never beat it on the top or edge, as this can cause damage. Always attach the plug to the appliance first, then plug the cord into the wall outlet. To disconnect, turn any control to OFF, then remove the plug from the wall outlet. Do not operate the unit without the bread pan in the chamber to prevent damage. The use of attachments not recommended by the manufacturer may cause fire, electric shock, or injury. The bread maker is intended for indoor household use only and should not be used for purposes other than its intended use.
For power supply, a short cord is recommended to reduce the risk of entanglement or tripping. Longer extension cords can be used with caution, provided their marked electrical rating is at least as great as the appliance's rating. The extension cord should be arranged to prevent it from draping over countertops or tables where children could pull on it or where it could cause unintentional tripping. If the appliance is grounded, the extension cord must be a grounding-type 3-wire cord.
Product Parts:
The bread maker consists of several key components:
- View Window: Allows users to monitor the baking process.
- Control Panel: Features an LCD display and buttons for menu selection, weight, color, and start/stop/pause functions.
- Bread Pan: The main container where ingredients are mixed and baked.
- Lid: Covers the bread pan during operation.
- Steel Housing: The outer casing of the appliance.
- Measuring Cup: Used for precise measurement of liquid ingredients. The unit "cup" in recipes refers to 240 ml, not a full standard cup. When measuring liquids, place the cup on a level surface and read the liquid surface parallel to your sightline. If using ingredients like egg and milk, fill water up to the volumetric mark, adjusting for the volume of these ingredients to maintain the total liquid volume.
- Measuring Spoon: Includes tablespoon and teaspoon measures for ingredients.
- Stirring Rod: Mixes the ingredients in the bread pan.
- Hook: Used to remove the stirring rod from the bread after baking.
Usage Features:
The bread maker offers a straightforward operating guide. To begin, clean the bread pan, stirring rod, measuring cup, and spoon. Insert the stirring rod onto the rotation axis in the bread pan. Add ingredients into the bread pan according to the recipe (e.g., 1.5LB Light Bread), placing yeast powder on top of the flour, ensuring it doesn't get soaked in water. Replace the bread pan into the bread maker's base slot at a 20° angle, rotate it clockwise by 20°, and close the lid. Upon switching on, the default menu (e.g., 1.5LB medium color, light bread) will be displayed. Press the START/STOP/PAUSE button to begin kneading, indicated by a buzzer sound and an indicator light. Once the timer counts down, the bread is ready, and the machine enters a holding state. Press START/STOP/PAUSE for 2 seconds to end the holding state. To remove the bread, use oven mitts or pot holders to turn the bread pan clockwise by 20°, lift it out, and flip it upside down. If the stirring rod remains in the bread, use the hook to remove it by inserting the hook into the hole on the rod and lifting it out.
The control panel includes:
- MENU button: Selects from 15 available menus: Soft Bread, Sweet Bread, Natural Sourdough, French, Whole-wheat, Quick, Sugar-free, Multigrain, Milky Loaf, Cake, Raw Dough, Leaven Dough, Gluten-free, Bake, and Yogurt.
- WEIGHT button: Selects bread weight (1LB/1.5LB/2LB) for menus 1-9 and 13.
- BAKING COLOR button: Selects baking color (Light/Medium/Dark) for menus 1-9 and 13.
- START/STOP/PAUSE button: Powers on/off or pauses the bread maker. A momentary press pauses the process, which resumes automatically after 3 seconds. A 2-second press stops the operation.
- "+" and "-" buttons: Adjust time settings in setting mode, extending or reducing time by 1, 5, or 10 minutes, with rapid adjustment when held down.
Specific Functions Description:
- Reserve Function: Allows users to preset the bread maker to bake bread overnight for fresh breakfast. The reserving time is calculated from the current time to the desired completion time, and this total time is displayed on the screen. Eggs should not be added when using this function, and yeast should be covered with flour to maintain its activity.
- Buzzer Sound: Indicates power connection, button presses (Loaf, Color, Menu, Time Setup, Start/Stop), and reminds users to add ingredients during kneading. It also signals the end of operation and intermittently sounds when "Keep Warm" is closed down.
- Memory Function: In case of a power disruption lasting no more than 15 minutes, the bread maker will resume operation from where it left off. For disruptions longer than 15 minutes, manual reset is required.
- Keep Warm Function: Automatically activates after baking is complete, keeping bread fresh for up to 1 hour. The ":" symbol flashes during this period. It can be manually ended by pressing On/Off for 2 seconds.
- To Make Cake: Select Menu 10. Default time is 1 hour and 33 minutes.
- To Make Raw Dough: Select Menu 11. Default time is 23 minutes. No baking color or weight selection is needed as the dough is not baked.
- To Make Leaven Dough: Select Menu 12. Default time is 1 hour and 24 minutes. No baking color or weight selection is needed.
- To Bake: Select Menu 14. Adjustable from 10 to 70 minutes. This function is useful for combining with other dough preparation steps.
- To Make Yogurt: Select Menu 15. Default time is 8 hours, adjustable from 5 to 13 hours.
Bread Baking Tips:
- Flour: Not all flour types are suitable for perfect bread. If bread flour is unavailable, "Gluten Flour" or "Dumpling (Noodle) Flour" can be used as substitutes.
- Yeast Powder: Do not replace yeast powder with baking soda. Expired or inactive yeast will negatively affect bread texture and appearance. To test yeast activation, mix half a cup of warm water (40-50°C) with a small spoon of sugar, then add two small spoons of yeast powder on the surface. Store in a warm place. If the mixture rises to the level of a full cup after 10 minutes, the yeast is active.
- Water and Flour Ratio: Different flours absorb water differently. Adjust water quantity based on the flour type. Too much water results in sticky dough and hard, flat, inelastic bread. If dough is sticky after 5 minutes, add 1-2 large spoons of flour and knead. Too little water leaves dry flour under the dough; add one large spoon of water at a time and knead until a ball forms.
- Other Recipes: Sugar and eggs darken bread. Adding too much can lead to a heavy color or even burnt bread. Eggs can also thin the dough, so adjust water by adding the egg to the measuring cup and filling water to the specified level.
Maintenance Features:
- Keep Surface Clean: Unplug the unit before cleaning. Use a small amount of gentle cleaning solution on a soft cloth to wipe the unit, then dry thoroughly with another cloth. Avoid abrasive cleansers and corrosive liquids.
- Keep Accessories Clean: Clean all accessories after each use. If the stirring rod is difficult to remove, pour some water into the pan and let it soak to loosen any residue. For storage, clean all accessories, allow them to cool, and store them in the pan.
Important Technical Specifications:
- Item No.: MBF004
- Rating Voltage: 120V 60Hz
- Rating Power: 650W
- Rating Capacity: 2.0LB
- Environment for Use:
- Temperature range: 14°F-104°F
- Relative air humidity: less than 95% (at 77°F)
- Storage temperature: -40°F-140°F
- Ambient air must be free of combustible and corrosive gas and conductive dust.
- The technical parameters are subject to change without notice.
Troubleshooting Guide:
- Bread maker does not work: Check power connection and if there's a time delay. If components are damaged, seek maintenance.
- Abnormal sound: Remove any hard objects from the bread pan and ensure the pan is properly installed.
- Peculiar smell: Check the power line for damage and ensure the heating tube is free of sundries.
- "E00" displayed: Inner temperature below 14°F. Use the bread maker within 14°F-104°F.
- "E01" displayed: Inner temperature above 122°F. Cool down to room temperature using a fan or natural cooling.
- "EEE" or "HHH" displayed: Temperature detector fault. Seek maintenance.
- Bread is half-baked or underdone: Inadequate water or excessively high water temperature, or incorrect ratio of raw materials. Refer to the recipe for proper proportioning.
Customer Support:
For any questions or warranty service, contact Courant™:
- Web: www.courantusa.com
- Email: service@courantusa.com
- Phone: +1 888-943-2111
It is important to register the product at WWW.COURANTUSA.COM within 14 days of purchase to ensure warranty coverage. Courant™ is a division of LT Inc., Wilkes Barre, PA.