Do you have a question about the InClima Inclima-09GR21 IN and is the answer not in the manual?
General safety warnings for using the appliance.
Safety guidelines for cleaning and maintaining the unit.
General cautions for operating the air conditioner.
Safety instructions related to electrical connections and power.
Safety advice specific to the installation process.
Specific safety warnings for flammable refrigerants.
Information on the proper disposal of electrical equipment.
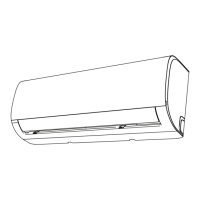
Describes the indicators and symbols on the indoor unit's display.
Explains the various codes shown on the indoor unit display.
Specifies the valid operating temperatures for different modes.
Details additional functions like Auto-Restart, Anti-mildew, etc.
Instructions on how to adjust vertical and horizontal airflow.
Guide on operating the unit using the manual button.
Procedures for cleaning the indoor unit's exterior and interior.
Steps for cleaning the air filters to maintain efficiency.
Information on filter cleaning and replacement reminders.
Steps to take when the unit is not used for an extended period.
Recommendations for checks before seasonal use.
Lists common problems and their possible causes.
Troubleshooting steps for operational issues.
Solutions for reduced heating effectiveness.
Guidance on interpreting error indicators.
Lists all parts that come with the unit and those to be purchased separately.
Step-by-step visual guide for indoor unit installation.
Diagram and list of all components of the indoor and outdoor units.
Pre-installation checks and model matching.
Guidelines for choosing the right place for the indoor unit.
How to securely fix the mounting plate.
Procedure for creating the wall opening for pipes.
Specifications for different mounting plate sizes.
Instructions for preparing the refrigerant pipes.
Steps for attaching the drain hose for proper drainage.
How to seal off unused drain openings.
Essential electrical safety rules and compliance.
Guide to wiring the indoor and outdoor units.
How to bundle and protect pipes and cables.
Final steps to attach the indoor unit to the mounting plate.
Information on adjusting the unit's position for pipe connection.
General guidelines for outdoor unit installation.
Criteria for choosing the outdoor unit's placement.
Advice for installation in harsh weather conditions.
Specific steps for heat pump unit drain joint installation.
Methods for securing the outdoor unit to its base or bracket.
Dimensions for anchoring the outdoor unit.
Precautions for drain hose installation in freezing temperatures.
Wiring procedures for the outdoor unit.
Importance of pipe length for performance and efficiency.
General steps for connecting refrigerant pipes.
Proper technique for cutting refrigerant pipes.
Ensuring burr-free pipe ends for a good seal.
Specifications for flare form dimensions.
How to create a proper flare for airtight connections.
Procedure for connecting the pipes to units.
Recommended minimum bending radius for piping.
Detailed steps for indoor unit connection.
Detailed steps for outdoor unit connection.
Specified torque values for tightening flare nuts.
Essential checks before starting evacuation.
Specific pre-evacuation checks.
Step-by-step guide to evacuating the refrigerant circuit.
Guidelines for charging additional refrigerant.
Table showing refrigerant addition based on pipe length.
Checks to perform before the final test run.
Verifying electrical system safety and grounding.
Procedure to verify proper grounding.
Checks to perform while the unit is running.
Testing for any electrical leaks.
Methods for detecting refrigerant leaks.
How to perform the operational test.
Re-checking connections during the test run.
Special procedure for testing in low temperatures.
Connection requirements for specific models regarding system impedance.
Safety checks before working on refrigerant systems.
Controlled procedures for minimizing risks.
Instructions for personnel working in the vicinity.
Using detectors to check for flammable atmospheres.
Ensuring fire safety equipment is available.
Prohibiting ignition sources near the system.
Importance of ventilation during servicing.
Verifying components and specifications.
Safety checks for electrical components.
Procedures for repairing sealed parts.
Working on components in flammable atmospheres.
Checking cable condition and routing.
Methods for detecting leaks of flammable gases.
Acceptable leak detection techniques.
Procedures for breaking into refrigerant circuits.
Requirements for charging the system with refrigerant.
Safely removing and handling refrigerants and components.
Requirements for labelling de-commissioned equipment.
Safe practices for removing and transferring refrigerants.
Procedures for venting R290 refrigerant.
Guidelines for handling units.
Interpretation of warning and caution symbols.
Lists the applicable models for the remote controller.
Tips for optimal signal reception.
Guide on how to change the remote controller batteries.
Details on supported models and their specifications.
Description of all buttons on the remote controller and their functions.
Explains how operation modes are shown.
Indicates when the remote is communicating.
Shows the status of the ON/OFF button.
Indicates when the auto-on timer is set.
Indicates when the auto-off timer is set.
Shows when the sleep function is active.
Displays the temperature at the remote's location.
Shows set temperature and timer values.
Indicates the selected fan speed.
Guide for using the automatic mode.
How to select and set these modes.
Instructions for using the dry mode.
How to control louver movement.
Setting auto-on and auto-off timers.
Detailed steps for setting the auto-on timer.
Detailed steps for setting the auto-off timer.
Using both ON and OFF timers simultaneously.
Setting sequential ON and OFF timers.
| Brand | InClima |
|---|---|
| Model | Inclima-09GR21 IN |
| Category | Air Conditioner |
| Language | English |