www.infinitycycleworks.com
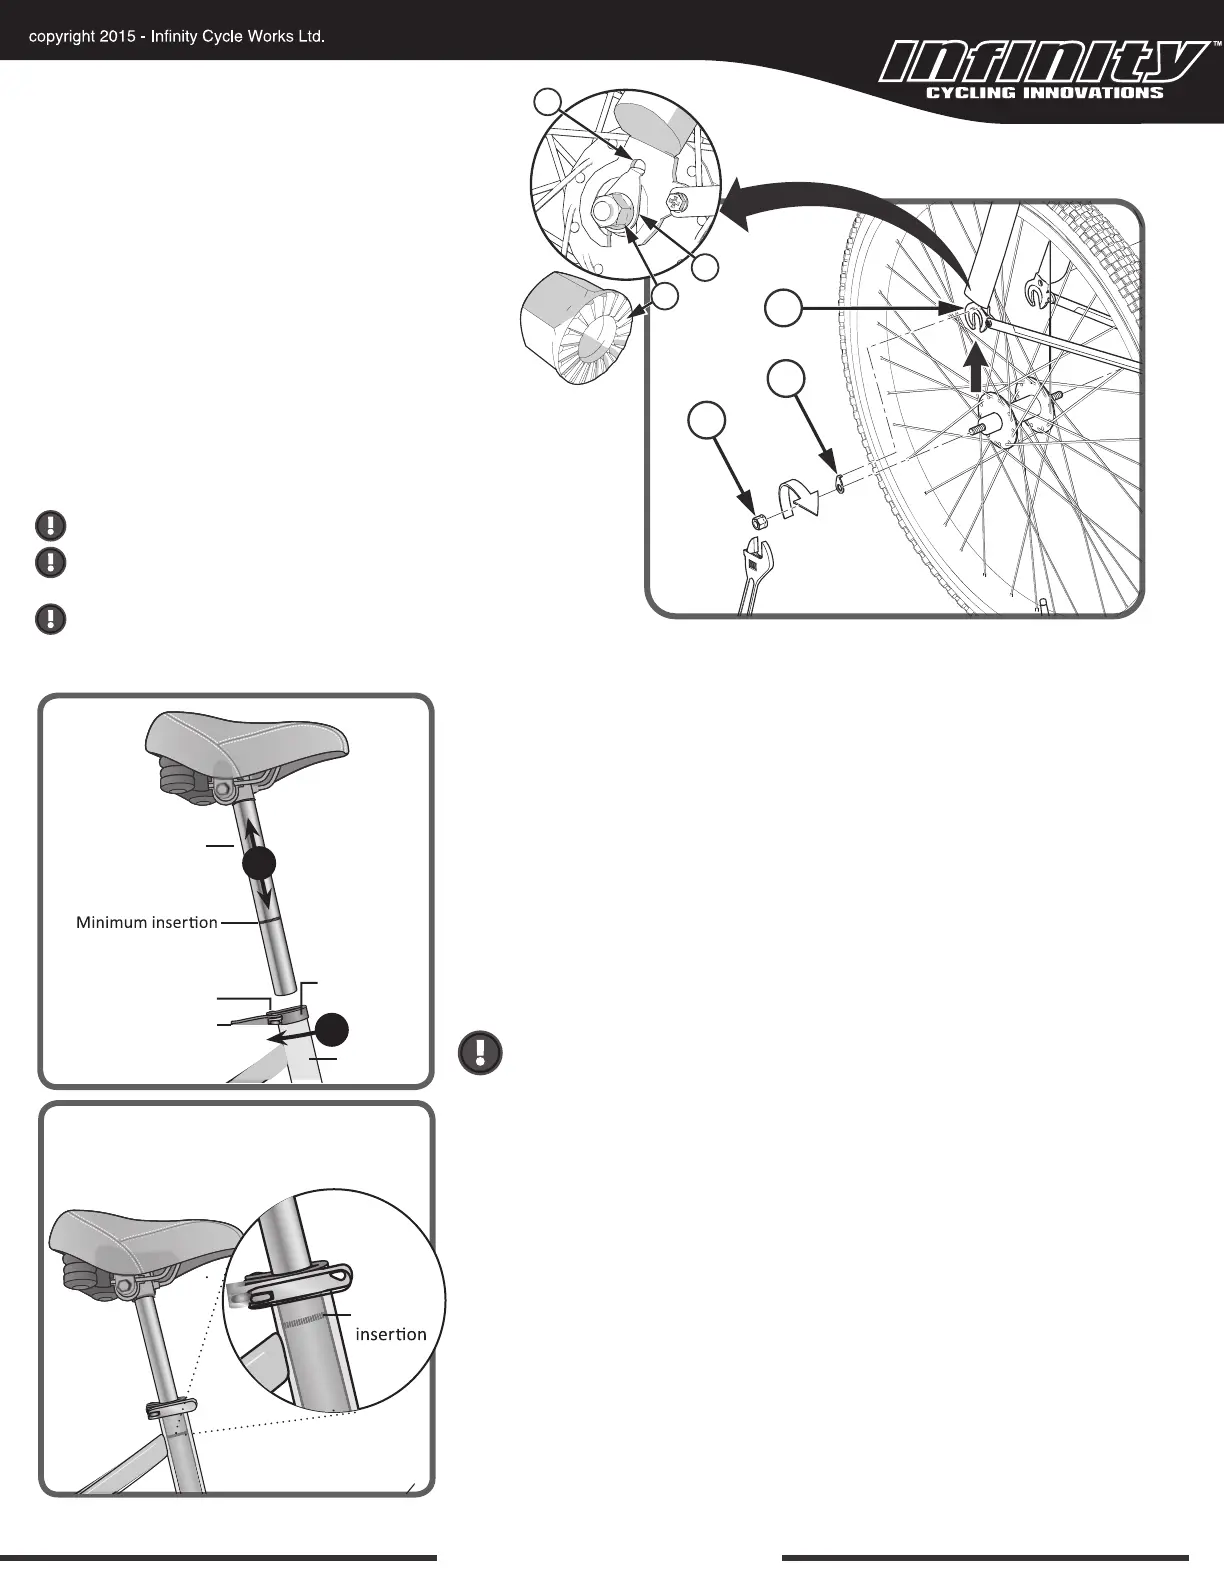
SADDLE ASSEMBLY
The saddle assembly should be adjusted with the saddle centered on the rails and
level. Insert the saddle assembly into the frame.
Adjust seat to desired height
(O) and tighten the quick release clamp (N) so that the
saddle may not turn left or right, or move up or down. If it moves after locking the
quick release lever, open it and tighten the adjusting nut further, then close the quick
release lever again.
Be sure that the seat post is inserted far enough into the frame so that the "minimum
insertion" mark on the seat post is no longer visible. Riding the bicycle with the seat
post above this line is dangerous and can cause serious injury, damage to the bicycle
and/or create an unstable riding position causing an accident.
Before each ride check to be sure the seat post is inserted so that the
minimum insertion mark cannot be seen. The quick release mechanism is
tightened securely to prevent accidental slippage.
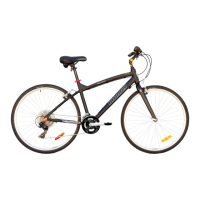
NUTTED FRONT WHEEL
(for models without quick release front wheel)
1. If the Axle Nuts (J) are already attached to the front
wheel axle, begin by removing them with an open end
wrench or adjustable wrench.
2. Set the wheel into the front fork
(K)
3. Install wheel retainer washers
(L) making sure the tabs
are in the fork
(M) tab holes.
4. Attach the front wheel with the Axle Nuts
(J).
5. Tighten Axle Nuts with 15mm wrench provided.
NOTE: Ensure wheel spins freely without contacting
K
L
J
WARNING: Do not use Nuts (G) without serrations to attach the front wheel.
WARNING: Put the wheel in the center of the fork and tighten
both nuts to the recommended torque.
WARNING: Failure to obey these steps can allow the front wheel to loosen
while riding. This can cause injury to the rider or to others.
L
J
M
3
marks on the seat post
Seat post
Quick-release lever
Quick-release
seat clamp
Adjustment nut
Seat tube
O
N
Minimum
marks
 Loading...