Installation Warnings and Tips
•Disconnect the negative (–) lead from your vehicle’s battery.
•Attheinstallationsites,locateandmakeanoteofallfuel
lines, hydraulic brake lines, vacuum lines and electrical
wiring. Use extreme caution when cutting or drilling in and
around these areas.
•Chooseasafemountinglocationawayfrommoisture.
•Makesurethereissufcientaircirculationatthemount-
ing location for the amplifier to cool itself.
•Mounttheamplier,usingthesuppliedhardware.
Specifications
•
CEA-2006A-compliant
0
Speaker Output Connectors
•Connectthespeakerstotheseterminals,observing
proper polarity. Gold screws indicate +, and silver
screws indicate – .
•Minimumspeakerimpedanceis2ohms.
1
Fuses
•Replaceonlywiththesametypeandrating.
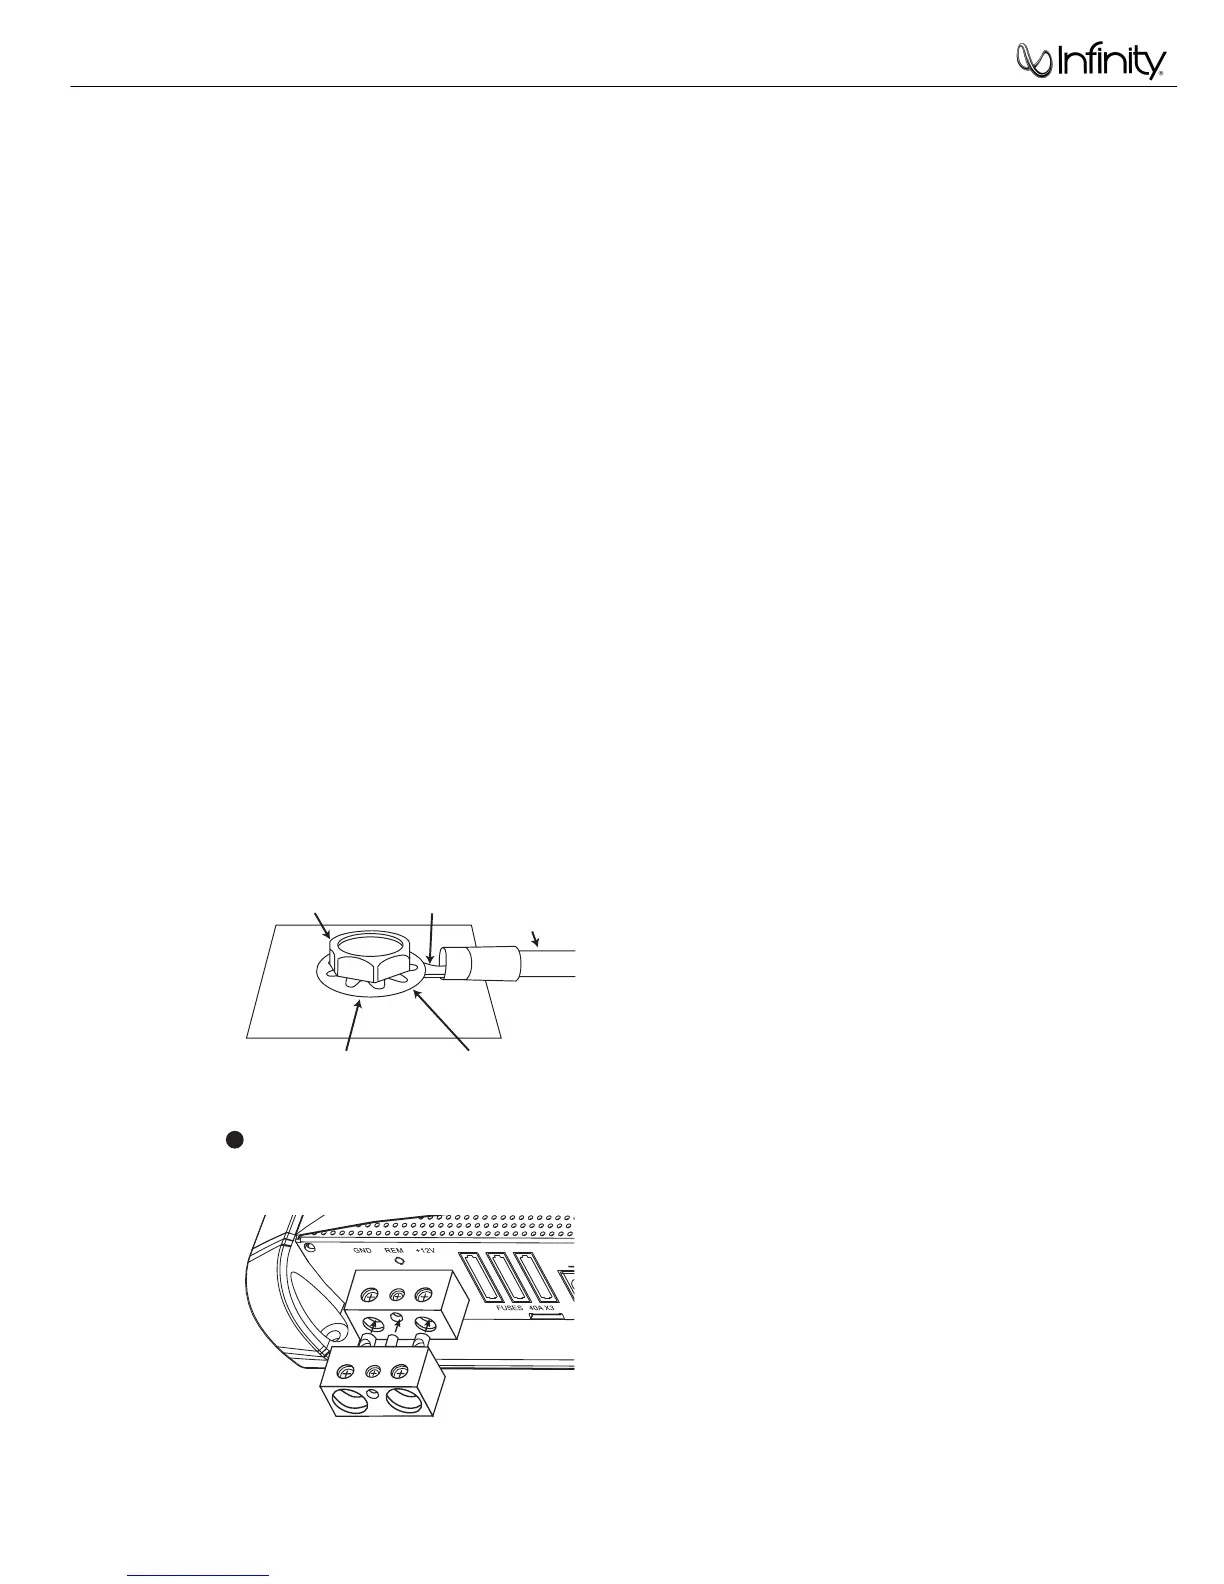
2
Power Input Connectors
•+12V:Connecttothepositiveterminalofthevehicle’s
battery. Install an appropriate fuse holder and fuse
(120Aminimum)within18”(457mm)ofthebattery.
Makesurethewireisnotdamagedorpinchedduring
installation. Install protective grommets when routing
wires through the firewall or other sheet metal.
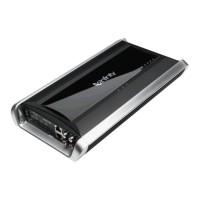
•GND:Connecttothevehicle’schassis.Refertothe
illustration below.
•REM:Connecttothe“RemoteOut”leadfromthe
source unit or to a source of switched +12V(ACC).
4 AWG Adapter
•Forpowerwirelongerthan4’(1.2m),4AWGwireis
recommended. Use the adapter to make the connection
according to the illustration below.
3
DBO: Variable Subsonic High-Pass
Filter With Variable Boost (Q)
•Forwoofersintuned(vented)enclosures,setthe
frequency control to a value 10Hz below the enclo-
sure’s resonance (tuned) frequency.
•Forwoofersinsealedboxes,setthecontroltoany
value you prefer between 30Hz and 50Hz.
•SettheBoostcontrolaccordingtoyourpreference,
being careful not to apply enough boost to damage
your woofer(s).
ADBOBoostcontrolprovidesupto12dBofboost,
slightly above the high-pass filter’s frequency.
See above for appropriate settings.
B
DBOHigh-PassFilterFrequencycontrol,variable
between 10Hz and 80Hz. See above for appropri-
ate settings.
4
Crossover-Frequency Control
•12dB/octavecrossover,variablefrom32Hzto320Hz.
See
for the adjustment procedure.
Input Level Control
•Usedtomatchtheinputleveloftheamplierto
the output level of the source unit. See
A
for the
adjustment procedure.
Input Connectors
•Connecttofrontoutputsfromthesourceunitor
signal processor.
Aux Output Connectors
•Nonlteredpass-throughoutput.Connecttothe
input of an additional subwoofer amplifier.
Protect LED
•Illuminatedunderanyofthefollowingfault
conditions: battery over/under voltage; short
circuit in speaker wires; amplifier is too hot;
amplifier’s output circuit has failed (DC voltage
present in the amplifier’s output).
Power On LEDs
•Illuminatedwhentheamplierison.
A
Setting Input Level
ATurnInputLevelcontrolcounterclockwiseto6V.
B With a dynamic music track playing, turn the head
unit’svolumecontroltothe3/4position.
C Turn Input Level control clockwise until the bass
output is proportionate to the output of the high-
frequency speakers, according to your preference.
D Input level is now adjusted correctly.
Setting the Crossover
A Crossover setting for subwoofers.
Note: Acceptable frequency ranges indicated in gray.
 Loading...