13
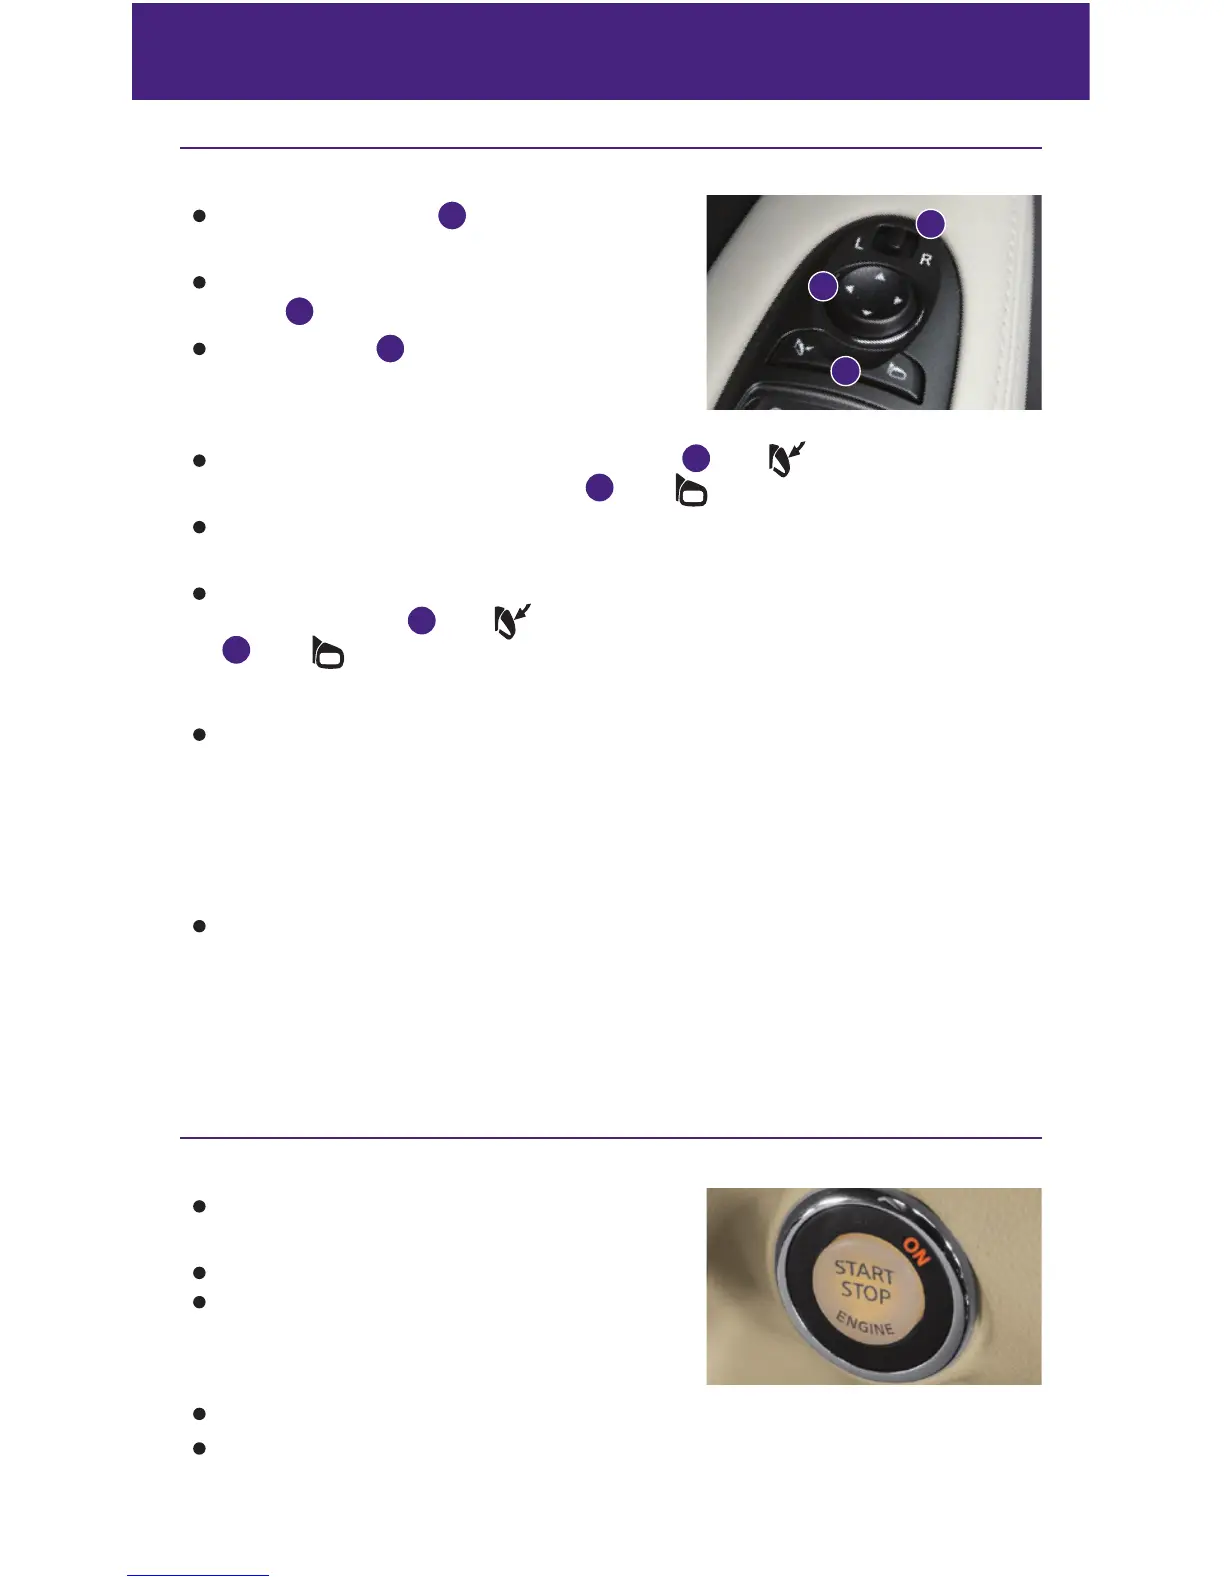
Outside Mirror Control Switch
Move the control switch
1
right or left to select the
right or left side mirror.
Adjust each mirror to the desired position using the
switch
2
.
Move this switch
1
to the center (neutral) position
to prevent accidentally moving the mirror.
POWER FOLDING OUTSIDE MIRRORS
To fold the outside rearview mirrors, push the switch
3
to the
position. To unfold the
outside rearview mirrors, push the switch
3
to the
position.
If the mirrors are manually operated or bumped, the mirror body can become loose at the
pivot point.
To correct the electronic mirror operation, cycle mirrors by pushing the outside rearview
mirror folding switch
3
to the
position until completely closed, then push the switch
3
to the
position until the mirror is completely open.
REVERSE TILT-DOWN FEATURE
When backing up the vehicle, the right and left outside mirrors will turn downward automatically
to provide better rear visibility.
1. Push the ignition switch to the ON position.
2. Move the shift lever to the R (REVERSE) position.
3. Choose the right or left outside mirror by operating the outside mirror control switch.
4. The outside mirror surfaces move downward.
When one of the following conditions has occurred, the outside mirror surface will return
to their original positions.
• The shift lever is moved to any position other than R (REVERSE).
• The outside mirror control switch is set to the center (neutral) position.
• The ignition switch is pushed to the OFF position.
For more information, refer to the “Pre-driving checks and adjustments (section 3)” of your Owner’s Manual.
Starting/Stopping the Engine
It is important to make sure the INFINITI Intelligent
Key is with you (that is, in your pocket or purse).
Depress the brake pedal.
Press the ignition switch START/STOP button to start
the engine.
TURNING THE ENGINE OFF
Move the shift lever to the P (PARK) position and apply the parking brake.
Press the ignition switch START/STOP button to turn the engine off.
For more information, refer to the “Starting and driving (section 5)” of your Owner’s Manual.
1
2
3
 Loading...