© MASS ELECTRONICS Pty Ltd 2014
Page 3
DS 1.29 - SENW5x - Wall Mounted Temperature Detector
December 2015
Operation Sequence and Display (SENW58 Only)
Power
• The SENW5x is powered by 24VDC or 24VAC ±10% from
terminals (VIN) and (GND).
• Terminal (GND) is common for power and setpoint outputs,
and reference for the 0/10VDC input for override.
• A Display segment test is performed by pushing and holding
the Override button during power-up. This action will latch
all the segments ON until the override is released.
Sensors
• Temperature is measured by a 10K-2 type thermistor.
• Temperature is viewed on the Primary Display.
Temperature Setpoint
• The setpoint is adjusted by the Up and Down buttons. A 0
to 10VDC signal is produced from terminal (STPT). The range
may be adjusted, unless configured for "Setpoint Lockout".
• The setpoint is viewed on the secondary display.
• The setpoint ranges from 55°F (12°C) to 95°F (35°C) absolute
temperature or as a relative temperature from ±5° (F or C).
The setpoint range is dependent on the settings for P3 and P4.
• The primary display shows the temperature setpoint during
adjustment. It will revert back to the temperature 5 seconds
aer the last button activity.
• 0.5° increments for SENW58F model.
• 0.1° increments for SENW58C model.
Override
• The override is activated by the Override pushbutton on
the front of the SENW58. When pressed, the temperature
sensor will short circuit for 5 seconds, unless configured for
"Occupancy Lockout".
• When the temperature input on the Innotech Maxim/Genesis
controller registers the fault from the SENW58 sensor short
circuit, the analogue output from the controller changes from
0VDC (o) to 10VDC (on).
• When the SENW58 detector registers 10VDC from the
controller, the " " is displayed to represent "Occupied"
mode.
• When the SENW58 detector registers 0VDC from the controller,
the " " is not displayed to represent "Unoccupied" mode.
Display
• Primary Display - Indicates Temperature in °F or °C depending
on the version of detector (F/C). This also displays the setpoint
when the Up/Down buttons are pressed. (This may be
adjusted to toggle between Temp and Setpoint - P7)
• Secondary Display - Indicates Temperature Setpoint. - P8
• The display can be adjusted for resolutions of 0.1, 0.5 or 1.
• The backlit display has two modes, “Active” and “Inactive”.
❒ Active - When a button press is detected the display will
illuminate.
❒ Inactive - When no button activity is detected for 5 seconds
the display will become dull.
• The " " is displayed on the SENW58 to indicate "Occupied"
or "Unoccupied" modes. (Refer to the Typical Configuration)
• "E" will be displayed if there is an error with the SENW58
sensor.
Parameters (SENW58 Only)
The SENW5x is factory set, as per the Parameters on page 4. These may
be adjusted using the Up/Down and Select buttons.
• Where [°F Default] or [°C Default] is indicated, this is the default for
the respective Fahrenheit or Celsius models.
• Where [Factory Default] is specified, it is the default setting
regardless of the model.
Enter the Parameter Menu
The parameter menu is accessed by a two step procedure.
1. Simultaneously press and hold the Up and Down buttons for 3
seconds. will be displayed.
2. Continue to hold the Up and Down buttons and also hold the
Select button for 3 seconds.
Aer successfully entering the Parameter Menu, the initial parameter
displayed will be P1.
You may modify multiple parameters before returning to the normal
mode of operation.
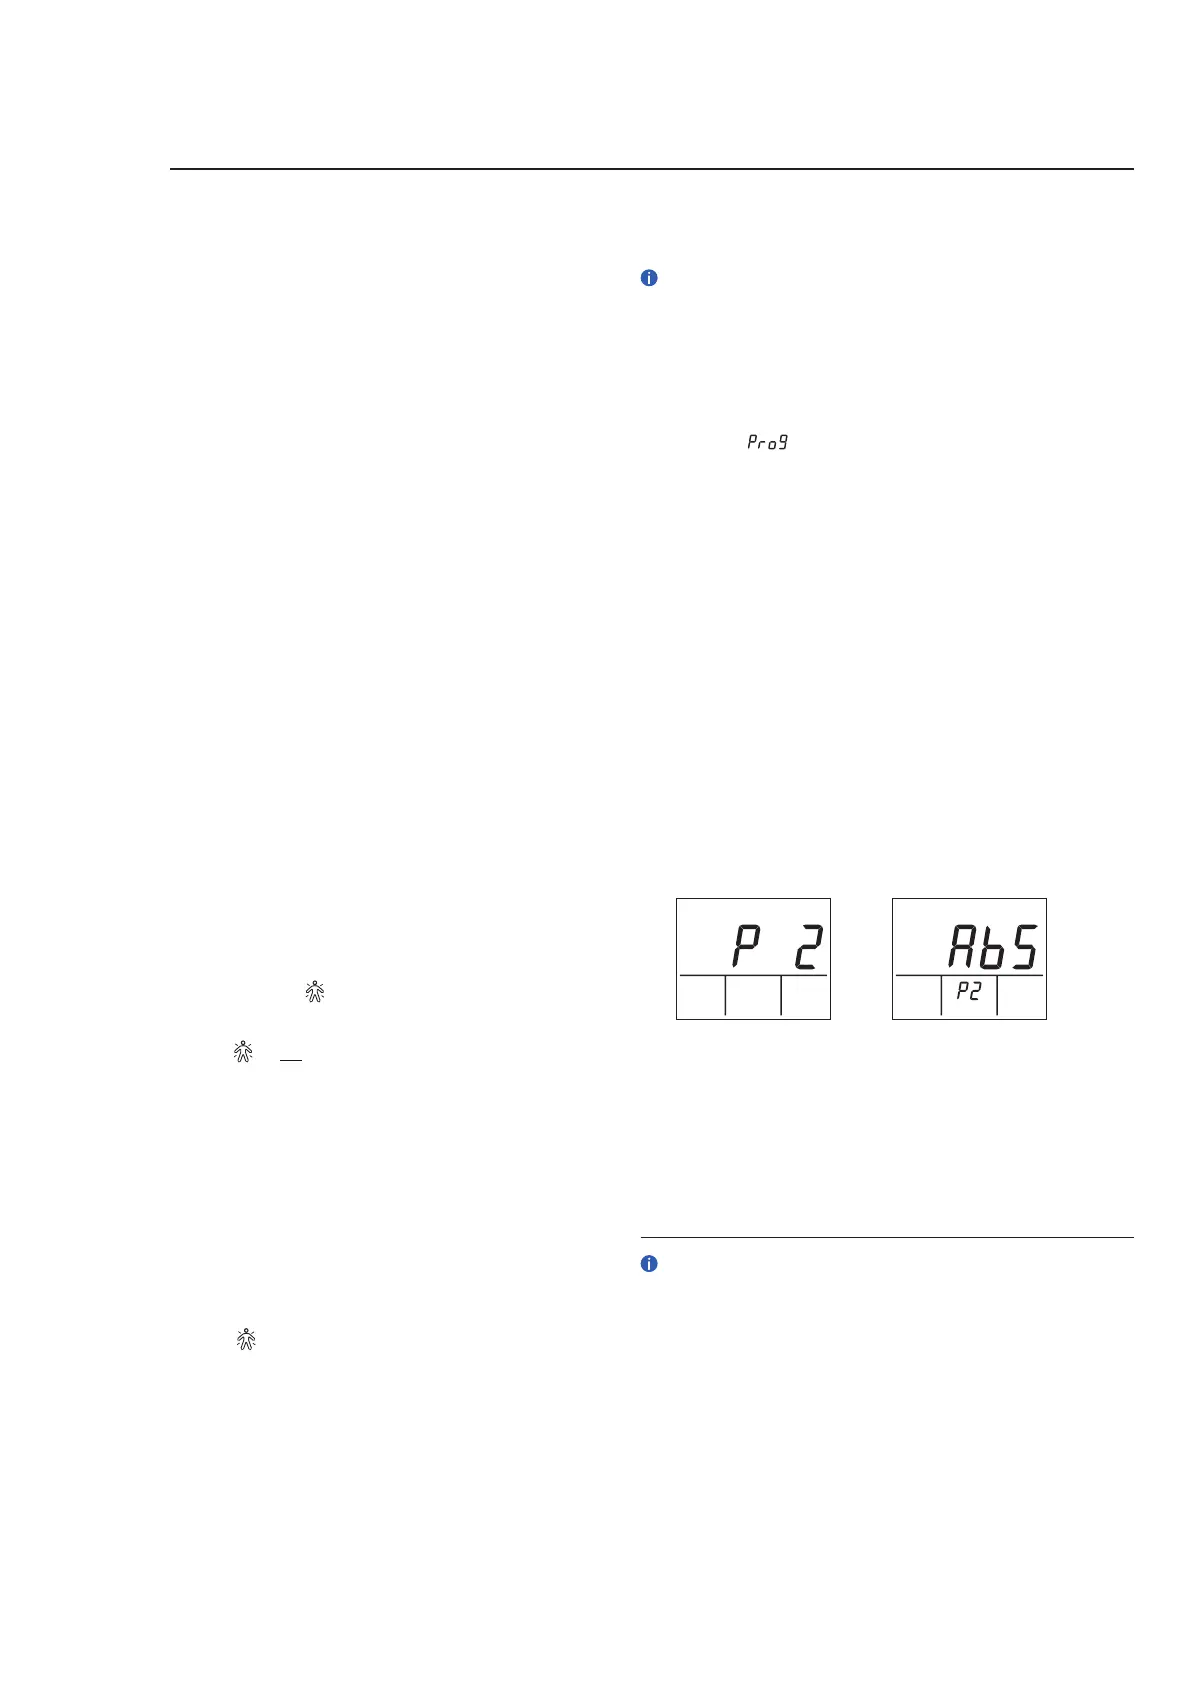
Setting Parameters
1. Press the Up/Down Buttons to select a setting from P1 to P13. The
parameter number will be displayed in the Primary display (The
Parameters are detailed on the next page).
2. Press the Select Button to modify the specific parameter to
change. The parameter number will drop to the secondary display
and the primary display will be used for parameter changes.
3. Change the parameter value using the Up/Down buttons.
4. Press the Select Button to save the changes.
5. If required, press the Up/Down Buttons to select the next
parameter.
Exiting the Parameter Menu
To exit the Parameter menu, press the Up, Down & Select buttons
together.
Alternatively the display will automatically revert aer button inactivity
for 30 seconds.
MONTH
ON START STOP kWh
Parameter Menu Parameter 2 Options
Selecting and Modifying a Parameter
• Refer to the typical configuration for programming of your Innotech
Controller.
• Where used, P# refers to a Parameter number. ie: P1 = Parameter 1.
 Loading...