Do you have a question about the Inside Weather ALTO and is the answer not in the manual?
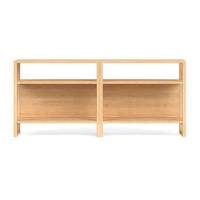
Lists all available components for the shelf assembly, including body, legs, and hardware for configuration and mounting.
Instructions for attaching the first leg to the shelf body, including placement and screw usage.
Guidance on repeating the leg attachment process for the second leg of the shelf unit.
Procedure to safely turn the assembled shelf unit upright onto its legs.
Details on connecting multiple shelf units together using L-brackets and screws.
Instructions for using the mounting template, leveling, checking for studs, and marking hole locations.
Process for creating pilot holes on the wall using mounting screws and the template.
Guidance on inserting wall anchors into pre-drilled holes for secure mounting.
Instructions for reinstalling screws into anchors, leaving them extended for unit attachment.
Final procedure for lifting and sliding the shelf unit onto the wall-mounted screws.
Confirmation that the unit is securely attached and ready for use.
| Category | Indoor Furnishing |
|---|---|
| Brand | Inside Weather |
| Product Name | ALTO |
| Assembly Required | Yes |
| Color Options | Multiple |