IMPORTANT SAFEGUARDS
Before using the coee maker, the following basic precautions
should always be followed:
1 Read all instructions.
2 Do not operate the coee maker without water.
3 Make sure that your outlet voltage corresponds to the voltage
stated on the rating label of the coee maker.
4 To protect against re, electric shock, and injury to persons, do
not immerse the cord, plug, or coee maker in water or other
liquid.
5 Do not leave the coee maker unattended.
6 Unplug the coee maker from the outlet when not in use and
before cleaning. Allow to cool before putting on or taking o
parts, and before cleaning the coee maker.
7 Do not operate the coee maker if it has been damaged or if it
malfunctions. Return the coee maker to an authorized service
facility for repair or examination.
8 The use of attachments not recommended by the appliance
manufacturer may result in re, electric shock, or injury.
9 Do not use outdoors.
10 Place the coee maker on a at surface or table and do not let
the cord hang over the edge of a table or counter, or touch a
hot surface.
11 Do not place on or near a hot gas or electric burner, or in a
heated oven.
12 Do not use the coee maker for anything other than its
intended use.
13 To remove the plug from a wall outlet, always hold the plug.
Never pull the cord.
14 To avoid splashing hot water, do not open the water tank
during brewing.
15 This coee maker is not intended for use by persons (including
children) with reduced physical, sensory, or mental capabilities,
or lack of experience and knowledge, unless they have been
given supervision or instruction concerning use of the coee
maker by a person responsible for their safety.
16 Do not allow children to use or play with the coee maker.
17 Do not touch hot surfaces. Use handles or knobs.
SAVE THESE INSTRUCTIONS
FOR HOUSEHOLD USE ONLY
POWER CORD SAFETY
This coee maker has a polarized plug (one blade is wider
than the other). To reduce the risk of electric shock, this plug
is intended to t into a polarized outlet only one way. If the
plug does not t fully into the outlet, reverse the plug. If it
still does not t, contact a qualied electrician. Do not
attempt to modify the plug in any way.
• A short power cord is provided to reduce risks resulting
from becoming entangled in or tripping over a long
cord.
• The coee maker is provided with non-detachable
power cord terminated in a 2-wire polarized type plug.
PACKAGE CONTENTS
• Coee maker (including the carafe)
• Permanent lter
• Funnel
• Measuring spoon
• Quick Setup Guide
FEATURES
• Brews up to 12 cups of coee
• Automatic pause and serve
• Delay brew allows you to pre-program your coee
maker up to 24 hours in advance
• Two-hour auto shut-o for safety
• Multiple brew functions
• Electronic control, LCD display, with blue backlight
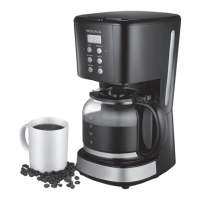
Coee maker, carafe, and measuring spoon
Control panel
Before using your new product, please read
these instructions to prevent any damage.
QUICK SETUP GUIDE
|
NS-CMSS6
12-cup Programmable Coee Maker
Lid
Water reservoir
Funnel support
Water gauge
Control panel
(see below)
Warming plate
Filter
Funnel
Measuring
spoon
Carafe lid
Carafe
FIRST USE
Clean your coee maker before the rst use. See “Cleaning
and Maintenance” for instructions. You may notice a slight
odor the rst time you use your coee maker. This is normal
and will not happen after a few uses.
BREWING COFFEE
1 Fill the carafe to the desired cup size level with cool
drinking water, then pour it into the water reservoir. Do
not ll the water reservoir above the Max ll line.
2 Place the funnel into the funnel support and make sure
that the funnel is placed correctly. Put the lter into the
funnel correctly.
3 Add coee to the lter, then close the lid.
Tip: Use approximately one measuring spoon full per cup of
water in the water reservoir.
4 Place the carafe on the warming plate.
5 Plug the power cord into the outlet. The LCD displays
AM12:00 and the colon ashes.
6 Press the ON/OFF button once. The ON/OFF LED lights
blue. The brew cycle starts.
7 After the brewing cycle is done, remove the carafe and
serve the coee.
8 Turn the coee maker o and disconnect the power
supply when not in use.
Caution: When pouring coee, don’t pour the coee too fast!
PAUSING TO SERVE
1 You can pause brewing at any time by pressing the
ON/OFF button once or taking the carafe o the
warming plate.
2 To resume brewing, press the ON/OFF button or return
the carafe to the warming plate.
Program
Minute
Hour
Delay Brew
On/Off
LCD display
ON/OFF
button
ON/OFF
LED
Program
button
Delay Brew
button
Minute
button
Hour
button
Delay Brew
LED