EasyManua.ls Logo

Insignia NS-DV720PBL2 - User Manual

Insignia NS-DV720PBL2
28 pages
Print Icon
To Next Page IconTo Next Page
Loading...
720p HD Digital Camcorder
NS-DV720PBL2
User Guide

Table of Contents

Other manuals for Insignia NS-DV720PBL2

Questions and Answers

  • K
    keithcrossJul 30, 2025
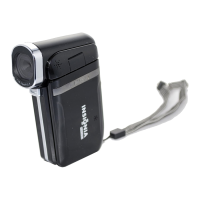
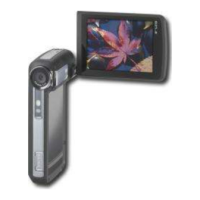
    What to do if files on Insignia NS-DV720PBL2 Camcorder memory card don't display smoothly?
    • W
      wrightdonnaJul 30, 2025
      If the files on your memory card aren't displaying smoothly and the LCD shows an “!” icon, it means the SD card is low speed or the files on the card are the wrong type. To resolve this, format your card using your Insignia Camcorder instead of a computer.
  • R
    rdavidAug 6, 2025
    Why do indoor pictures look blurry and dark with Insignia NS-DV720PBL2?
    • J
      johnsondustinAug 7, 2025
      If your indoor pictures taken with your Insignia Camcorder look blurry and dark, it's because the camcorder extends the exposure time in low-light conditions. To fix this, keep both the camcorder and the subject steady for a few seconds when taking pictures. The shutter sound indicates when the picture is taken.
  • T
    Terry MooreAug 14, 2025
    How to fix blurry image on Insignia NS-DV720PBL2 LCD?
    • T
      Tammie JonesAug 15, 2025
      If the image on the LCD of your Insignia Camcorder is blurry, try switching between Macro and Normal mode. Use Macro mode for objects between 6 in. ~ 10 in. (15 cm ~ 25 cm) away. Use Normal mode for objects over 5 ft. (150 cm) away.
  • N
    Nicole HaydenAug 22, 2025
    Why is the LED light on my Insignia NS-DV720PBL2 not working?
    • M
      Megan GibsonAug 22, 2025
      If the LED light on the front of your Insignia Camcorder isn't working, it may be due to low battery power. Charge the battery. Also, note that you cannot turn on the LED light while recording. Stop recording first, turn on the light, and then start recording again.

Summary

Important Safety Instructions

Introduction

Features Overview

Package Contents

System Requirements

Camcorder Front View

Camcorder Back View

Camcorder Right View

Camcorder Left View

Camcorder Bottom View

LCD Recording Mode Icons

LCD Playback Mode Icons

Setting Up Your Camcorder

Installing the Battery

Steps to install the battery: slide cover, insert battery, replace cover.

Charging the Battery

How to charge: use adapter/USB cable, turn off camcorder, connect to outlet/computer.

Inserting or Removing an SD;SDHC Memory Card

Steps to insert/remove card, notes on capacity and protection tab.

Protecting Data on an SD;SDHC Memory Card

Use protection tab to prevent recording or deletion of pictures or movies.

Getting Started

Turning Your Camcorder On or Off

How to power on/off: press/hold power button or open/close LCD panel.

Turning On Your Camcorder for the First Time

Initial setup: choose language, set date and time.

Initial Settings

Recording a Movie

Viewing Movies

Deleting Movies

Taking a Picture

Taking a Close-Up Picture

Viewing Pictures

Deleting Pictures

Using Camcorder Features

Using the Light

How to use built-in light for low-light conditions: press switch, aim, record, turn off.

Using the Self-Timer

How to use self-timer: aim, press, wait 10 seconds for picture.

Using Zoom

Adjusting Camcorder Settings

Turning Simple Mode Off

Steps to disable Simple Mode for advanced settings access.

Turning Operation Sounds On or Off

How to enable/disable function sounds for key operations.

Setting the Video Format

Turning Stabilization On or Off

Turning Motion Detection On or Off

Selecting the Scene Mode

Adjusting the Color Balance

Imprinting the Date and Time on Pictures

Setting the Date and Time

Erasing Memory Card or Internal Memory

Selecting the Menu Language

Turning Help Text On or Off

Selecting the TV Format

Selecting the File Format for Movies

Resetting to Factory Defaults

Viewing Movies and Pictures on a TV

Connecting to an HDMI Enabled TV

Steps to connect camcorder to TV using an HDMI cable.

Connecting to a TV Using the Supplied A;V Cable

Steps to connect camcorder to TV using the supplied A/V cable.

Viewing Movies and Pictures on a Computer

Installing Software

How to install ArcSoft Medialmpression software for media management.

Transferring Movies or Pictures to a Computer

Steps to connect camcorder to computer via USB for file transfer.

Burning a Movie to a DVD

Troubleshooting Common Issues

Specifications and Default Settings

Specifications

Technical details: image sensor, lens, zoom, resolution, battery, dimensions, weight.

Default Settings

Factory default configurations for resolution, stabilization, scene, and other settings.

Legal Notices

FCC Part 15 Compliance

Compliance with FCC rules for digital devices and interference limits.

FCC Warning

Warning about unauthorized modifications that could void user's authority to operate.

Canada ICES-003 Statement

Compliance with Canadian digital apparatus standards.

One-Year Limited Warranty

Insignia NS-DV720PBL2 Specifications

General IconGeneral
Video Resolution720p
Battery LifeUp to 2 hours
Weight0.6 lbs
Digital Zoom4x
Image Sensor TypeCMOS
Battery TypeLithium-ion
HDMI OutputYes
USB InterfaceUSB 2.0
Display2.7 in. LCD
StorageSD/SDHC card support

Related product manuals