EasyManua.ls Logo

InSinkErator HWT-00 - User Manual

InSinkErator HWT-00
3 pages
Print Icon
To Next Page IconTo Next Page
Loading...
Tank Replacement | Instruction Sheet
Steaming Hot Water Taps
12345
STEP
1
PREPARATION
Unplug tank.
Run water from tank until cool. Turn off water supply.
Hot
(red)
12345
STEP
REMOVE LINE/TANK
Remove inlet tube.
Remove outlet and
vent tubes from fittings.
23
1
2
Lift old tank off mounting
bracket or screws.
Drain water into empty
sink or container.
Hang new tank on mounting
bracket or screws.
MOUNT TANK
12345
STEP
3
FILL TANK & CONNECT POWER
If no leaks, plug in tank.Check for leaks around fittings.
Activate HOT handle
and hold until water flows
from the spout (1-2 min.)
To flush lines, run the water
for at least 2 min. (both hot
and cold handles if applicable).
Turn on water supply.
A
C
B
D
Hot
(red)
12345
STEP
5
Note: Gurgling or hissing is normal during initial heating cycle. Allow
12-15 minutes for water to reach desired temperature.
Note: Snap connect fitting not included.
Note: A minimal amount of water might spill when removing it
from the cabinet. Have a towel available for clean-up.
CONNECT LINE
Attach inlet tube.
Attach outlet and
vent tubes to fittings.
3
1
2
Inlet
(blue)
Outlet
(white)
6.4mm
8mm
11mm
Vent
(clear)
12345
STEP
4
Note: DO NOT plug in yet.
This appliance must be grounded. This steaming hot water tap is
equipped with a cord that has a grounding conductor and a grounding
pin. The plug must be connected to an appropriate outlet that is properly
installed and grounded in accordance with all local codes and ordinances.
DO NOT modify the plug provided with the appliance – if it will not fit the
outlet, have a proper outlet installed by a qualified electrician. Check with
a qualified electrician or serviceman if you are in doubt as to whether the
steaming hot water tap is properly grounded.
A steaming hot water tap, like any water heater, has a limited life and will
eventually fail. To avoid possible property damage and personal injury,
this steaming hot water tap should be regularly examined for leakage and/
or corrosion and replaced when necessary. A drain pan, plumbed to an
appropriate drain or outfitted with a leak detector, should be used in those
applications where any leakage could cause property damage. To check
for corrosion, examine the appearance of the dispensed water in a clear glass
once every three (3) months. If there is any discoloration or rusty appearance
unplug and drain unit. If the water discoloration remains after draining and
refilling unit, discontinue use and contact an authorized
InSinkErator service agent.
Electric Shock Hazard: Using an ungrounded or improperly connected
appliance can result in serious injury or death from electrical shock.
Personal Injury/Property Damage: This tank is a non-pressurized
tank. DO NOT modify this system. DO NOT close vent tube
or connect other type taps or valves to the tank. Use only the
InSinkErator tap. Use only parts provided. Contact an authorized
InSinkErator Service agent for repairs or replacement components.
Fire Hazard: To minimize possibility of fire, DO NOT store flammable
items such as rags, paper or aerosol cans near the tank. DO NOT
store or use gasoline or other flammable vapors and liquids in the
vicinity of this or any other appliance.
Leak Hazard: Regularly inspect dispenser and plumbing fittings for
leaks, which can cause property damage and could result in
personal injury
For your satisfaction and safety, read all instructions, cautions and
warnings before installing or using this steaming hot water tap.
Make sure that all electrical wiring and connections conform to
local codes.
A standard, earth (grounded) electrical outlet is required under the sink for
the tap’s electrical power.
The wall outlet powering your tap must have electrical power supplied to
it continuously.
This outlet must be fused and should not be controlled by the same
wall switch that operates the food waste disposer. Fuse/circuit breaker
required is 10 amp for 230 volt (10 amp for 220-240 volt UK) and 15 amp
for 120 volt.
To ensure proper operation, this unit is not intended to be flushed with
chlorine. If you suspect elevated levels of chlorine in your water, it is
recommended to use our water filtration system.
In Australia, all plumbing and electrical work must be completed by a
qualified tradesperson.
To prevent damage or unit not operating properly, the water pressure
must be between 172 kPa - 862 kPa (1.7 bar - 8.6 bar; 25 psi - 125 psi).
Ambient (room) temperature between 10ºC and 38ºC. In Australia, an
Australian water mark approved 350 kPa set pressure limiting valve and
dual check valve must be used.
Moving parts inside the tank causing a rattling noise is normal.
If the supply cord is damaged, it must be replaced by the manufacturer,
its service agent or similarly qualified persons in order to avoid a hazard.
WHAT YOU SHOULD KNOW BEFORE YOU BEGIN
PARTS INCLUDED
19mm Screws (2)
DO NOT alter or remove the ground pin from power cord.
Using an ungrounded appliance can result in serious injury or death
from electric shock.
This appliance must be grounded – the power cord is equipped
with an equipment grounding conductor and a grounding pin. The
plug must be connected to an appropriate outlet, properly installed
and grounded in accordance with all local electrical codes and
ordinances.
Water must flow from faucet prior to plugging unit into electrical
outlet. DO NOT plug in yet.
NOTICE
Snap connect fitting not included. Required when
replacing tank manufactured prior to January 2006. Call
the AnswerLine® 1-800-558-5700 to order.
STOP
STOP
WARNING
WARNING
WARNING
WARNING
WARNING
Question and Answer IconNeed help?

Do you have a question about the InSinkErator HWT-00 and is the answer not in the manual?

Summary

Important Information Before Installation

Safety and Operational Precautions

Essential safety guidelines covering electrical hazards, personal injury, fire risks, and leak prevention.

Included Parts and Preparation

Parts Included Overview

Details on the components provided with the unit, including screws and optional fittings.

Installation Preparation Steps

Steps to prepare for installation, including turning off the water supply and initial tank checks.

Installation Procedure

Remove Existing Line and Tank

Instructions for safely disconnecting and removing the old tank and its associated lines.

Mount New Tank

Guidance on securely mounting the new tank in the correct orientation.

Connect Lines and Fill Tank

Steps for attaching inlet, outlet, and vent tubes, and filling the tank with water.

Connect Power and Test

Procedure for connecting the unit to power, activating the hot handle, and checking for leaks.

Warranty Information

Warranty Coverage Details

Information on what is covered and not covered by the product warranty.

Warranty Service Procedure

Explanation of how to claim warranty service and what the manufacturer will do.

Limitation of Liability

Legal disclaimers regarding consequential damages and manufacturer liability.

Overview

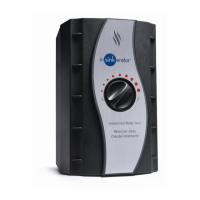
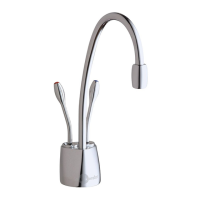
This document describes the InSinkErator Steaming Hot Water Tap, a device designed to provide instant hot water for various kitchen tasks. The manual covers installation, usage, maintenance, and safety guidelines for the tank replacement process.

The primary function of the InSinkErator Steaming Hot Water Tap is to deliver near-boiling water on demand, making it convenient for preparing hot beverages, cooking, and other kitchen needs. The system consists of a tap and an under-sink tank that heats and stores water.

Installation and Setup:

Before installation, it is crucial to read all instructions, cautions, and warnings to ensure safety and proper operation. All electrical wiring and connections must conform to local codes. A standard, grounded electrical outlet is required under the sink, and it must provide continuous power. The outlet should be fused (10 amp for 230V/220-240V UK, 15 amp for 120V) and not controlled by the same wall switch as a food waste disposer.

The water pressure must be maintained between 172 kPa and 862 kPa (25-125 psi), with an ambient temperature between 10°C and 38°C. In Australia, an Australian WaterMark approved 350 kPa set pressure limiting valve and dual check valve are required.

The installation process involves several steps:

  1. Preparation: Turn off the water supply and unplug the old tank. Run water from the old tank until cool. Remove the inlet, outlet, and vent tubes from the fittings. Lift the old tank off its mounting bracket or screws and drain any remaining water into a sink or container. A towel should be available for cleanup as a minimal amount of water might spill.
  2. Mounting the Tank: The new tank must be mounted level to ensure proper operation. It should be positioned vertically within 400mm of the faucet water lines and within 760mm of a standard grounded outlet. Mark locations for two hanging screws, leaving 6.4mm for the hanging tank. Pre-drill 3mm pilot holes and install the provided screws (for wood only) or use wall anchors (for drywall), leaving 6.4mm exposed. Hang the new tank on the screws and tighten them 1/2 turn clockwise, being careful not to overtighten.
  3. Connecting Lines: Attach the inlet tube to the tank. Then, attach the outlet and vent tubes to their respective fittings. Note that snap connect fittings are not included and may be required for tanks manufactured prior to January 2006.
  4. Filling the Tank and Connecting Power: Turn on the water supply. Activate the HOT handle and hold it until water flows from the spout (approximately 1-2 minutes). To flush the lines, run water for at least 2 minutes (using both hot and cold handles if applicable). Check for leaks around all fittings. If no leaks are present, plug in the tank. It is crucial not to plug in the unit until water has flowed from the faucet.

Usage Features:

The InSinkErator Steaming Hot Water Tap is designed for ease of use. Once installed and powered, the tank will begin heating the water. Gurgling or hissing sounds are normal during the initial heating cycle. It typically takes 12-15 minutes for the water to reach the desired temperature. The tap provides instant access to hot water, making tasks like making tea, coffee, or preparing instant meals much quicker.

Maintenance Features and Safety Guidelines:

Regular maintenance and adherence to safety guidelines are essential for the longevity and safe operation of the steaming hot water tap.

  • Grounding: The appliance must be properly grounded to prevent electric shock. The power cord is equipped with a grounding conductor and a grounding pin. The plug must be connected to an appropriate, properly installed, and grounded outlet in accordance with all local codes. Do not alter or remove the ground pin from the power cord, and do not use an extension cord set with the unit.
  • Water Quality: To ensure proper operation, the unit is not intended to be flushed with chlorine. If elevated levels of chlorine are suspected in the water, using a water filtration system is recommended.
  • Tank Integrity: The tank is a non-pressurized unit. Do not modify the system, close the vent tube, or connect other types of taps or valves to the tank. Only use parts provided by InSinkErator. Contact an authorized InSinkErator Service agent for repairs or replacement components.
  • Leak Prevention: Regularly inspect the dispenser and plumbing fittings for leaks. Leaks can cause property damage and personal injury. A drain pan, plumbed to an appropriate drain or outfitted with a leak detector, should be used in applications where leakage could cause property damage.
  • Corrosion Check: Examine the appearance of dispensed water in a clear glass every three months. If there is any discoloration or rusty appearance, unplug and drain the unit. If the water discoloration persists after draining and refilling, discontinue use and contact an authorized InSinkErator service agent.
  • Fire Hazard: Do not store flammable items (rags, paper, aerosol cans, gasoline, or other flammable vapors and liquids) near the tank or any other appliance.
  • Product Lifespan: Like any water heater, the steaming hot water tap has a limited life and will eventually fail. To avoid property damage and personal injury, the tap should be regularly examined for leakage and/or corrosion and replaced when necessary.

Warranty Information:

The product comes with a warranty provided by InSinkErator. The warranty covers defects in materials and workmanship for a specified "Warranty Period," which begins on the later of the original installation date, purchase date, or manufacturing date (identified by the serial number). Documentation supporting the installation or purchase date is required. The warranty covers replacement parts and labor costs for residential use only.

The warranty does not cover losses or damages resulting from conditions beyond the manufacturer's control, including accident, alteration, misuse, abuse, neglect, improper installation, or failure to maintain the product according to instructions. Normal wear and tear, such as cosmetic rust, scratches, and dents, are also not covered. The warranty does not apply to products installed in commercial or industrial applications.

In the event of a covered claim, InSinkErator or its authorized service representative will either repair or replace the product at no cost to the customer. Repair or replacement will be determined at their sole discretion. All services will be provided at the customer's home. The warranty on a replacement product will be limited to the unexpired term of the original warranty.

InSinkErator's liability is limited to the price paid by the original owner for the product and does not cover incidental, special, indirect, or consequential damages, including economic loss, business interruption, or loss of use or revenue.

InSinkErator HWT-00 Specifications

General IconGeneral
Voltage120 volts
InstallationUnder-sink
MaterialStainless steel
Wattage1300 W
FinishStainless steel
Capacity60 cups per hour

Related product manuals