PAYLOAD & COMPASS CALIBRATION
The payload calibration and the compass calibration must be performed once with each payload. If the status display
shows the message “No calib on payload found!”, you must perform the payload calibration rst. If the status display
shows the message “No c.calib. matching pID, using default.”, you must perform the in-ight compass calibration
additionally. Once performed the payload calibration is stored in the payload and the compass calibration in the UAS.
Every time the payload is attached the correct calibration parameters are recalled automatically.
Payload calibration
The payload calibration can be done indoors with the
motors switched o.
1. Attach the payload with which the calibration shall be
performed.
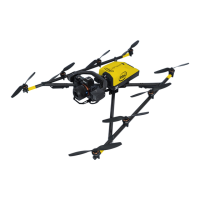
2. Switch on the payload, the Intel® Falcon™ 8+ Drone
and the Intel® Cockpit Controller.
3. On the Intel® Cockpit Controller push the ENT button
of the status display and navigate to Settings >
Payload calib.
4. Make sure that the camera can turn freely from
the full down position to the full up position (with
the Inspection Payloads, you will need to raise the
Intel® Falcon™ 8+ a bit to make sure the payload does
not hit the ground when it tilts downwards).
5. Press ENT to start the calibration. The camera will
rst rotate fully downwards and then progressively
move to the fully upwards position (do not touch the
Intel® Falcon™ 8+ during the process).
6. When the payload does not move anymore, switch o
the payload, the Intel® Falcon™ 8+ and Intel® Cockpit
Controller and restart the system.
It is important to restart the system
immediately after each calibration process.
Only after the restart the new calibration
parameters will become active.
7. Repeat the above steps once for every payload which
shall be used with the Intel® Falcon™ 8+.
Compass calibration
The compass calibration needs to be done in ight while
outdoors.
1. Attach the payload with which the compass
calibration should be performed.
2. Take the Intel® Falcon™ 8+ out in the field to a
spot with good GPS reception and no magnetic
disturbances.
3. Switch on the payload, flight system and Intel®
Cockpit Controller as usual and take off.
4. Have the Intel® Falcon™ 8+ hovering in GPS mode
in around 30m of altitude where no magnetic
disturbances are to be expected.
5. Push the ENT button of the status display on the
Intel® Cockpit Controller to enter the menu and
navigate to Settings > Compass calib.
6. Push ENT to confirm. The Intel® Falcon™ 8+ will
make a 400° turn.
7. Once the Intel® Falcon™ 8+ finished the turn, please
land, switch off the camera, the Intel® Falcon™ 8+
and the Intel® Cockpit Controller and restart the
complete system.
It is important to land and restart the
system immediately after each calibration
process. Only after the restart the new
calibration parameters will become active.
8. Repeat the above steps once for every payload which
shall be used with the Intel® Falcon™ 8+.
Learn more: http://intel.com/Falconmanual.
Disclaimer: The information contained herein is subject to change without notice. All statements, information and recommendations contained herein do not constitute a warranty of any kind, either expressed or implied.
Intel Deutschland GmbH | Konrad-Zuse-Bogen 4 | 82152 Krailling, Germany | wwww.intel.com/drones © Intel Deutschland GmbH
English

 Loading...