2) The valve of the outdoor unit should be closed completely (as in
the factory status). Every time when connecting the pipe, screw off
the nut at the valve, and connect the flared pipe (within 5 minutes). If
the nut is put away for a long time after being screwed off the valve,
dust and other foreign substance may intrude into the pipeline
system and lead to fault.
3) After the refrigerant pipe is connected to the indoor and outdoor
units, expel air as instructed in the “Expel air” section. After expelling
the air, screw up the nut at the maintenance orifice.
a.Precautions for the flexible part of the pipeline
i.The bend angle shall not exceed 90°. (See Fig.6-2)
ii. The bend shall be preferably in the middle of the pipe length, and
higher bend radiuses are preferred.
iii. Do not bend the flexible pipe for over 3 times.
b. Bend the thin-wall connective pipe (See Fig.6-3)
i. When bending the pipe, cut out a notch of the desired size at the
bend of the adiabatic pipe, and then expose the pipe (wrap the pipe
with the wrapping tape after bending it).
ii. The radio of the elbow pipe should be as large as possible to
prevent flattening or crush.
iii. Use the pipe bender to make close elbow pipe.
c. Use purchased copper pipe
When the cooper pipe is purchased from the market, be sure to use
the heat insulation materials of the same type (with a thickness of
over 9mm).
2. Deploy the pipelines
1) Drill a porthole on the wall, and put the hole sheath and hole
cover through the wall.
2) Place the connective pipe together with the indoor & outdoor
connection wires. Use wrapping tape to tie them tight. Do not let
air penetrate into it lest condensation and drips of moist.
3) Pull the connective wrapped connective pipe from outdoor
through the sheath, which gets through the wall, and lead it into
the room.
3. Make a vacuum of connective pipeline.
4. After the above steps are completed, the spool of the valve of
the outdoor unit should be completely open, and the refrigerant
pipeline of the indoor unit and the outdoor unit should be smooth.
5. Use a leak detector or soap water detect leak carefully to
prevent leakage.
6. Put on an adiabatic envelope (accessory) at connective pipe
adapter of the indoor unit, and wrap it tight with the wrapping tape
lest condensate and leakage.
Fig.6-2
Fig.6-3
Use a thumb to bend the pipe
Minimum radius 100mm
Method of unleashing the spooled pipe
Straighten the pipe end
6.4 Pipeline connection
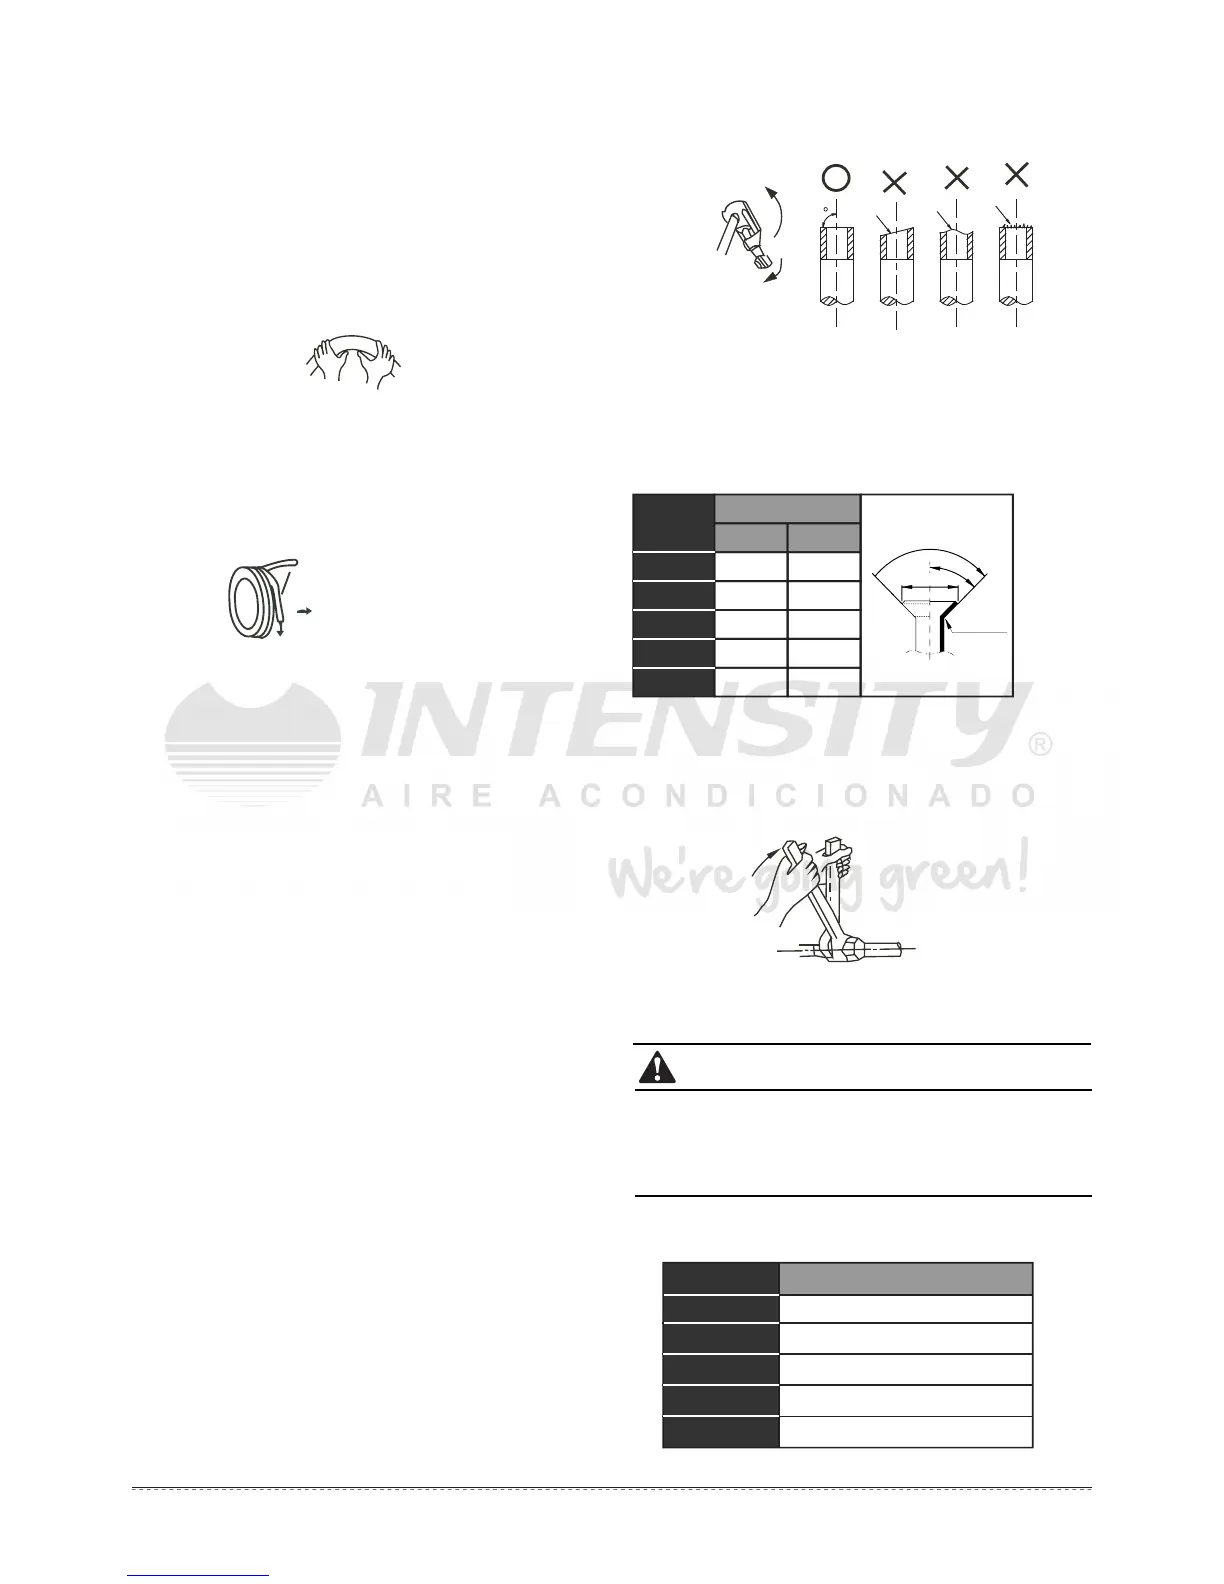
1. Flare
1) Use a pipe cutter to cut off the pipe (See Fig.6-4)
Burr
Slant
Coarse
Fig.6-4
2) Pull the pipe into the rear flare of the connective nut. (Refer to
Table: 6-3)
º
º
º
º
º
$PP
Table: 6-3
Max. Min.
2. Tighten the nut
Align with the connective pipe, screw up the connection pipe nut
manually, and use a spanner to tighten it as shown in Fig.6-5.
Fig.6-5
CAUTION
According to the installation conditions, too large torque will
damage the flaring, and too small torque will lead to looseness
and leakage. Determine the tightening torque by reference to
Table: 6-4.
Table: 6-4
Outer
diameter
(mm)
R0.4~0.8
45
°
±
2
90
°
±
4
A
 Loading...