3. Add dye to your shirt - you can dye
the whole shirt, or just squirt dye onto
the small sections that are sticking up.
Top Tip:
To create small dots, only leave
1 - 2cm of fabric outside of the
elastic band. Larger dots can be
made by tying the fabric further
down so that a larger section of
fabric sticks out.
2. Then, put your thumb and index finger
in the centre of the shirt. Begin moving
them in a circular motion, spiralling the
shirt around the centre point.
When you have spiralled the entire shirt,
loop elastic bands around the shirt.
7. Once your shirt is covered with dye,
pop the shirt into a plastic bag and
leave it to set. Follow the instructions
in Section 1 to finish your shirt.
Create Polka Dots
1. To create a polka dot design, take
your shirt, and pinch small sections of
fabric between your fingers.
2. Wrap an elastic band around the
end of the fabric.
3. Use at least three elastic bands over
the shirt to create 6 sections.
It’s now time to dye your shirt!
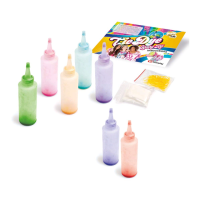
4. First put on the gloves provided in
the kit, then mix your dye following
the instructions on page 5.
5. Using the squirt bottle upside down
apply colour directly to the shirt.
6. Once the top side of your shirt is
covered in dye, turn the shirt over and
cover this side with dye.
8 9