L
M
H
2H
4H
8H
Ion
On/Off
UV
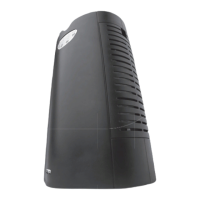
CONTROL PANEL
1.
“ON / OFF“ Button
Press this button to turn on or switch o the unit.
2.
“Timer” Button
a) By pressing this button, the purifier can operate for intervals of 2, 4 or 8 hours, stop-
ping automatically when the selected operating time has elapsed.
b) Press this button
(Timer) to select the required operating time. A warning light
automatically indicates the remaining operating time.
c) To select the continuous operating mode, press the button repeatedly until there are
no further indicator lights.
3.
“Speed“ Button
The fan speed of the unit can be adjusted when the unit is in operation. Each time that
you press the
(SPEED/ON) button, the speed is adjusted from L (low) to M (medium)
to H (high).
a) When the unit is switched on, it is automatically positioned in L (low) mode.
b) To change this speed, press the
(SPEED/ON) button again. The red LED light indi-
cates the selected speed.
c) We suggest the use of high speed setting for the first 30 minutes of usage.
4.
“Ionisator and UV“ Button:
a) 1st press: Ionizer and UV lamp on.
b) 2nd press: Ionizer o and UV lamp on.
c) 3rd press: Ionizer o and UV lamp o.
30 | 31
GB
The default setting is Ionizer on and UV lamp o. The purifier will be set back to the
default setting after you press the button more than 3 times.
Important note: When the unit is not in use, please switch it o and unplug it.
PRE-OPERATING INSTRUCTIONS
When removing the unit from the packing, check for any shipping damage.
PLEASE FAMILIARISE YOURSELF WITH THE FOLLOWING PROCEDURES BEFORE OPE-
RATING YOUR NEW AIR PURIFIER.
a) Remove the plastic protective wrap from the for 3-in-1 filter pads (HEPA, active
carbon and PCO filters). After removing the protective wrap, re-install the filters in
accordance to the instructions set out in the “filter replacement” section.
b) After installing the filters, choose a suitable location to position the unit.
c) Plug the unit in.
d) See “control panel” section for details on the various features.
CARE AND CLEANING
Plastic housing – Dirt, dust or spots can be wiped away with a damp soft cloth and non-
abrasive cleaner. Treated with care, this high quality air purifier will retain its attractive
appearance for many years.
The pre-filter can be cleaned with a vacuum cleaner and can also be washed in cold
water.
WARNING: Do not wash the 3-in-1 filter pads; they are disposable items.