85PO
SAVE THESE INSTRUCTIONS
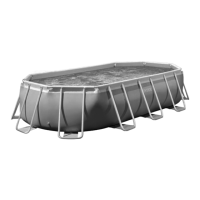
(85PO) PRISM FRAME™ OVAL PREMIUM POOL ENGLISH 7.5” X 10.3” PANTONE 295U 05/13/2020
English
Page 12
POOL SETUP
(
continued
)
6.
Withonepersonstandinginsidethepool,raiseonecorner;
insert the connecting rod
(10)
intotheoverlappingopenings,
to connect the liner straps to the restrainer straps. Repeat
the operation in the other corners and then
on the sides
(see drawings 6.1 & 6.2)
.
7.
Pull the bottoms of the side supports out away from the
liner to make the straps taut. Repeat for all locations
(see drawing 7)
.
8.
Ifthegroundisnotconcrete(asphalt,lawnorearth)you
mustplaceapieceofpressure-treatedwood,size
15”x15”x1.2”,undereachlegandsetflushwiththe
ground. The U-shaped side supports must be placed in
the center of the pressure-treated wood and with the wood
grain perpendicular to the support leg
(see drawing 8
).
NOTE:
Make sure each support pad is recessed and set
flush with the ground and not just placed on the ground.
Donotusesupportpadsorslabswithslippery,smooth
surfaces as the U-shaped side support will slide outward
causingdamagetothepoolandvoidthewarranty.
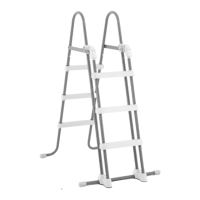
9.
Assemble the ladder. The ladder has separate assembly instructions in the ladder box.
10.
Placetheassembledladderoveroneofthesideswithoneofthelinerinstallationteammembers
enteringthepooltosmoothoutallbottomlinerwrinkles.Whileinsidethepoolthisteammember
shouldcheckthe2drainvalves(incorners)tobesuretheinsidedrainplugisinsertedintothevalve.
This team member should push each inside corner in an outward direction.
11.
Before filling the pool with water, ensure that the drain plug inside the pool is closed and that the drain
capontheoutsideisscrewedontightly.Fillthepoolwithnomorethan1inch(2.5cm)ofwater.Check
toseewhetherthewaterislevel.Alsomakesureallthecornerjoints
(6)
are properly inserted into the
beams before continue filling the pool with water.
IMPORTANT: If the water in the pool flows to one side, the pool is not completely level. Setting
up the pool on unleveled ground will cause the pool to tilt resulting in the sidewall material to
bulge. If the pool is not completely level, you must drain the pool, level the area and re-fill the
pool.
Smoothouttheremainingwrinkles(frominsidepool)bypushingoutwherethepoolfloorandpool
sidesmeet.Or(fromoutsidepool)reachunderthesideofthepool,graspthepoolfloorandpullitout.
Ifthegroundclothiscausingthewrinkles,have2peoplepullfromeithersidetoremoveallwrinkles.
6.1
LINER
LINER
7
10
8
Level
6.2
10
 Loading...