This document contains user manuals for two Intex products: the INTEX 26795EH Prism Frame Premium Oval Above Ground Swimming Pool Set and the Intex 28003E Deluxe Pool Maintenance Kit.
INTEX 26795EH Prism Frame Premium Oval Above Ground Swimming Pool Set
Function Description:
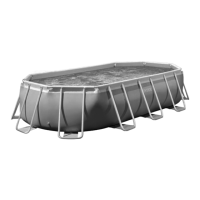
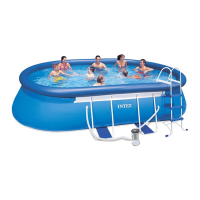
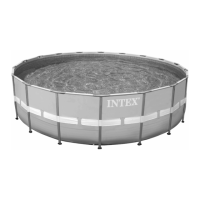
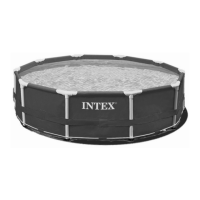
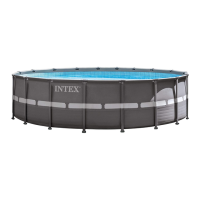
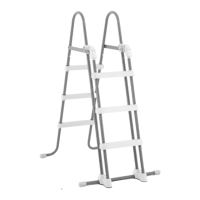
The INTEX 26795EH Prism Frame Premium Oval Above Ground Swimming Pool Set is designed to provide a recreational swimming experience in an outdoor setting. It is an above-ground pool that can be assembled and disassembled by adults. The pool set includes a filter pump, a removable ladder, a pool cover, and a ground cloth, offering a complete solution for a backyard swimming pool.
Important Technical Specifications:
- Dimensions: 16.6ft x 9ft x 48in (503 cm x 274 cm x 122 cm) or 20' x 10' x 48" (610 cm x 305 cm x 122 cm).
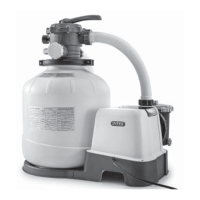
- Filter Pump: Includes a 1500 GPH (gallons per hour) Cartridge Filter Pump.
- Assembly Time: Estimated 60-90 minutes (approximate, individual experience may vary).
- Support Pads: For non-concrete ground, pressure-treated wood (15" x 15" x 1.2" or 38 x 38 x 3cm) or steel/reinforced concrete slabs are recommended under each U-shaped support.
- Electrical Requirements: Filter pump must connect to a grounding type receptacle protected by a ground-fault circuit interrupter (GFCI). No extension cords, timers, plug adapters, or converter plugs should be used.
- Safety Barrier: The top of the barrier should be at least 48 inches above grade. Openings in the barrier should not allow passage of a 4-inch diameter sphere. Access gates should open outward, be self-closing, and have a self-latching device.
- Dual Suction Outlets: Designed with dual suction outlets and one inlet fitting to comply with the Virginia Grahame Baker Act (for USA and Canada).
Usage Features:
- Setup: Requires a flat, level, and compact ground free of sharp objects. A ground cloth is provided to protect the liner. The liner should be spread out with the drain valve facing the draining area and allowed to warm in the sun for easier installation. The hose connections should be oriented towards the electrical power source for the optional filter pump.
- Assembly: A team of 2-4 people is recommended for pool set up. No tools are required. Horizontal beams (A, B, C, D) are slid into sleeve openings, and corner joints (6) connect the beams. U-shaped side supports (9) with double button spring-loaded clips (8) are inserted into beam holes. Connecting rods (10) link liner straps to restrainer straps (11).
- Filling: Fill the pool with water up to just below the sleeve line. The side walls and frame structure will lean inward, which is normal to accommodate water movement and pressure.
- Safety: Continuous and competent adult supervision is required. A safety barrier must be installed to prevent unauthorized access. Never dive, jump, or slide into the pool. Do not lean, straddle, or exert pressure on the top rim. Remove all toys and flotation devices when not in use. Keep rescue equipment nearby and emergency numbers posted. Keep the pool clean and clear, with the floor visible at all times. Use proper lighting for night swimming. Stay away from the pool when using alcohol or drugs. Keep children away from pool covers.
- Water Level: If the water flows to one side, the pool is not level and must be drained, leveled, and refilled to prevent sidewall bulging and potential collapse.
- Wrinkle Removal: Wrinkles in the liner can be smoothed from inside the pool by pushing out where the floor and sides meet, or from outside by reaching under the side and pulling the floor out.
Maintenance Features:
- Water Balance and Sanitization: Maintaining proper water balance with sanitizers is crucial for maximizing liner life, appearance, and ensuring clean, healthy, and safe water. Consult a pool professional for chemical, test kits, and testing procedures.
- Chlorine Application: Never let undissolved granular or tablet chlorine come into direct contact with the liner. Dissolve chlorine in a bucket of water before adding it to the pool. Never mix chemicals together; add them separately and dissolve each thoroughly.
- Cleaning: An Intex pool skimmer and vacuum are available for maintaining clean pool water. Do not use a pressure washer to clean the pool.
- Filter Cartridge: Replace filter cartridges every two weeks.
- Rainwater Drainage: Immediately drain rainwater if the water level exceeds the maximum to prevent damage and overfilling.
- Draining and Storage:
- Connect a garden hose to the drain valve on the outside pool wall using the drain connector (14).
- Place the other end of the hose in a safe draining area.
- The drain connector will push the drain plug open, allowing water to drain.
- Lift the pool from the side opposite the drain to completely empty it.
- Disconnect the hose and adapter.
- Re-insert the drain plug and replace the drain cap.
- Disassemble the pool by reversing setup instructions.
- Ensure all parts are completely dry before storage. Air dry the liner in the sun and sprinkle talcum powder to prevent sticking and absorb moisture.
- Fold the liner into a compact rectangular shape for storage.
- Store the liner and accessories in a dry, temperature-controlled location between 32°F (0°C) and 104°F (40°C). The original packaging can be used for storage.
- Winter Preparations (if leaving pool out):
- Clean pool water thoroughly.
- Remove skimmer or accessories from threaded strainer connectors.
- Plug inlet and outlet fittings from inside the pool with provided plugs (for sizes 16' and below) or close plunger valves (for sizes 17' and above).
- Remove and store the ladder.
- Remove hoses connecting the pump and filter.
- Add appropriate winter chemicals (consult a local pool dealer).
- Cover the pool with an Intex Pool Cover (note: not a safety cover).
- Clean and drain the pump, filter housing, and hoses. Discard the old filter cartridge and keep a spare.
- Store pump and filter parts indoors in a safe, dry area between 32°F (0°C) and 104°F (40°C).
Troubleshooting:
- Algae (greenish water, black spots, slippery liner, bad odor): Super chlorinate, correct pH, vacuum pool bottom, maintain proper chlorine level.
- Colored Water (blue, brown, black after chlorination): Adjust pH, run filter until clear, replace cartridge frequently.
- Floating Matter in Water (cloudy/milky water): Correct pH, check chlorine level, clean/replace filter cartridge.
- Chronic Low Water Level: Repair rips/holes with patch kit, finger tighten caps, replace hoses.
- Sediment on Pool Bottom: Use Intex pool vacuum.
- Surface Debris: Use Intex pool skimmer.
- Pool Inlet Air Adaptor Leaking: Tighten or reinstall hose clamps.
- Inlet Threaded Air Connector Leaking: Tighten or reinstall plunger valve.
- Air Jet Valve Leaking: Tighten/reinstall air jet valve (facing up), flush dirt out by running pump on/off repeatedly, replace valve if broken.
Limited Warranty:
- Duration: 1 year for pool liner and frame from the date of initial retail purchase.
- Coverage: Manufacturing defects.
- Process: Contact Intex Service Center. Proof of purchase is required. Product may be repaired or replaced at no charge if covered by warranty.
- Exclusions: Negligence, abnormal use/operation, accident, improper maintenance/storage, punctures, tears, abrasions, ordinary wear and tear, damage from external environmental forces (fire, flood, freezing, rain), unauthorized alterations/repairs.
Intex 28003E Deluxe Pool Maintenance Kit for Above Ground Pools
Function Description:
The Intex 28003E Deluxe Pool Maintenance Kit is designed to assist in keeping above-ground pools clean by removing debris from the water surface and pool floor. It includes a pool vacuum, a hand-held skimmer net, and a hand-held brush, all utilizing a telescoping aluminum shaft.
Important Technical Specifications:
- Filter Pump Flow Rate Requirement: 800 - 4000 gallons/hour (3028 - 15140 liters/hour). This kit requires a compatible filter pump for operation.
- Telescoping Aluminum Shaft: Adjustable length for reaching different areas of the pool.
Usage Features:
- Pool Vacuum Setup:
- Insert the debris bag (4) into the vacuum body (3).
- Install the vacuum body cover (5) onto the vacuum body (3) and turn clockwise to lock securely.
- Attach the desired cleaning head accessory to the vacuum body cover:
- Flat vacuum nozzle (8) for heavy/mid-large particles (sand, stones) and maneuvering tight corners.
- Vacuum head brush (6) for fine/small debris (dust, dead algae) on the pool floor. Ensure the ridge on the vacuum body cover matches the groove on the nozzle/brush head.
- Attach one end of the vacuum hose (13) to the vacuum body (3), ensuring the hose end covers the hose seal (2).
- Attach the telescoping aluminum shaft (10) to the vacuum body (3) by squeezing the spring tips (1) and checking that the spring "pops" into the pre-drilled holes. Adjust shaft length as needed.
- Screw the adaptor (9) to the threaded strainer connector from inside the pool.
- Place the assembled vacuum into the water.
- Fill the vacuum hose (13) with water by slowly submerging it vertically, section by section, starting from the end closest to the vacuum body, to remove all entrapped air.
- Quickly attach the other end of the water-filled vacuum hose (13) to the adaptor (9).
- Turn on the filter pump. Turn the air release valve (if any) 1-2 turns counter-clockwise to allow trapped air to escape from the hose/pump system. Never run the pump dry. Keep the vacuum body submerged at all times during use.
- Pool Vacuum Operation:
- Once the pump is on and air is released, gently "sweep" the entire bottom surface of the pool liner in soft strokes until it is clear of debris.
- If suction is low, check if all air has been removed from the hose, review the filter pump troubleshooting guide, and ensure the debris bag and filter pump cartridge are clean.
- Hand-held Skimmer Net Assembly & Operation:
- The skimmer net (12) uses the same telescoping handle.
- Align the plastic spring inside the net with the holes in the handle. Squeeze spring tips to attach the handle to the net, ensuring the spring "POPS" into place.
- Gently sweep the surface of the pool to remove floating leaves and debris.
- Hand-held Brush Assembly & Operation:
- The brush head (11) uses the same telescoping handle.
- Align the plastic spring inside the brush head with the holes in the handle. Squeeze spring tips to attach the handle to the brush head, ensuring the spring "POPS" into place.
- Gently sweep the entire side and bottom surfaces of the pool liner until it is clear of debris.
Maintenance Features:
- Debris Bag: Check and empty the debris bag (4) regularly during and after each use. If suction is low due to a full bag, turn off the pump, remove the vacuum assembly, empty and clean the debris bag, and reassemble.
- Long Term Storage:
- Turn off the filter pump and disconnect the power cord.
- Disassemble the pool vacuum, hand-held skimmer, and hand-held brush by reversing the setup instructions.
- Clean and air dry all accessories and parts thoroughly.
- Store in a dry, cool location, preferably in the original packaging.