AUTO
FILTER
H
M
L
Q
4
Product Introduction
Operating Instructions
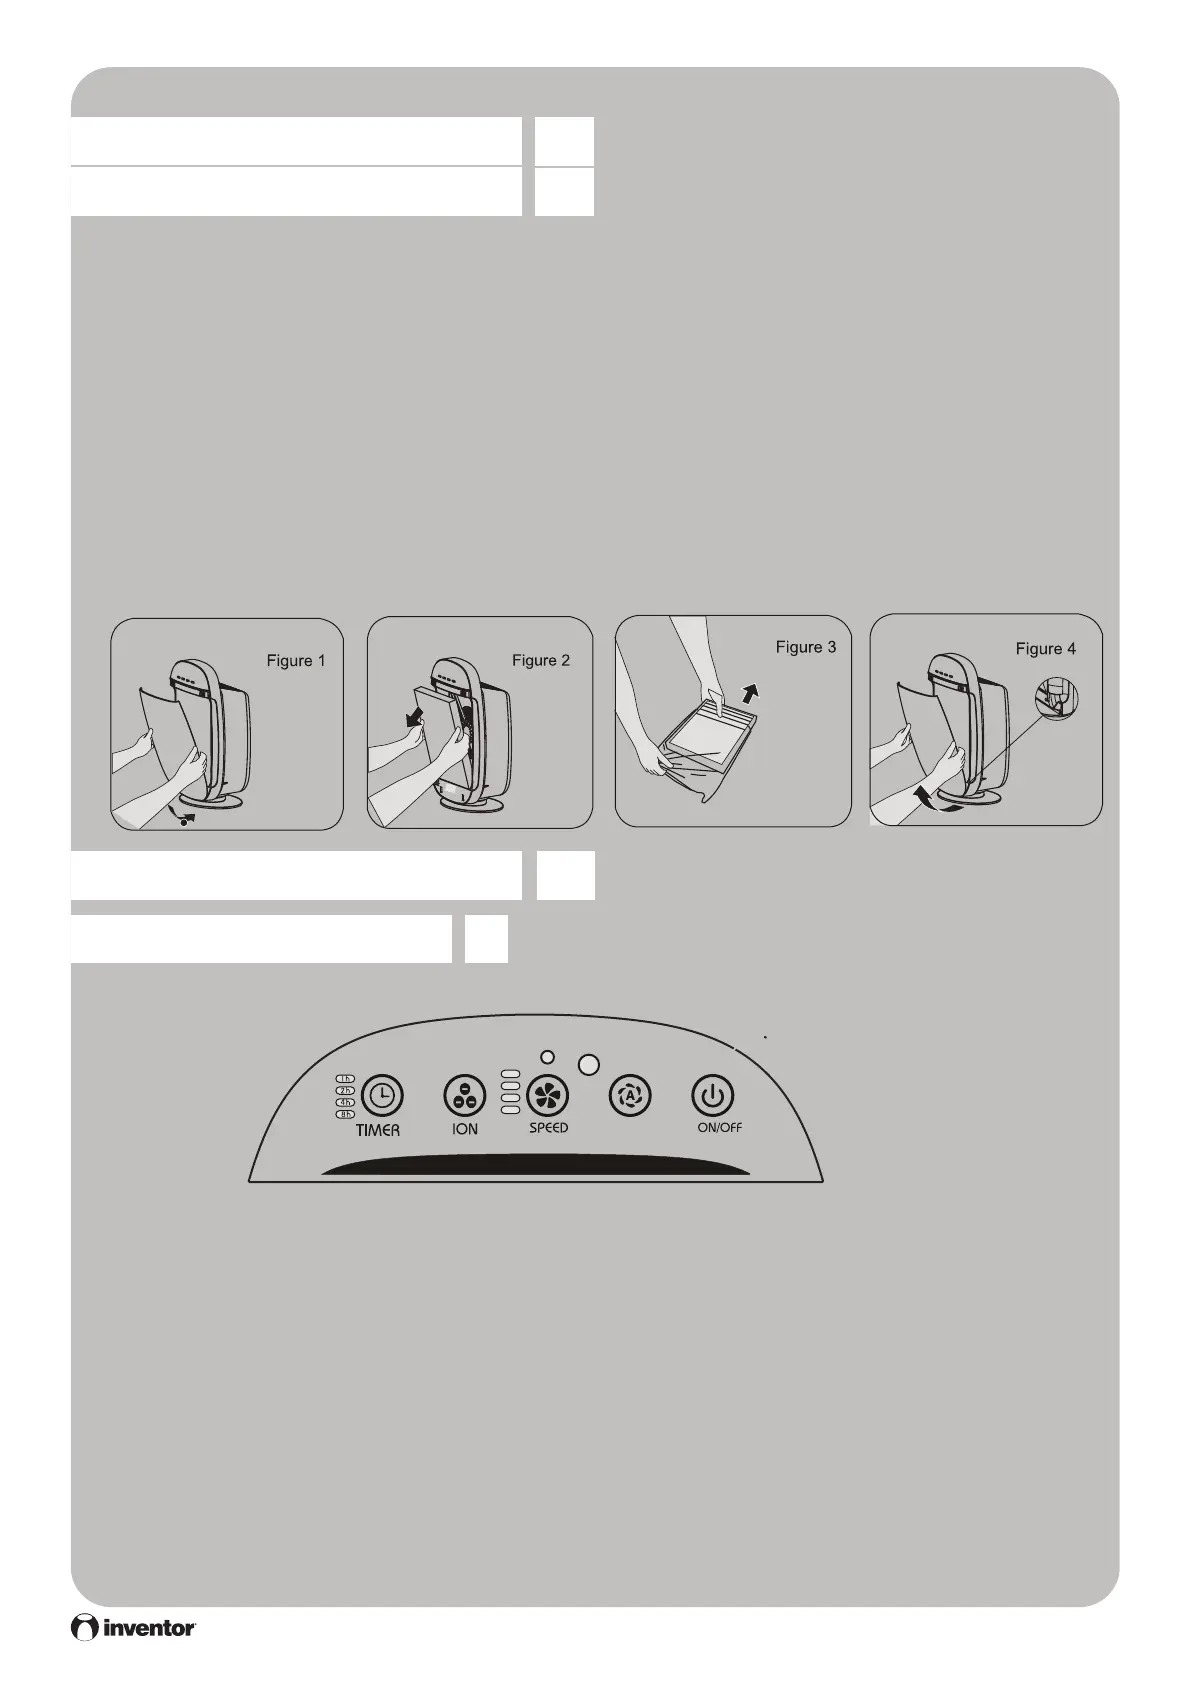
Installation Method
Note: Make sure the unit is unplugged when installing the lter. Please be mindful of the front
and the back of the unit to prevent improper installation.
1. Make sure the unit is in an upright position when removing the front panel. Use both hands
to grip the side panel and gently pull outwards. Lift the bottom buckle and pull the panel out.
2. To remove the lter, hold the drawstrings on both sides of the lter and pull outwards.
3. Make sure to remove the new lter from its packaging. Follow the arrow direction on the top
of the new lter when inserting.
4. To reinstall the front panel, reverse the removal steps above.
Product Introduction
Operating Instructions
Please read the following instructions before using the unit for the rst time.
1. Connect the Power
Make sure the power cord is plugged in securely and properly.
Note: Do not handle the power cord with wet hands as it may cause electrical shock. Always
unplug the unit before moving it.
2. ON/OFF
Press the “ON/OFF” button to turn the unit on and off.
3. Timer
Press the “Timer” button to set the unit to power down in 1-8 hours.
Remove
packaging of
the new lter