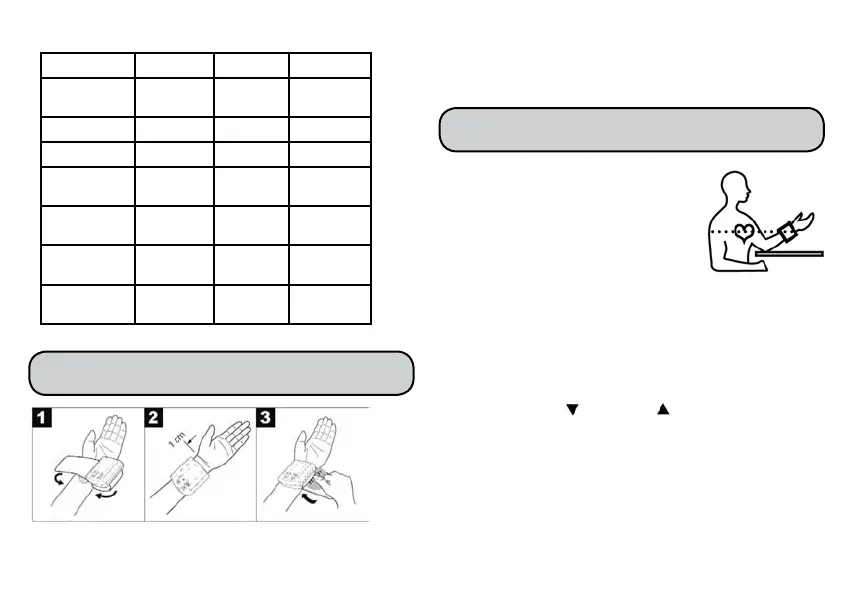
Table for classication of blood pressure values (unit
of measurement mmHg) for adults:
Range Systolic Diastolic Action
Hypotonia -
(degraded bl. pr.)
< 105 < 60 Check with
doctor
Optimal < 120 < 80 Self-control
Normal 120 - 129 80 - 84 Self-control
High-normal 130 - 139 85 - 89 Check with
doctor
Mild hypertension
- Grade I
140 - 159 90 - 99 Check with
doctor
Moderate hyper-
tensive - Grade II
160 - 179 100 - 109 Seek medical
advice
Severe hyper-
tension- Grade III
>= 180 >= 110 Seek medical
advice
Source: WHO, 1999
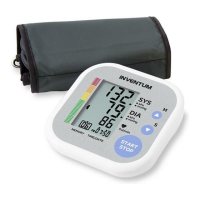
• Bare your left wrist, making sure that the circulation in
the arm is not resctricted by any clothes etc. that are too
tight. Position the cuff on the inside of your wrist.
• Fasten the cuff with the Velcro fastening so that the upper
edge of the monitor is positioned approx. 1 cm below the
ball of your thumb.
• The cuff has to be tted tightly around the wrist but
should not constrict it.
• Rest for approx. 5 minutes before each
measurement. Otherwise there may be
differences.
• You can perform the measurement
either sitting or lying down. It is
essential to support your arm and have
it at an angle. Always make sure that
the cuff is level with your heart. Otherwise there may be
serious differences. Relax your arm and the palms of your
hands.
• In order not to distort the result, it is important to keep
still during the measurement and not talk.
• Switch on the blood pressure monitor with the “START/
STOP” button.
• Using the buttons “down” or “up”, select the user
memory 1, 2 or 3. On succesful measurement, results are
automatically stored in the selected user memory. You can
also use the different user memories to save measurement
results separately, e.g. in the morning, afternoon and
evening.
• Start the measurement process by pressing the “START/
STOP” button. The cuff is pumped up to 195 mmHg. Cuff
air pressure is released slowly.
If a tendency towards high blood pressure is already
7 | MEASURING BLOOD PRESSURE
32
6 | APPLYING THE CUFF