DISPENSER
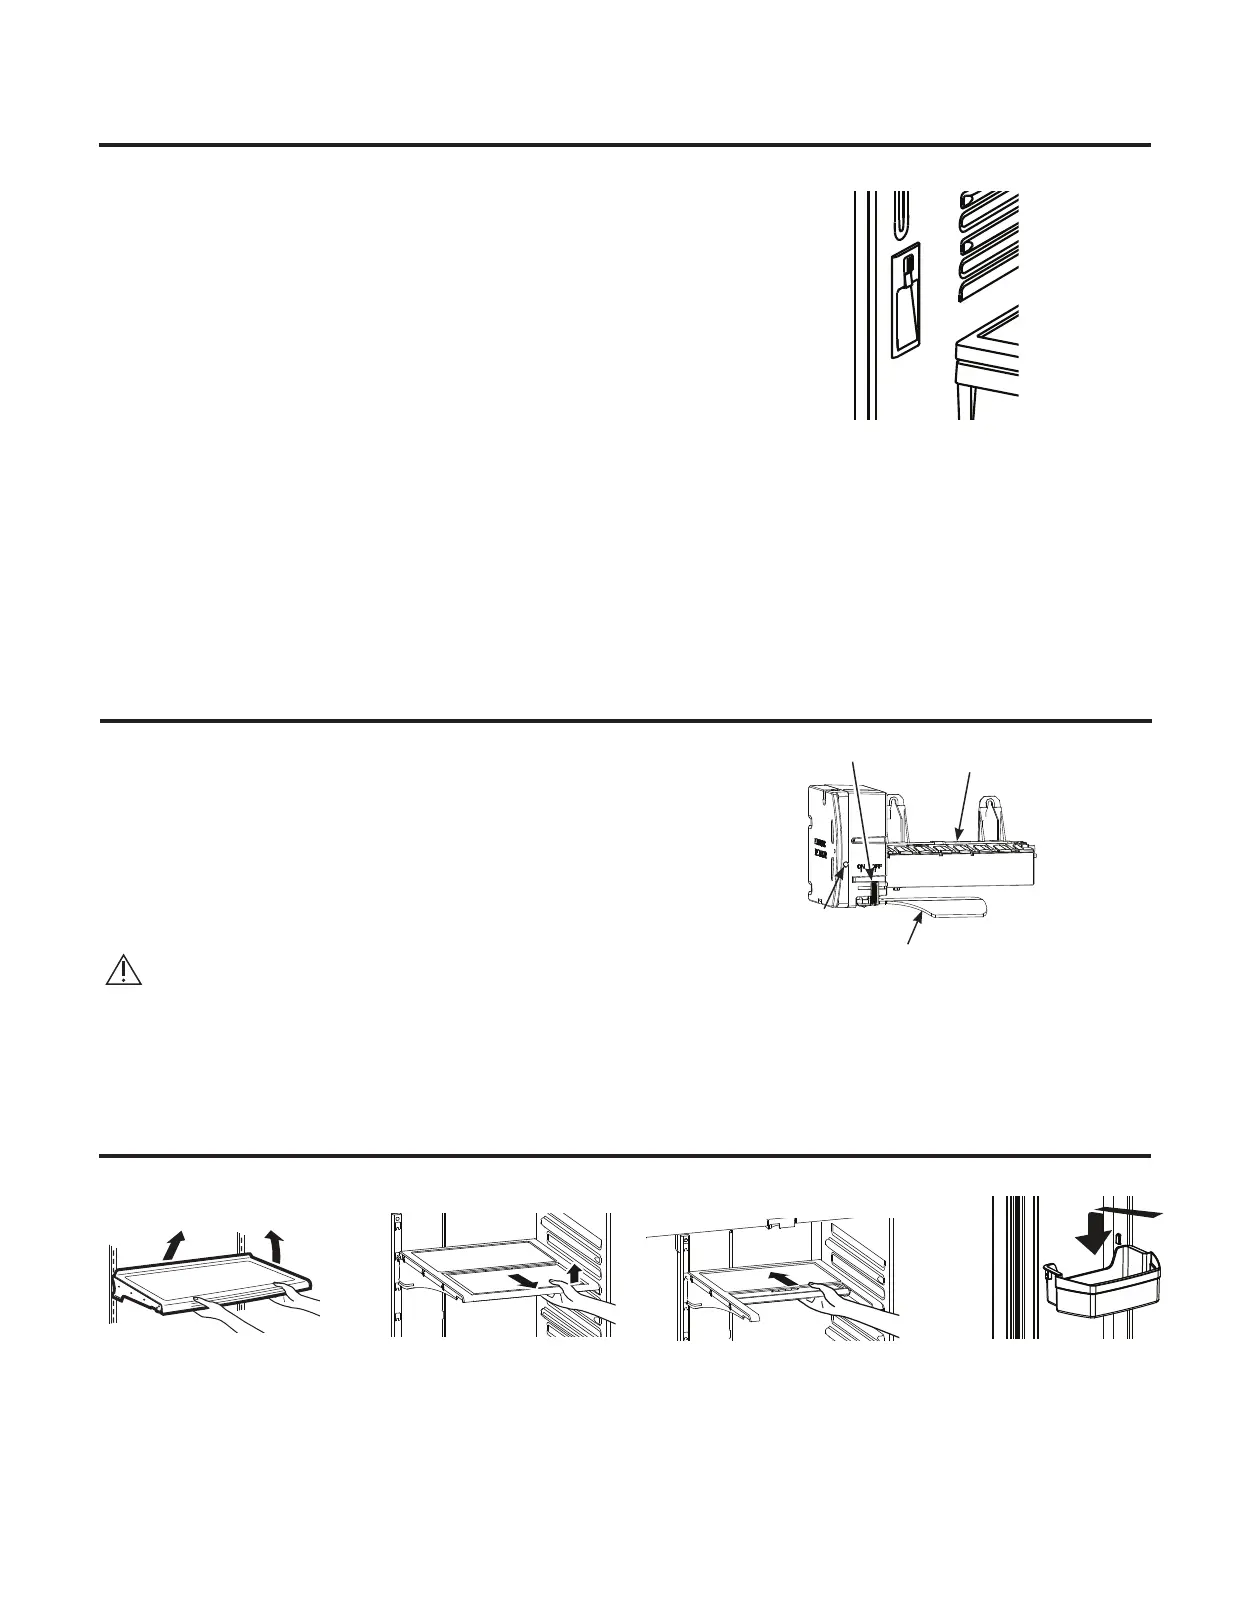
Internal water dispenser
The water dispenser is located on the left-hand wall
inside the refrigerator.
To dispense water:
1. Hold the glass against the opening.
2. Press the button on the water dispenser.
3. Hold the glass under the dispenser for 2-3 seconds
after releasing the dispenser button.
If water is not dispensed after the first installation of
the refrigerator, there may be air in the water pipe
system. Press the dispenser button for at least five
minutes to remove any trapped air from the water line
and fill the system with water. During this process,
dispenser noise may be high when purging air from
the water line system. To remove impurities from the
water line, throw away the first six glasses of water.
NOTE: To avoid water deposits, the dispenser should
be cleaned periodically with a clean cloth or sponge.
NOTE: In order to guarantee the temperature in the
water dispenser, the demand time should not exceed
2 minutes (2 liters) and 15 minutes should pass before
the ideal temperature of the water in the dispenser is
reached again.
CAUTION
Ice maker
Feeler Arm
Switch
AUTOMATIC ICE MACHINE
It can take between 12 and 24 hours for a newly
installed refrigerator to start making ice. The ice-maker
will produce seven cubes per cycle-approximately
100-130 cubes in a 24-hour cycle, depending on the
freezer temperature, room temperature, number of
times the door is opened, and other conditions of use.
Discard the first few loads of ice cubes to allow the
water line to clean.
Avoid contact with the moving parts of the ejector mechanism, or with the heating element located at the
bottom of the ice maker. Do not touch the latter mechanism while the refrigerator is plugged in.
ON THE SHELVES AND COMPARTMENTS
Not all functions correspond to all models.
Lift from the front and then
up from the back to remove
the shelf.
The Quick Space Shelf (on some models) can be folded
to half its size for storage of tall items on the bottom
shelf. Push the shelf out and up and slide it back until it
stops to form a half shelf. Push up and forward, then
down to re-form the entire shelf.
The adjustable door
drawers can be
removed for clean-
ing.
Green Power light
26


 To Next Page
 Loading...