2
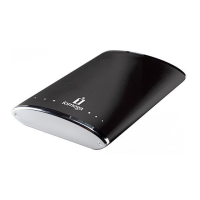
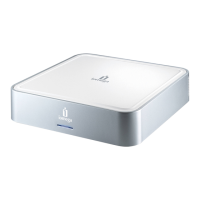
CAUTION! The Iomega
®
MiniMax
™
hard drive is
designed to fit UNDER the Mac
®
mini. Never place the
MiniMax drive on top of the Mac mini.
1. Place the MiniMax drive on a stable surface.
Connect the included power supply to the back of
the drive and to a power outlet.
CAUTION! Do not move the drive while it is
powered up to avoid drive damage or data loss.
2. Connect the appropriate USB/FireWire cable to
the back of the drive
.
3. Connect the other end of the cable to the port on
your computer. Turn the drive on.
Mac Users
: The drive should mount and appear
on the Mac Desktop.
PC Users
: The MiniMax ships preformatted for
Mac OS. See the Using Your MiniMax
TM
Drive
section for Windows
®
formatting instructions.
After formatting the drive, Windows will search
for and install the driver automatically. The drive
should appear in My Computer or Windows
Explorer.
4. Insert the CD that came with your drive and install
the software you want to use. If the CD menu does
not open automatically, double click the CD icon
in My Computer, Windows Explorer or on the Mac
desktop, then double click the Start icon.
CAUTION! To prevent data loss, do not disconnect the
drive during data transfer (drive activity light flashing).
Refer to the user’s manual on the CD for instructions
on disconnecting the drive.
ATTENTION ! Le lecteur de disque dur Iomega MiniMax
est conçu pour s’adapter SOUS le Mac mini. Ne placez
jamais le lecteur MiniMax au-dessus du Mac mini.
1. Placez le lecteur MiniMax sur une surface stable.
Connectez l’alimentation fournie à l’arrière du
lecteur, puis connectez-la à une prise secteur.
ATTENTION !
Ne déplacez pas le lecteur lorsqu’il
est sous tension pour éviter tout dommage ou
perte de données.
2. Connectez le câble USB/FireWire approprié à
l’arrière du lecteur.
3. Connectez l’autre extrémité du câble au port de
votre ordinateur. Mettez le lecteur sous tension.
Utilisateurs de Mac : Le lecteur doit être monté et
apparaître sur le bureau du Mac.
Utilisateurs de PC : Le MiniMax est livré
préformaté pour Mac OS. Consultez la section
Utilisation de votre lecteur MiniMax pour obtenir
des instructions sur le formatage pour Windows.
Après avoir formaté le disque, Windows va
rechercher et automatiquement installer le pilote.
Le lecteur doit apparaître sur le Poste de travail
ou dans l’Explorateur Windows.
4. Insérez le CD livré avec votre lecteur et installez
le logiciel que vous souhaitez utiliser. Si le menu
du CD ne s’ouvre pas automatiquement, double-
cliquez sur l’icône du CD dans le Poste de travail
ou dans l’Explorateur Windows, ou sur le bureau
du Mac, puis sur l’icône Démarrer
.
ATTENTION ! Pour éviter toute perte de données, ne
déconnectez pas le lecteur pendant un transfert de
données (voyant d’activité du lecteur clignotant).
Reportez-vous au guide de l’utilisateur sur le CD pour
obtenir des instructions sur la déconnexion du lecteur.
Quick Install • Installation rapide
 Loading...