EasyManua.ls Logo

ION Camocam Wi-Fi User Manual

ION Camocam Wi-Fi
140 pages
To Next Page IconTo Next Page
Page #1 background imageLoading...
Page #1 background image
Quick Start Guide

Questions and Answers:

ION Camocam Wi-Fi Specifications

General IconGeneral
Battery LifeUp to 6 months
Wireless ConnectivityWi-Fi
Night VisionYes
PIR Sensor Range20m
Detection Range20m
IR Flash Range20m
MemoryUp to 32GB

Summary

Getting to know your camera

Common features

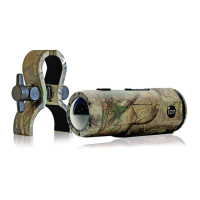
Key features of the ION CAMOCAM, including Full HD video, 14MP sensor, wide-angle lens, and waterproofing.

1. Package Contents of CAMOCAM

2. Functional Parts of CAMOCAM

3. Using Your Camera

3.1 Charging up Your Camera

Charge the camera using the USB cable or car adapter. A red LED indicates charging status.

3.2 Inserting a Memory Card

Insert a MicroSD card (up to 32GB) into the camera with the power turned OFF.

3.3 Setting up Date and Time

Connect to a PC and use the iON software to set the camera's date and time.

3.4 Installing the PODZ

Attach and lock the PODZ to the camera's rear socket, ensuring the latch is secured for waterproofing.

3.5 Recording Videos

Select resolution and start recording by sliding the switch or pressing the Power button.

3.6 Taking Photos

Turn on the camera and briefly press the Power button to capture a still photo.

4. Mounting Your Camera

4.1 Secure Strap

Thread the secure strap through the camera hole and attach it to the mount for added security.

4.2 CamLOCK

Attach the camera to helmets, poles, or boards using the versatile CamLOCK Mount System.

5. iON Software Application

5.1 Windows Software Application

Run the iON.exe application from the camera's MicroSD card on a Windows PC.

5.2 Mac Software Application

Download the Mac software from the iON website and install it on your Mac.

6. Signing Up for Free iON Cloud Storage

7. Connecting Your Camera

7.1 Connecting Your Camera to a PC

Connect to PC via USB, insert card, power on, and launch the iON software from the MicroSD folder.

7.2 Connecting Your Camera to a TV/HDTV

Connect camera to TV/HDTV via Composite RGB or HDMI to view content or use as viewfinder.

8. CAMOCAM Package Content

8.1 Wi-Fi PODZ Functional Parts

Details the functional components of the Wi-Fi PODZ, including the PODZ, LED indicator, and power button.

8.2 Using the Wi-Fi PODZ

8.2.1 Installing and turning on the Wi-Fi PODZ

Install the Wi-Fi PODZ, turn on the camera, and press the Wi-Fi power button to activate Wi-Fi.

8.2.2 Connecting the Camera to a PC using Wi-Fi PODZ

Connect PC to 'WIFIPODZ' network, enter password, and use browser to access camera files.

8.2.3 Connecting the Camera to Your Smart Device (Browser)

Connect mobile device to 'WIFIPODZ' network and use browser to view camera photos and videos.

8.2.4 Connecting the Camera to Your Smart Device (App)

Download the 'ioncamera' app, connect to 'WIFIPODZ' network, and launch the app.

9. Sealing Your Camera to prevent water damage

10. Troubleshooting

11. Specifications

12. System Requirements