4
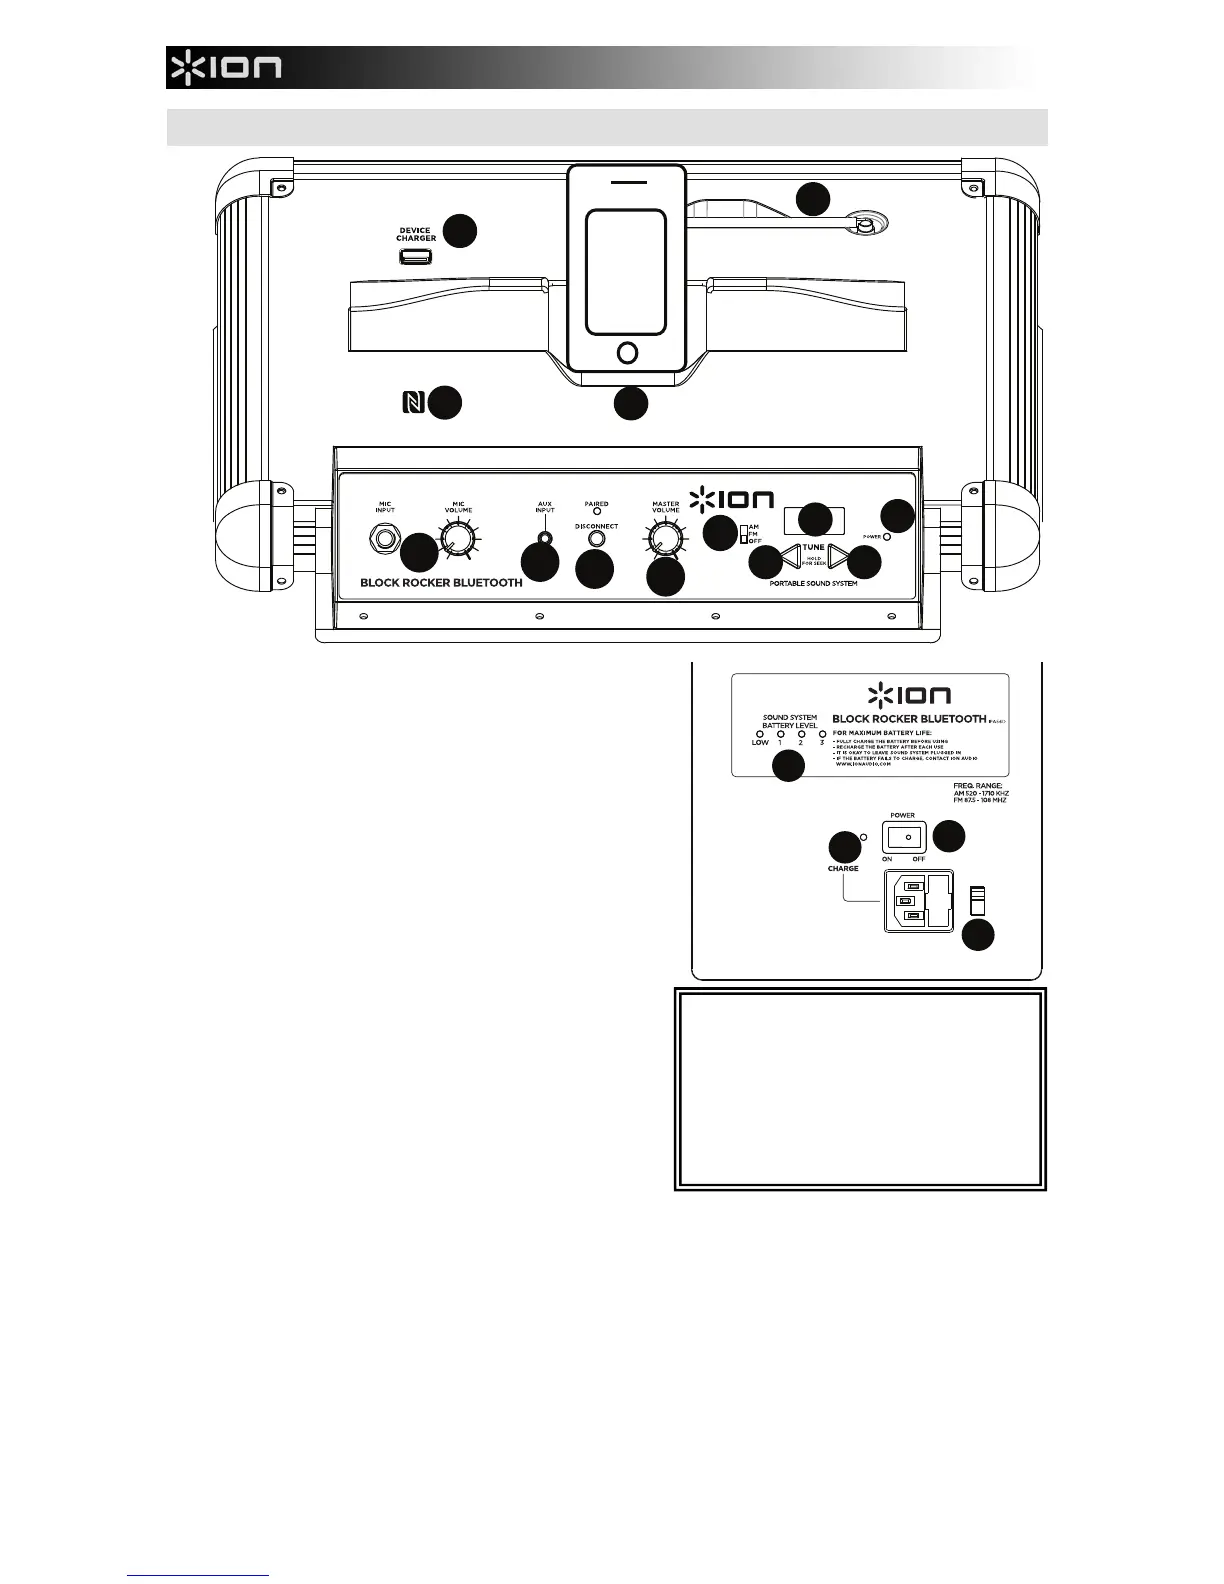
Diagram and Parts Description
1. Instrument/ Microphone Input with Volume Control
(1/4"): This mono input accepts a 1/4" input such as a
microphone, guitar, or other musical instrument.
2. Auxiliary input: This stereo 1/8” input can be used to
connect a CD player, MP3 player, or other audio source.
3. Bluetooth: The Paired LED will be lit when a device is
paired to Block Rocker Bluetooth. This LED will not be lit
when Block Rocker Bluetooth is first powered on (unless
it was previously paired with a device). Press the
Disconnect button to disconnect a paired Bluetooth
device.
4. Master Volume Control: This adjusts the speaker’s
main mix volume, which includes
Instrument/Microphone Input, Auxiliary Input, Tuner, and
the audio of a paired Bluetooth device.
5. Radio Selector: This switch sets the tuner to AM or
FM or turns the tuner off. (Note: This switch does not
turn the unit's power off – just the tuner.)
6. LCD: Displays the current radio station.
7. Tuner: Use these buttons to search for a radio
station. To "seek" (jump to the next available station),
hold this down for a few seconds until it starts to seek
a station. Unit will remember the last station you were
on when you power off and power back on.
8. Power LED: Indicates whether Block Rocker
Bluetooth is on or off.
9. USB Charge Port: Connect your devices charge cables to these ports to charge them. USB charging
only functions when the unit’s power is turned on.
10. Device Cradle: Place your iPad/iPod touch/iPhone, Android or other device here to be held. These can
be connected via Bluetooth or to aux input using the included 1/8” to 1/8” cable.
Note: It is recommended to remove your iPad or other device from the cradle before transporting or
traveling with Block Rocker Bluetooth.
11. NFC: Tap your NFC (near-field communication) supported and enabled device here to pair your phone
by gently bumping on the ‘N’ logo. See the section Pairing with a Device using NFC for more
information.
*WARNING: If your unit has a voltage
selector switch, change its setting only
when necessary (e.g., when traveling to a
country or region with a different voltage).
Selecting an improper voltage setting can
damage the unit. To change its setting,
only remove *one* screw of the cover and
slide it aside to expose the selector.