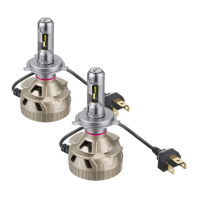
Components
Installationprocedure
Protection tape … 1 Cable ties … 4
LEDbulbassy
… 2
②
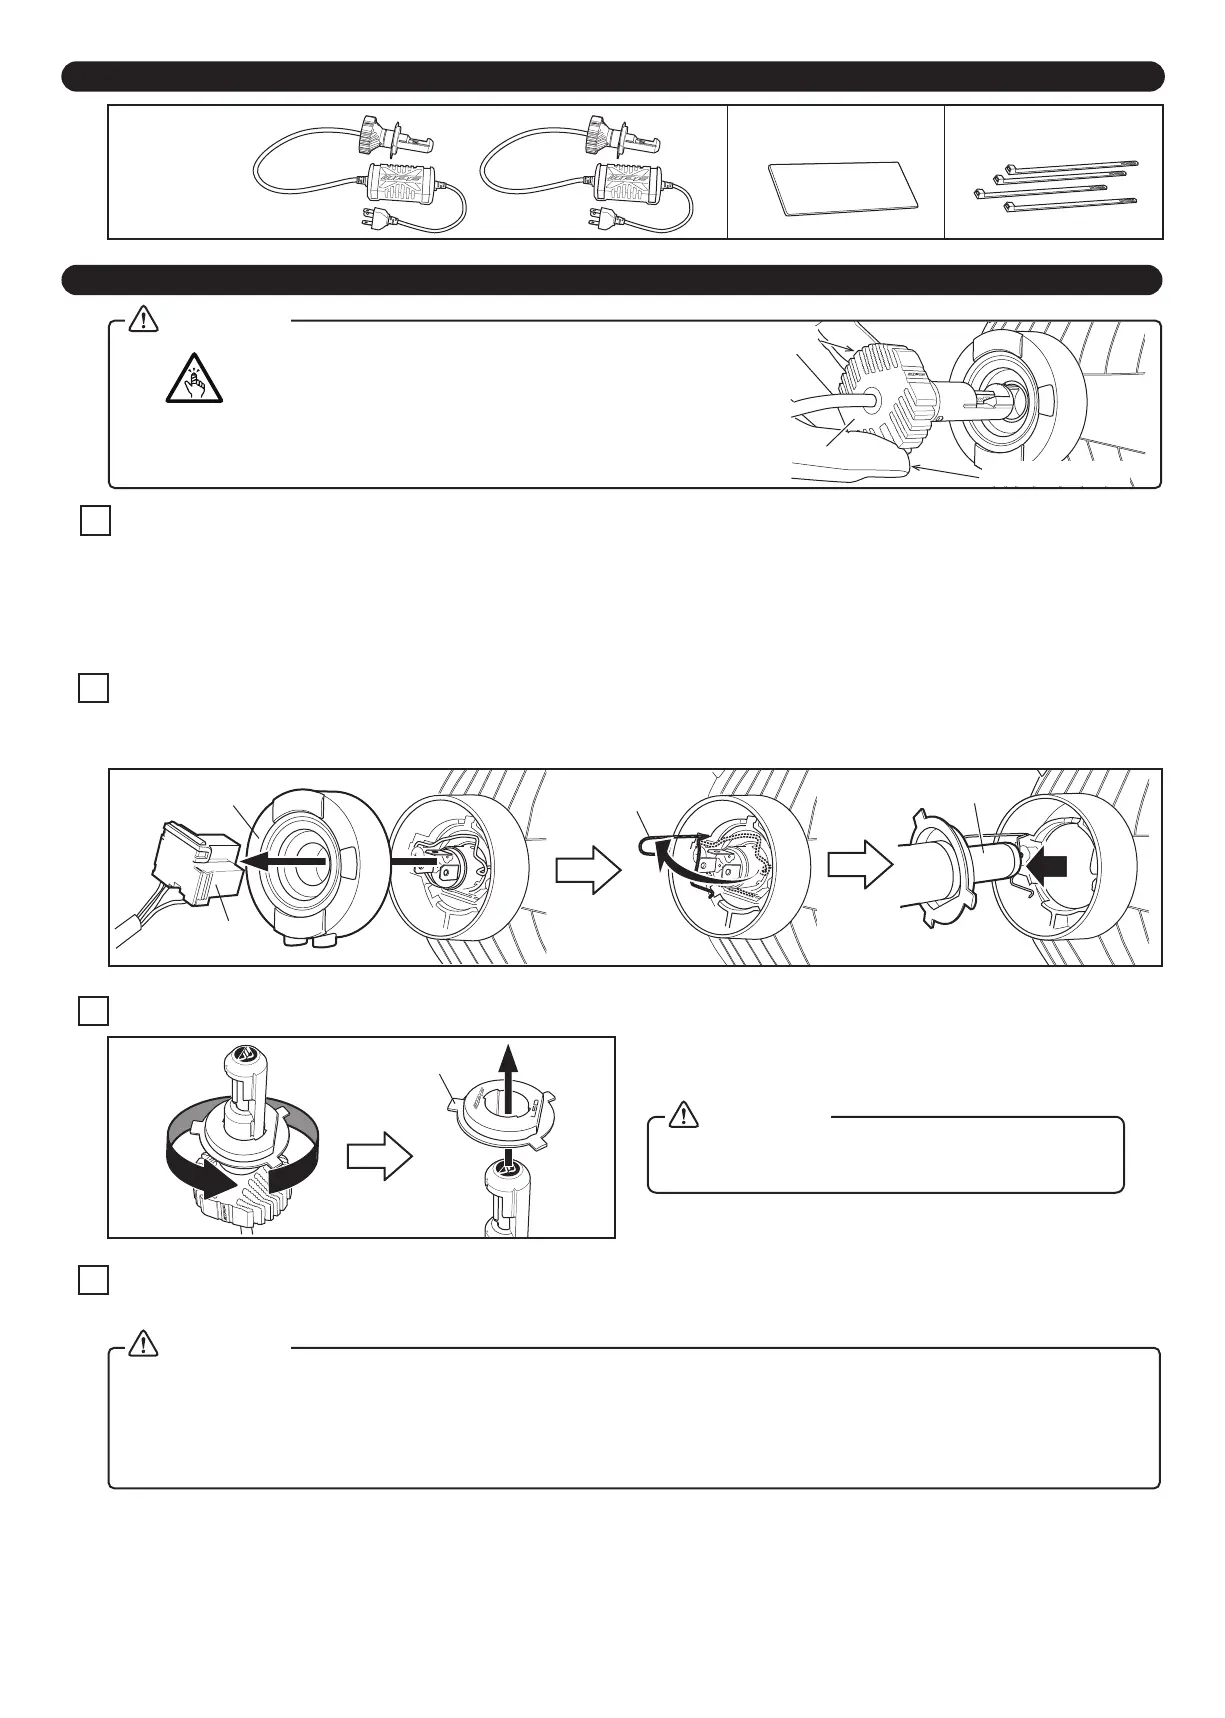
Wear work gloves to prevent a minor cut
with pointed part of the heatsink.
Beware
LED bulb
Heatsink
Wear work gloves
Check the condition of the halogen bulb attachment.
If the check cannot be done visually or the space is too narrow,
please remove the headlamp unit from the vehicle.
Refer to the vehicle's manual when changing or removing your halogen headlamp bulb.
1
Halogen bulb check
2
Removing halogen bulb
3
Preparing the LED bulb
Remove the flange cap from the bulb.
Refer to the figure left.
Wear work gloves to prevent a minor cut
with pointed part of the bulb or flange.
Caution
Remove the vehicle’s connector and the rubber cover, unclasp and remove the bulb.
Refer to the vehicle’s manual for bulb removal procedure, as it can differ between vehicles.
Clasp
Halogen bulb
Rubber cover
Vehicle’s
connector
Flange cap
Warning
4
Installing the LED bulb
Attach and clasp the flange cap. Put the rubber cover back into place fit securely.
Verify that the flange cap and head lamp are secured. If loose it causes a damage to the bulb and head
lamp rubbed by vehicle vibration.
Pay extra attention to installation for off-road vehicles or trucks in particular.
Verify that the clasp is tightly secured.
To prevent water entry, push the rubber cover tightly around the center of the flange hole.
Caution
 Loading...