Do you have a question about the ipf H4 and is the answer not in the manual?
Details clearance requirements for fitting LED bulbs around the headlamp assembly.
Illustrates incorrect installation regarding exposure to environmental elements.
Outlines the steps to verify proper LED bulb operation after installation.
Inspects the existing halogen bulb attachment before replacement.
Guides on how to detach the original halogen bulb from the vehicle.
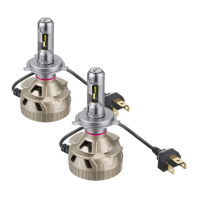
Details steps for preparing the new LED bulb, including flange cap removal.
Instructs on correctly fitting the LED bulb into the headlamp assembly.
This document outlines the installation and maintenance procedures for an LED bulb, specifically designed for H4 and H19 compact type headlamps. It serves as a comprehensive guide for users to ensure proper fitting, functionality, and longevity of the LED bulbs.
The primary function of this product is to replace existing halogen headlamp bulbs with LED technology, providing enhanced illumination for vehicles. The manual details the steps for installing these LED bulbs into a vehicle's headlamp assembly, ensuring correct alignment and electrical connection. It covers the transition from traditional halogen bulbs to LED, emphasizing the importance of proper space clearance around the bulb and secure connections to prevent issues. The LED bulbs are designed to integrate with the vehicle's existing electrical system, including the headlamp leveler and high-beam indicator, aiming for seamless operation. The product also includes components like protection tape and cable ties to aid in a secure and tidy installation, contributing to the overall reliability and performance of the lighting system.
The installation process is broken down into several key stages, starting with a preliminary check of the halogen bulb and the surrounding space. Users are instructed to ensure sufficient clearance around the LED bulb (more than 50mm from the flange to the shade, and more than 46mm from the flange to the rear) and a minimum space diameter of 50mm to accommodate the heatsink and allow for full range of headlamp movement. The manual explicitly warns against direct contact with water, dirt, or dust, indicating that such conditions are "Bad" for the LED bulb's operation.
Before full installation, a crucial "LED bulb lighting test" is recommended. This involves connecting the new LED parts to the vehicle's connector and testing both high and low beams. Users are advised to check for correct lighting, normal operation of the high beam indicator on the dash, and the absence of any warning signs on the vehicle's gauges. A critical warning is issued: "Do not turn on the switch if the bulb is not connected," to prevent potential damage. The LED bulb connector is designed to be non-polarity, simplifying the electrical connection process.
The "Removing halogen bulb" section guides users through disconnecting the vehicle's connector, removing the rubber cover, unclasping, and finally removing the halogen bulb. It highlights that this procedure may vary by vehicle and advises consulting the vehicle's manual.
"Preparing the LED bulb" involves removing the flange cap from the LED bulb. A "Caution" note here advises wearing work gloves to prevent minor cuts from pointed parts of the bulb or flange.
"Installing the LED bulb" details attaching and clasping the flange cap, then securely fitting the rubber cover. Another "Caution" emphasizes verifying that the flange cap and headlamp are secured, especially for off-road vehicles or trucks, to prevent damage from vibration. It also stresses pushing the rubber cover tightly around the flange hole to prevent water entry.
The "Installation check" section focuses on verifying the correct orientation of the LED bulb. For right-hand traffic, the "IPF" and "LED" markings on the flange cap should be horizontal, and a specific mark on the front edge of the bulb, along with the "IPF logo" sticker on the back face, should slant approximately 15 degrees. A separate note is provided for left-hand traffic, where the mark on the front edge of the bulb should be horizontal, and the markings on the flange cap should also slant approximately 15 degrees. This precise alignment is crucial for optimal light distribution.
"Connecting and fixing the harness and drive unit" involves connecting the LED bulb connector to the vehicle's connector, ensuring a full insertion. If there is excess harness length, users are advised to fix it with cable ties, leaving some slack to accommodate headlamp leveler movement. If the headlamp unit was removed, it should be reinstalled at this stage. A "Caution" warns against loose connections, which can lead to short circuits.
Finally, the "Lighting check" section reiterates the importance of turning on the engine and switching on the headlamp to confirm proper low-beam and high-beam illumination, as well as the correct functioning of the high-beam indicator. It also notes that for older vehicle models where the high-beam indicator might not work, an additional "high beam indicator lighting circuit (PN: WA-4)" may be required.
The manual incorporates several maintenance-related instructions and warnings to ensure the long-term performance and safety of the LED bulbs.
One significant maintenance feature is the "Make sure to check connecting terminal and restore if needed" section. This addresses potential issues arising from repetitive connecting and disconnecting motions, which can lead to a bad fit between the vehicle connector and the LED bulb connector. Users are instructed to check the workability of the connection, specifically if a male terminal fits lightly into the vehicle connector's terminal. If a connection is loose or disconnected, it should be restored by carefully reducing the width of the connecting point using a flat-blade screwdriver. A critical "Warning" in this section advises removing the minus terminal when restoring connections, and if using two batteries, removing both minus terminals to prevent electrical hazards. This proactive check and restoration process helps maintain a secure electrical connection, which is vital for consistent performance and preventing electrical faults.
Another maintenance aspect is the proper management of the harness and drive unit. Users are instructed to insert cable ties into loops and fix them to a sound place near the headlamp unit. A "Warning (prevent disconnecting)" explicitly states: "Do not tie the harness together with the drive unit. Do not bend or pull the harness by excessive power. Leave a slack in the harness." It also specifies that the harness's minimum bend radius should be more than 20mm. These guidelines are crucial for preventing strain on the wiring, which could lead to damage, intermittent connections, or complete failure over time. Proper routing and securing of the harness ensure that it is not subjected to undue stress from vehicle vibrations or movement, thereby extending its lifespan.
Throughout the installation process, several "Caution" notes contribute to preventative maintenance. For instance, wearing work gloves during preparation and installation helps prevent minor cuts, which, while seemingly minor, can lead to discomfort or injury during handling. The emphasis on verifying that the flange cap and headlamp are securely fastened is a key preventative measure against damage caused by vehicle vibration, especially in off-road conditions. Ensuring a tight seal with the rubber cover around the flange hole is critical for preventing water entry, which can cause corrosion or short circuits in the electrical components of the LED bulb.
The "Installation check" and "Lighting check" sections are also integral to maintenance. By verifying the correct orientation of the LED bulb and confirming proper high and low beam functionality, users can identify and correct installation errors early on. This prevents potential issues with light distribution and ensures the headlamps operate as intended, contributing to road safety. The recommendation to use manual mode for headlight tester measurements, rather than auto mode, highlights a best practice for accurate assessment of light output, which is important for maintaining optimal visibility.
In summary, the manual provides a robust framework for both initial installation and ongoing care, emphasizing secure connections, proper harness management, and preventative measures against environmental damage and mechanical stress, all of which are essential for the long-term reliability and performance of the LED bulb system.
| Bulb Type | H4 |
|---|---|
| Voltage | 12V |
| Wattage | 60/55W |
| Product Type | Halogen Bulb |
| Brand | IPF |